Cutting Art with Shingo Sato
Deutsch
From Tokyo to New York: Japanese pattern artist and fashion design lecturer Shingo Sato holds worldwide pattern making seminars with TR Cutting School, which was founded by himself. The aesthetics of Shingo Sate’s extraordinary creations combine couture and architecture. In 2017 the master of pattern-innovation came to Germany for the first time. Shingo Sato`s technique, called “Transformational Reconstruction Technique”, is a combination of two-dimensional cutting technique and three-dimensional draping on the bust. In this article you will find a small extract of the cutting instructions. You can find the complete instructions in the Damen-Rundschau 01-02/2017. You can order the english translation thru our customer service.
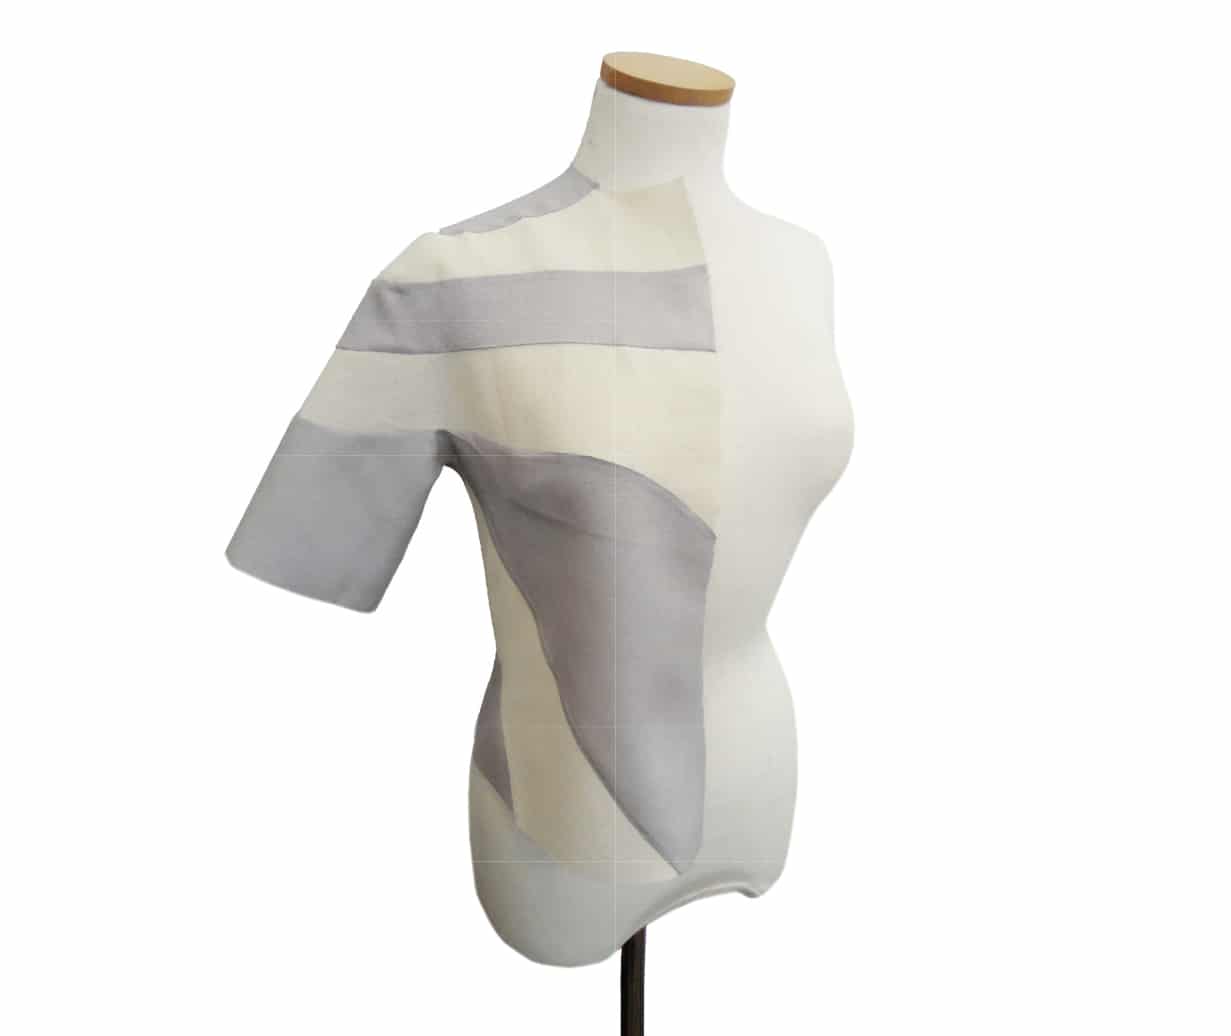
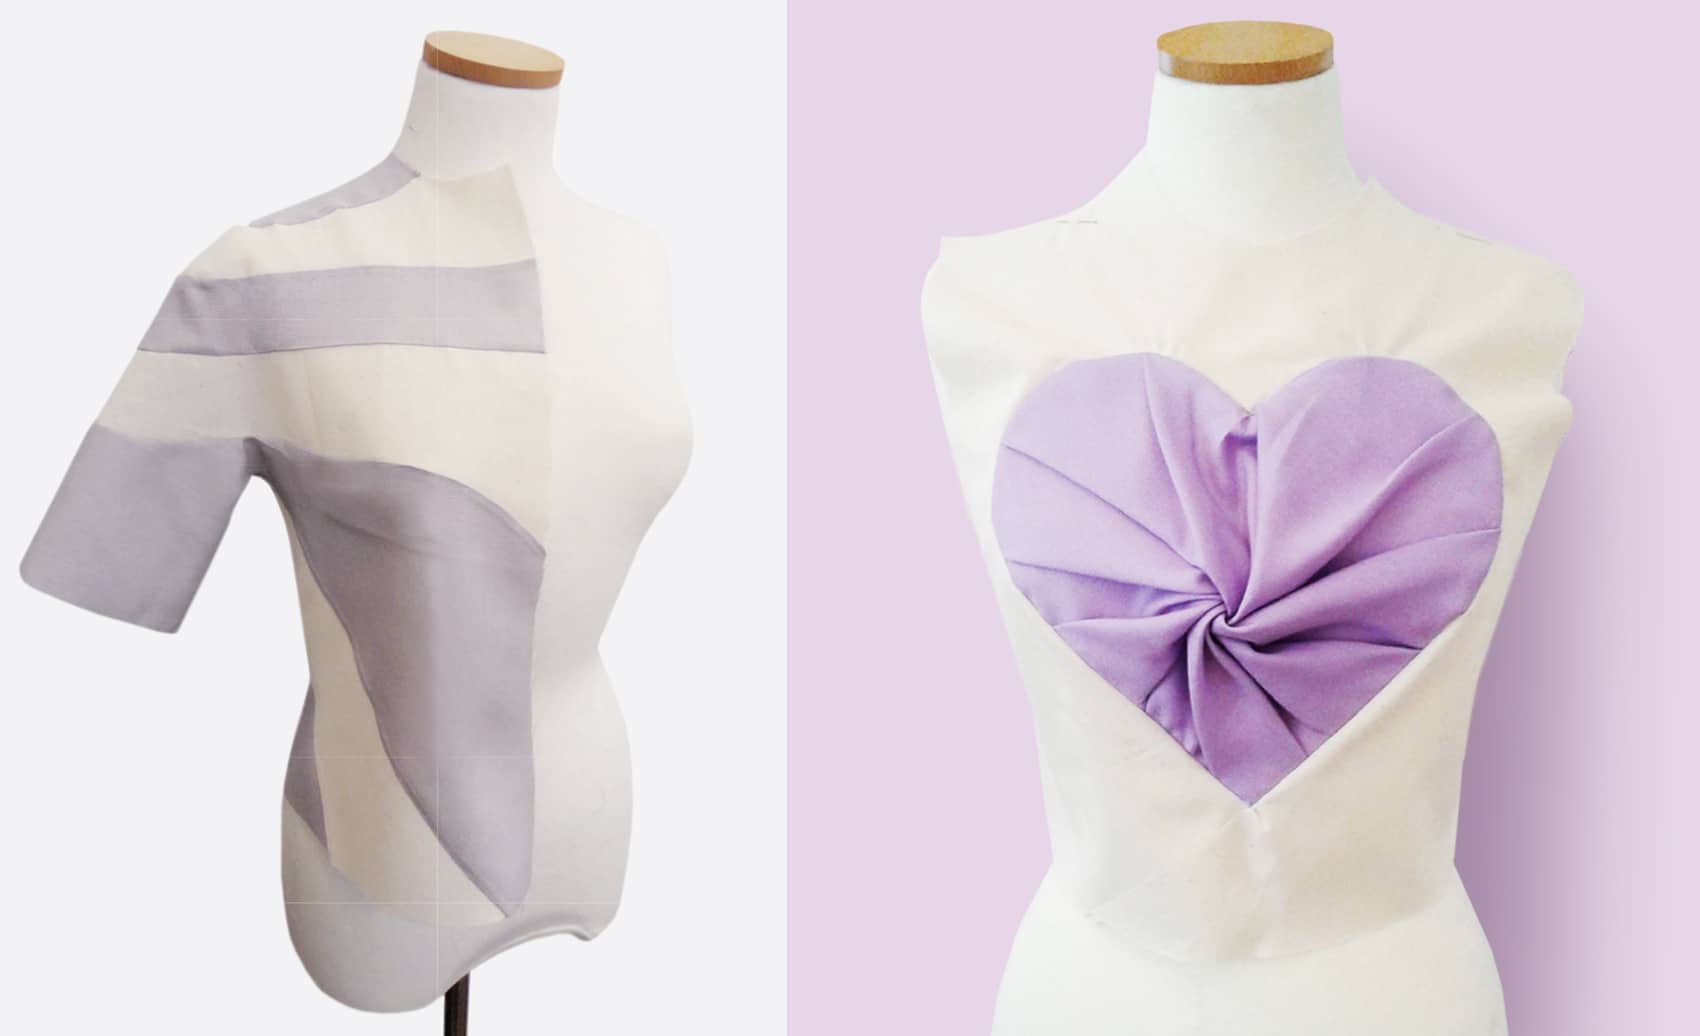
Shingo Sato’s “Transformational Reconstruction Technique” is a combination of two-dimensional, flat patternmaking and three-dimensional draping on the dress form. A muslin toile is made from the basic pattern. All darts are sewn closed. The muslin toile is placed on the dress form and the new style seams are drawn free hand onto the muslin fabric.
The placement of matching notches is vey important for this technique. Especially in curved seamlines, this will ensure the perfect fit. Then, the garment will be cut apart along the new seamlines. The original seamlines and the darts are no longer needed. Finally, add seam allowances and hem allowance all around and cut out all pattern pieces.
The picture shows a sleeveless bodice up to the waist. This relatively simple dart manipulation can be either achieved by freehand drawing on the sewn muslin toile or by drafting the pattern per two-dimensional pattern techniques.
Pattern Construction Front Pattern
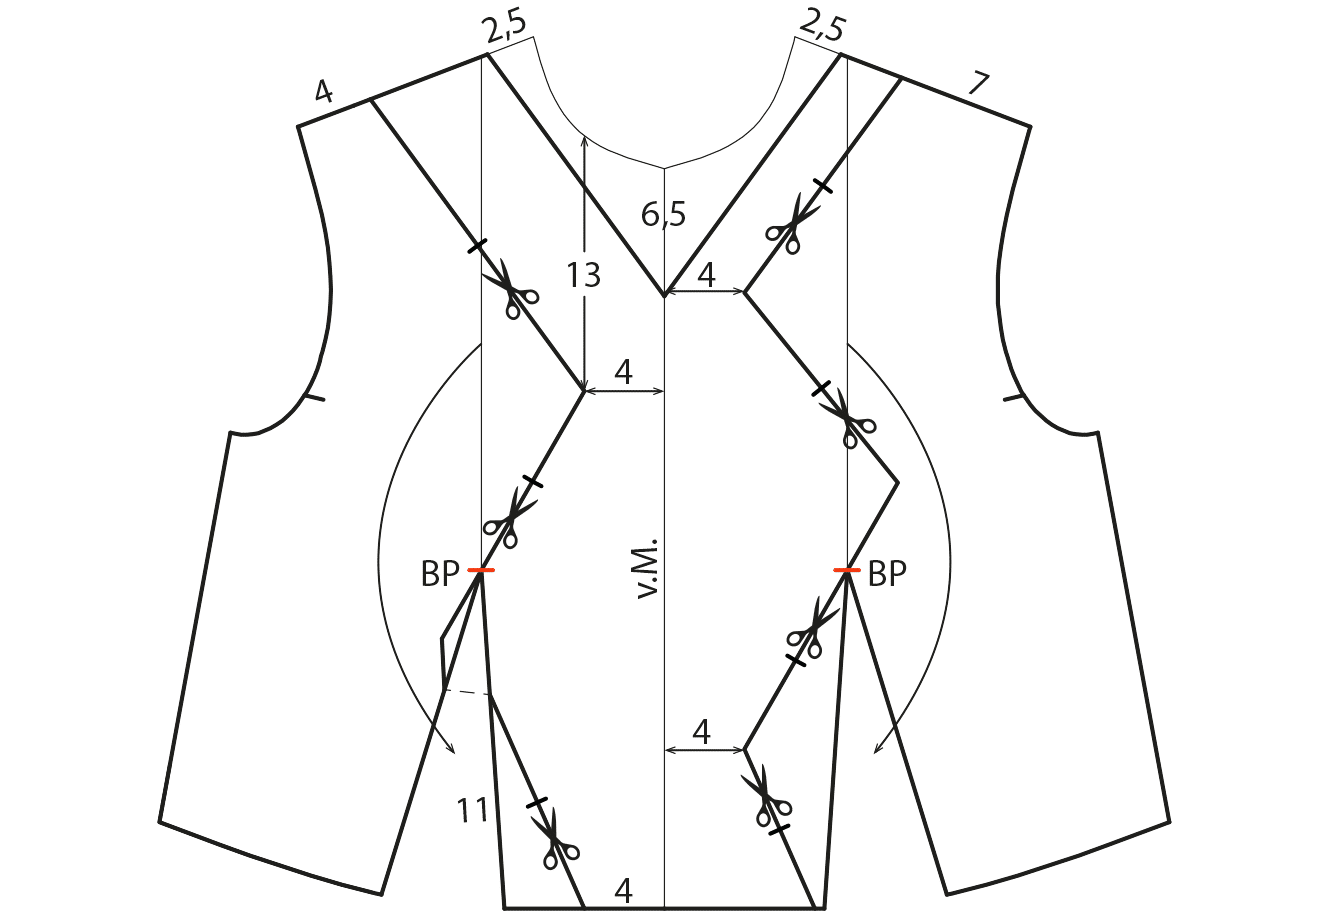
Rotate the bust dart intake to the waist. Mirror the front pattern over the centre front. Lower the neckline 2.5 cm at the shoulder and 6.5 cm at the centre front. Draw the V-neckline shape. Draw the asymmetrical style seams as shown in the illustration. Make sure that the new seamlines run through the bust point (BP)! Mark matching notches on straight sections.
Pattern Construction Back Pattern
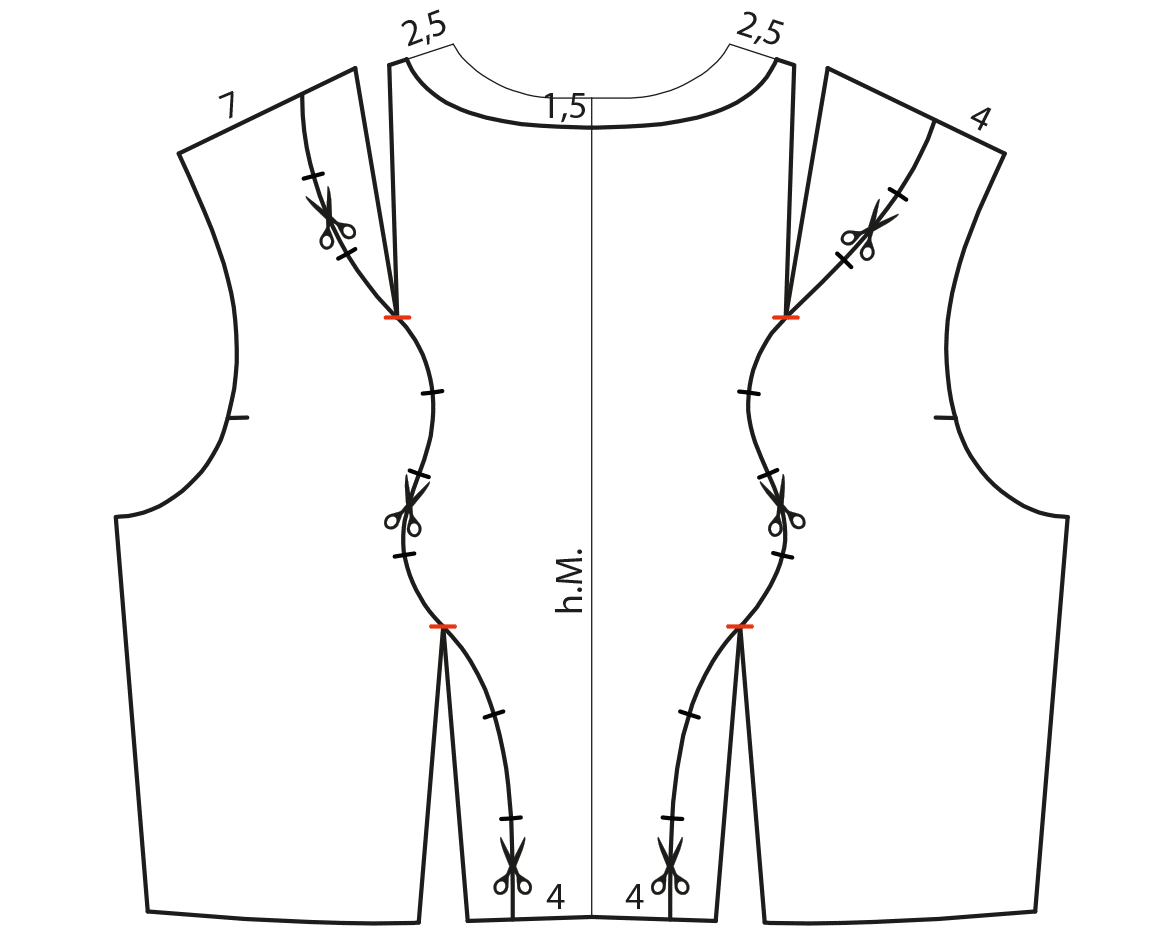
Mirror the back pattern over the centre back. Lower the neckline 2.5 cm at the shoulder and 1.5 cm at the centre back. Draw the new rounded back neckline. Draw the wavy style seam as shown in the illustration. Make sure that the seamlines run through the endpoints of the shoulder dart and the waist dart! Mark the seamline the same position on the shoulder as on the front pattern. Mark 2 to 3 matching notches at each wavy section.
Finished Pattern Pieces
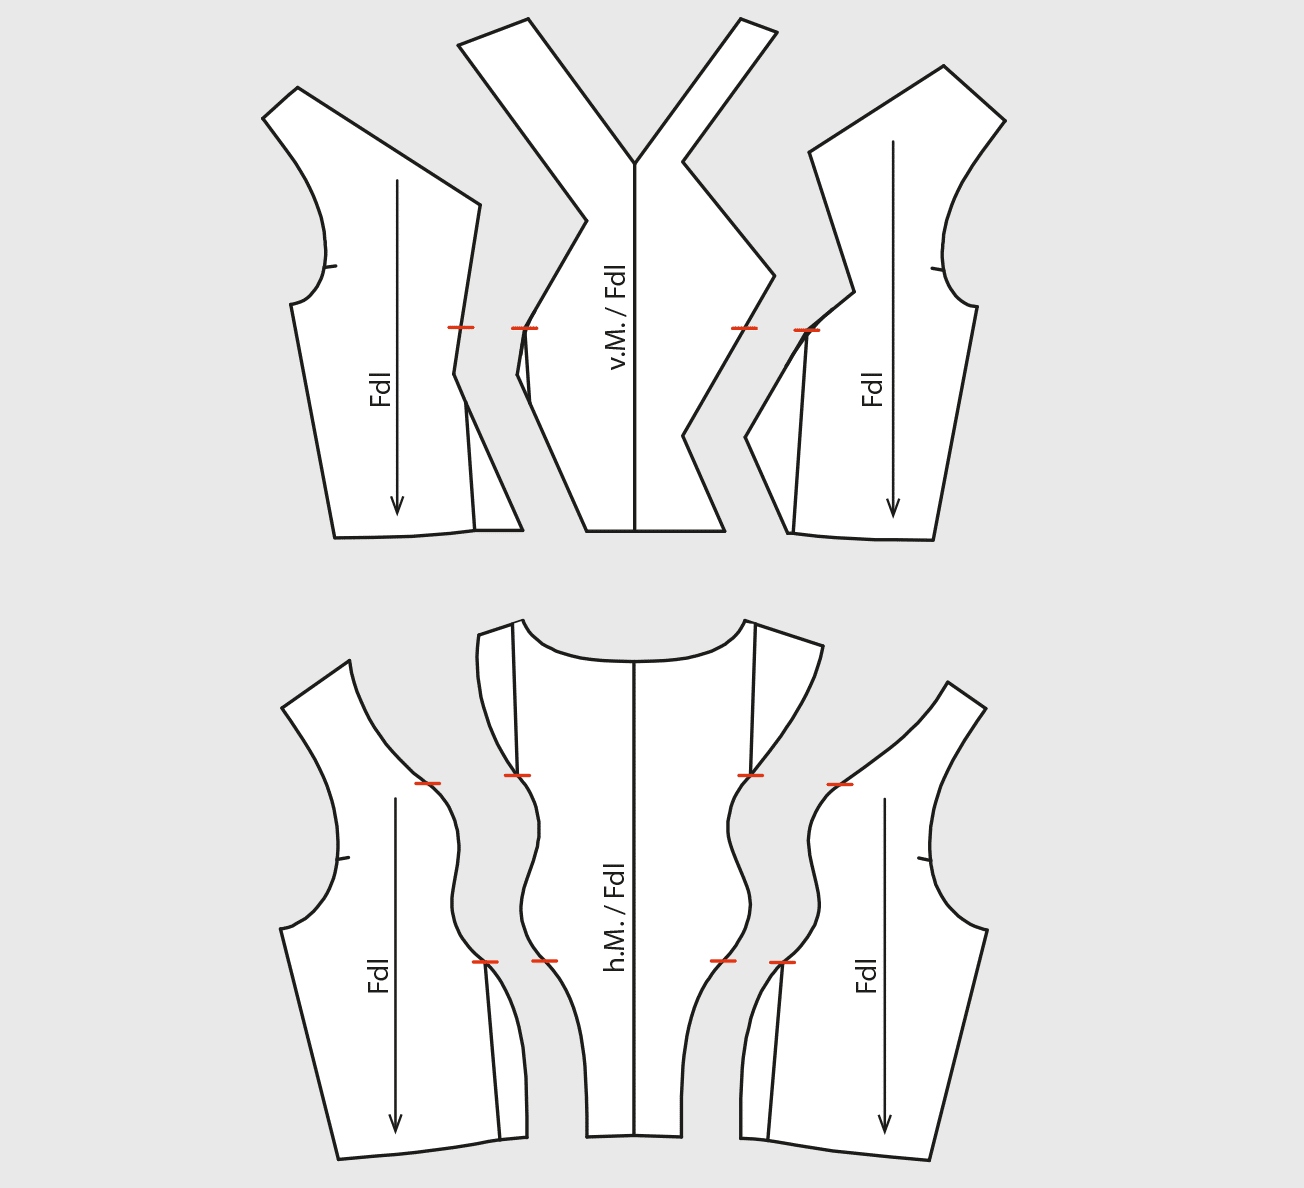
Cut through the front and back pattern along the new seamlines and close the darts. Blend the seamlines and transitions. Mark the grainline.
Many more cutting instructions and finished patterns for sewing can be found in our online shop.


