Pattern Construction for Bikinis
Deutsch
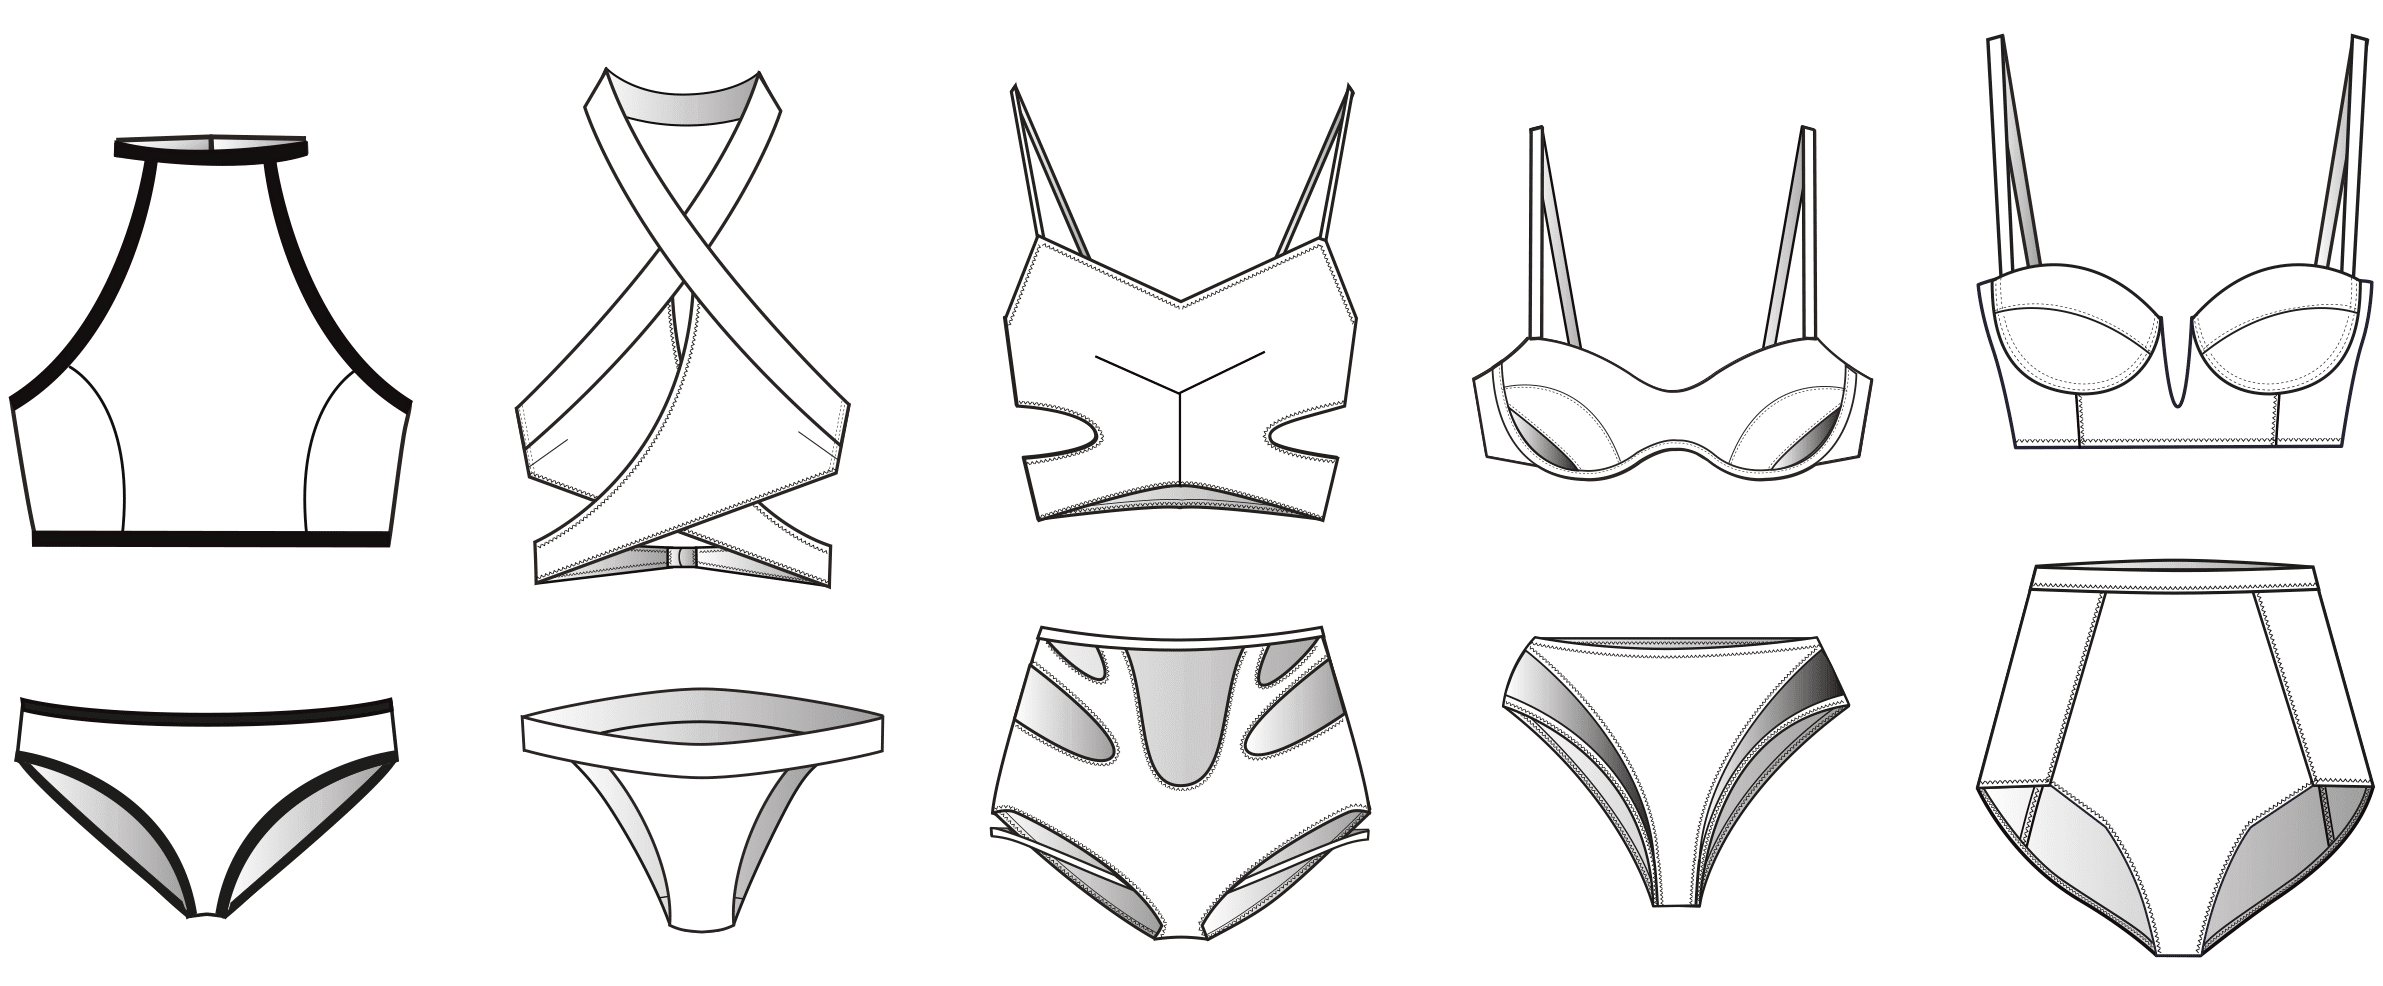 Bikinis are trendy in a wide variety. There is something for everyone, from a casual scuba look to sophisticated neckline variations.
Tip
Determine the stretch factor in percent in crosswise and lengthwise direction before you draft the pattern. The measurements of the following designs are reduced by 15% in crosswise direction and 5% in lengthwise direction. This can vary depending on the material and must be considered.
Material
Highly elastic functional materials with the following characteristics:
• chlorine resistant • no pilling • easy care • wrinkle-free • sun block • quick dry • extra comfort
You can find the full bikini-pattern-instructions in our magazine Rundschau for women 6.2017.
Sportswear Bikini
The shell pattern is drafted up to the waist with the reduced measurements according to the stretch factor. Taper the centre back 2.0 cm at the waist.
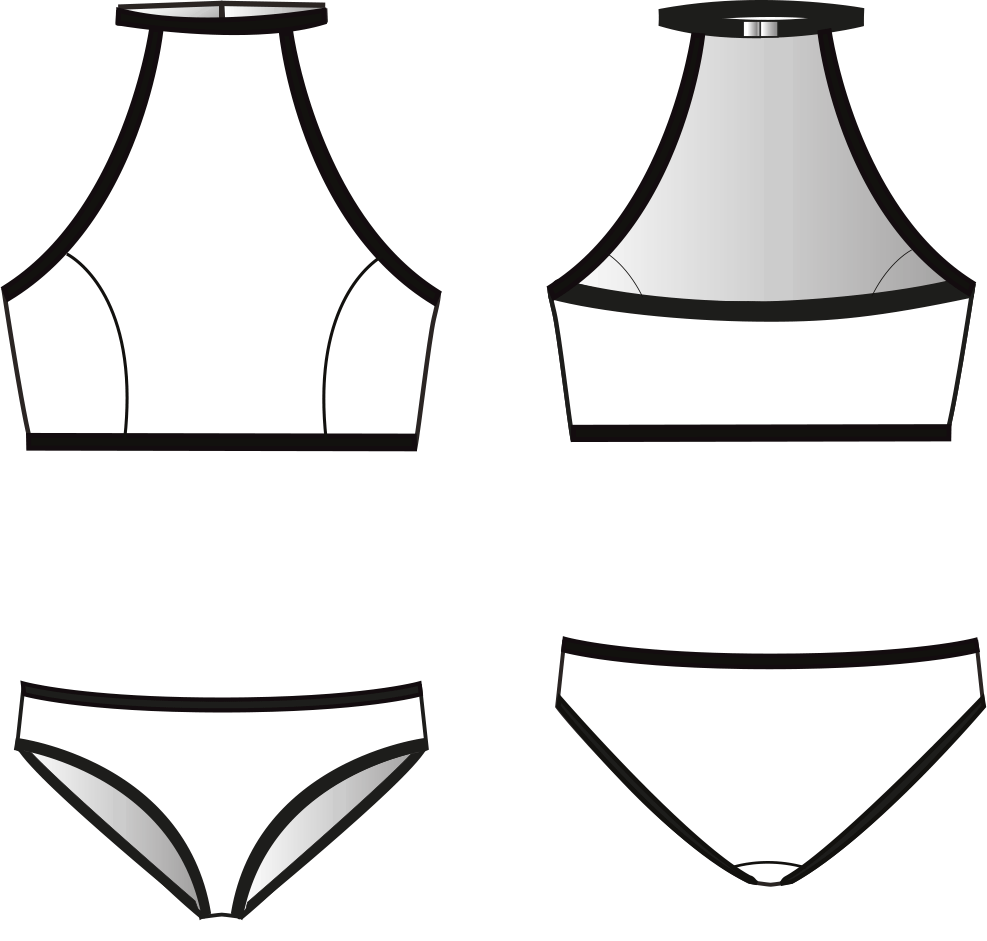 (Photo Credit: Techniical drawing C. Sievers)
Preperation
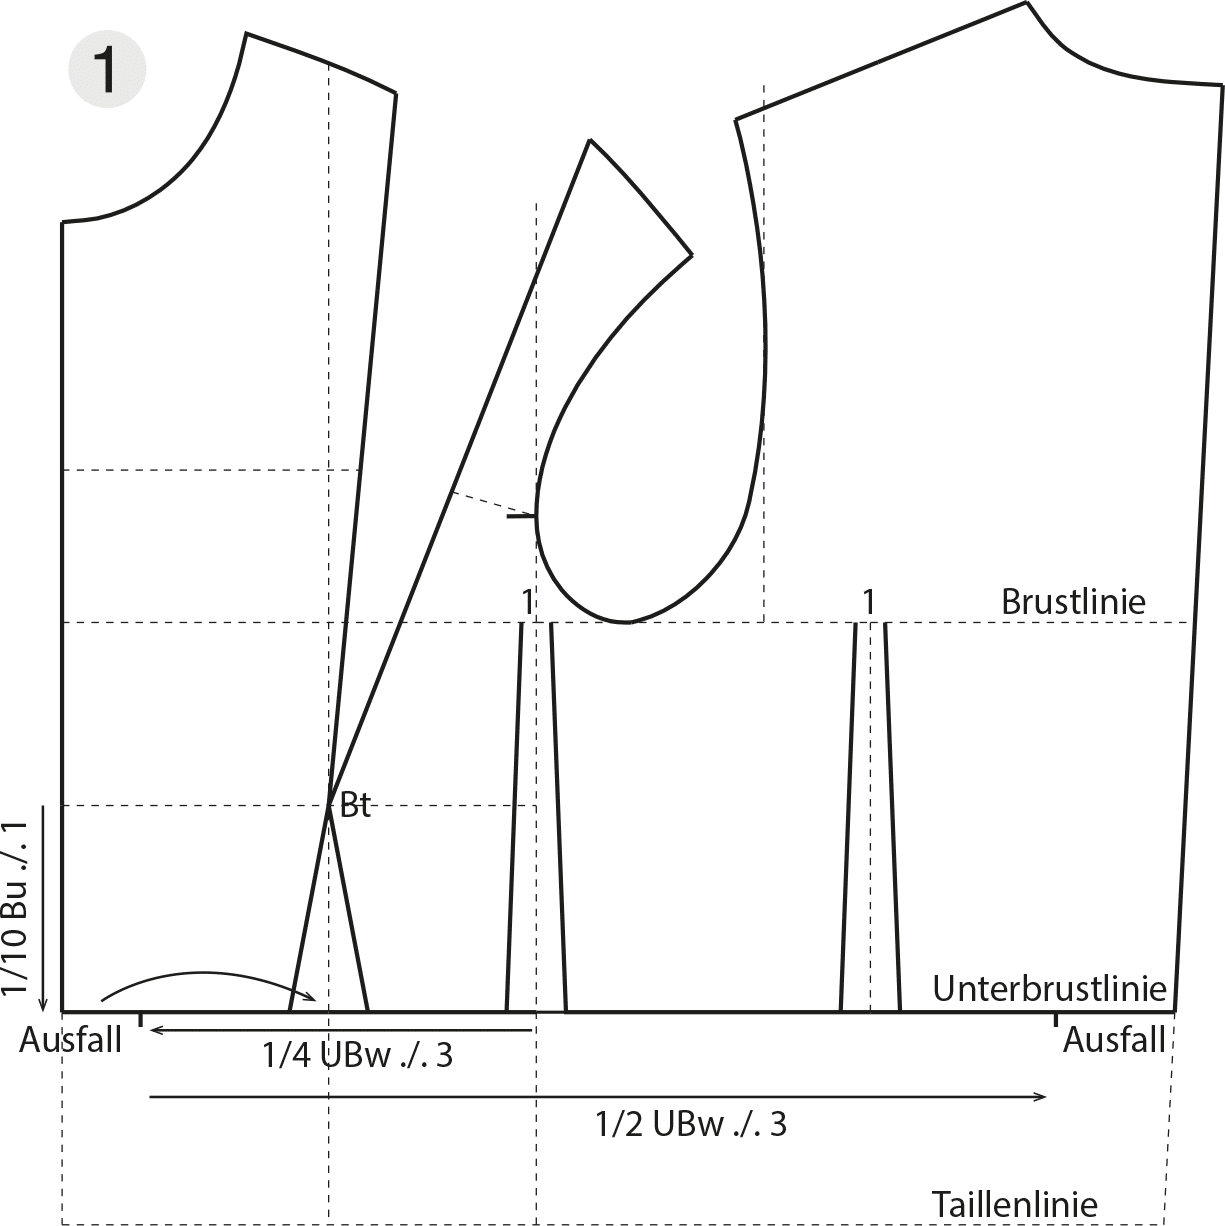
1 Draw a horizontal guideline from the bust point to the centre front. Measure 1/10 of the chest girth minus 1.0 cm downward along the centre front and mark the underbust line. Draw the underbust line horizontally from the centre front to the centre back. Along the underbust line, measure ¼ of the underbust width minus 3 cm from the front pitch line to the left. Measure the extra width between this point and the centre front and remove half of this amount to each side of the waist dart.
Measure ½ of the underbust girth minus 3 cm from this point to the right. The amount between this point and the centre back is extra width that needs to be removed at the underbust line. Mark half of this amount at the front pitch line and half on the back pattern as shown in the illustration. Also remove 1 cm each dart at the chest line.
Front and Back Pattern
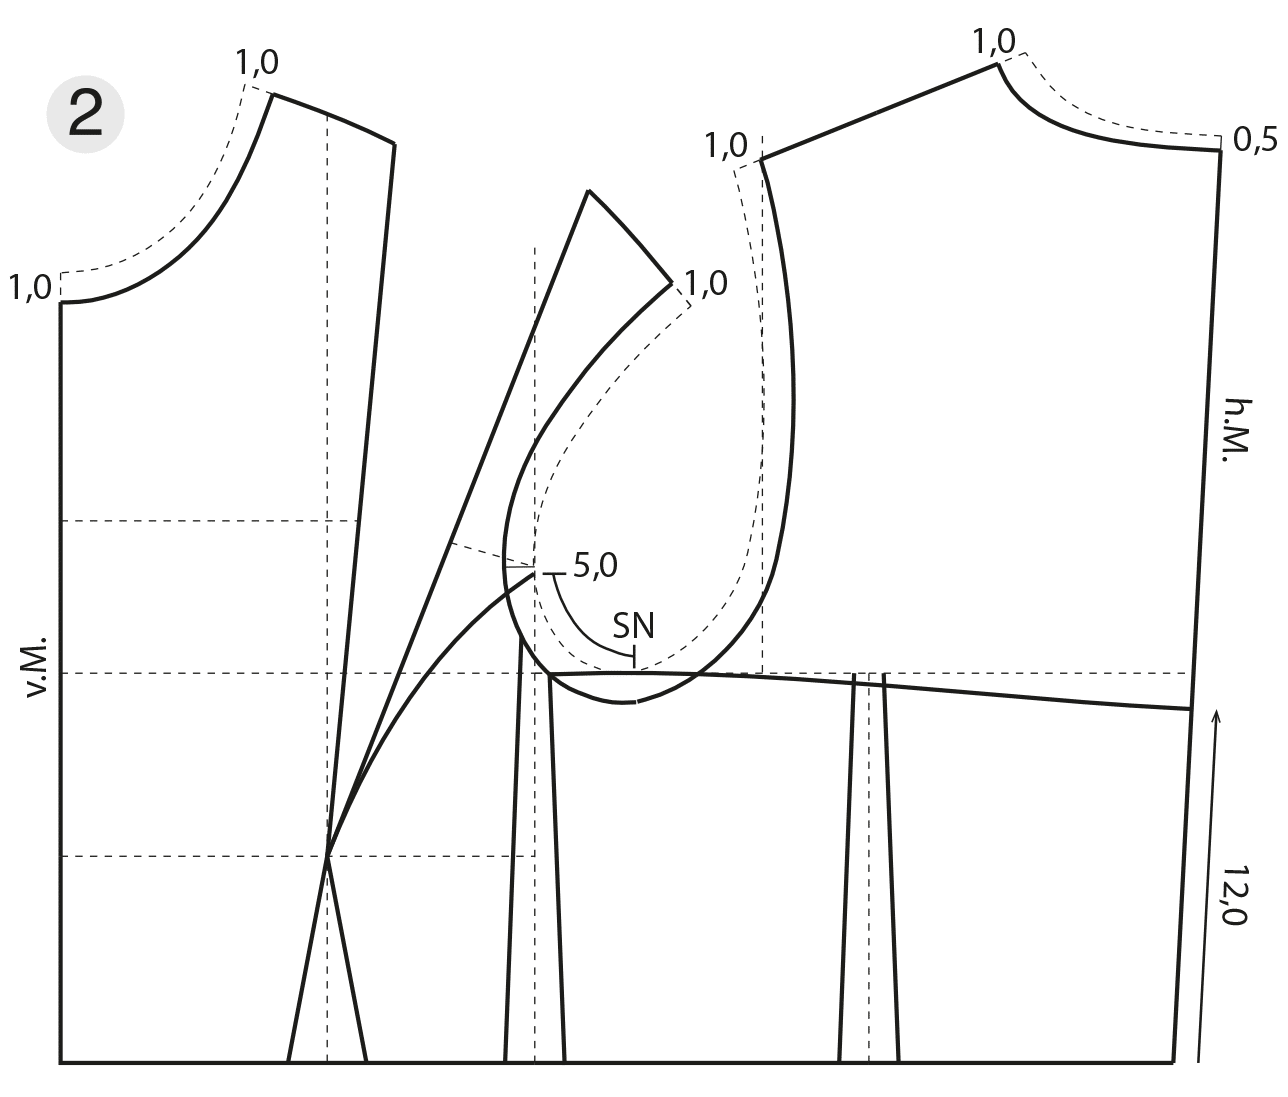
2 Lower the neckline 1 cm at the shoulder and at the centre front. Lower the neckline 0.5 cm at the centre back and draw the new neckline. Measure 5 cm from the sideseam along the front armhole and draw the front panel seam from the armhole to the bust point. Mark the height at the centre back with 12 cm above the underbust line. Draw the back neckline to the front pitch line. Lower the armhole and trim the shoulder 1.0 cm and draw the new armhole as shown in the illustration.
Dart Manipulation
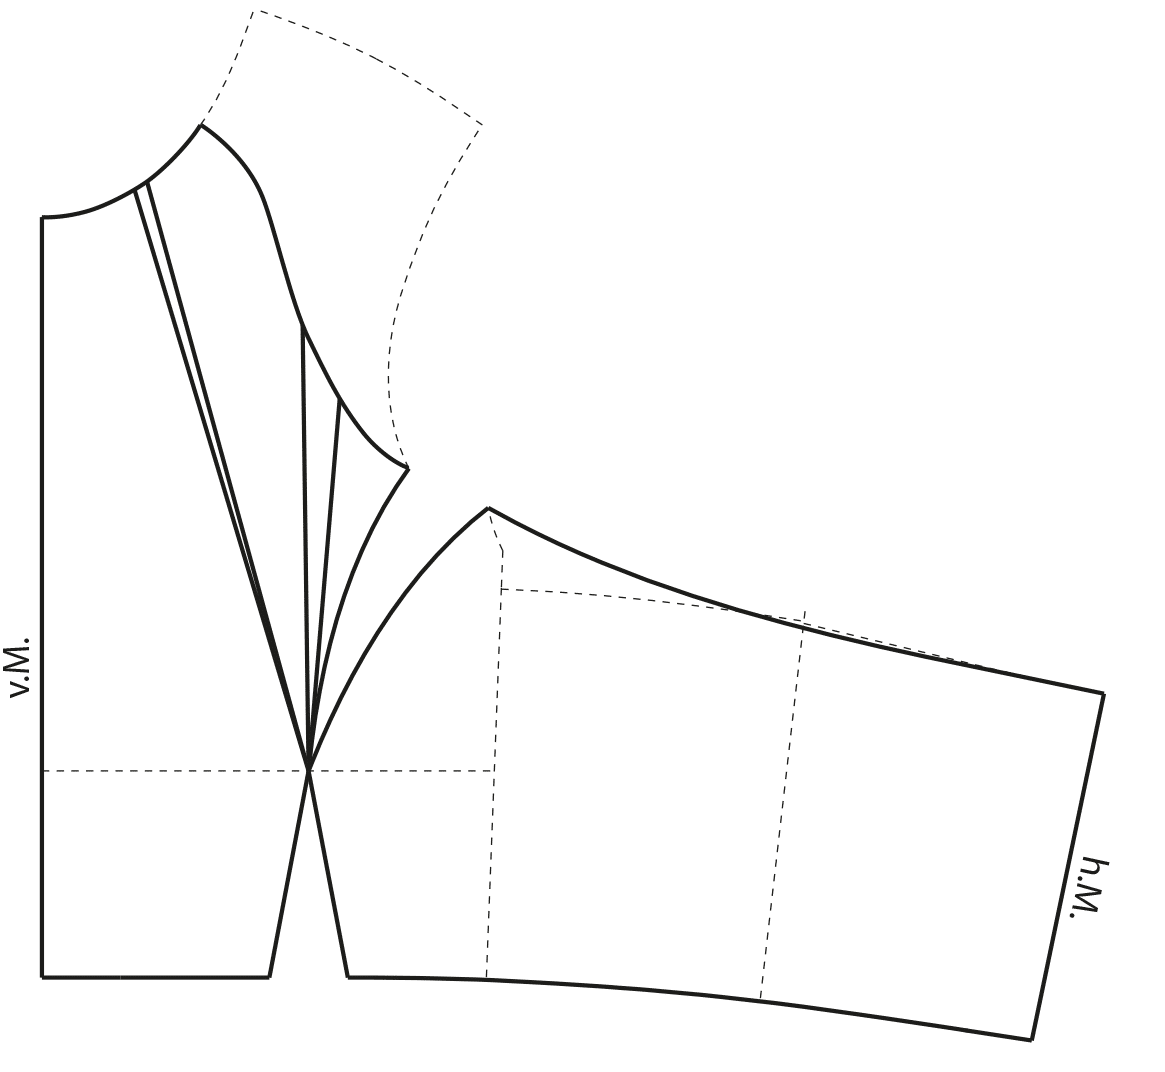
Draw the new armhole and the upper edge of the back. Mark 0.5 cm closing amount for a closer fit at the neckline and 0.75 cm closing amount for a better fit at the armhole.
Completion
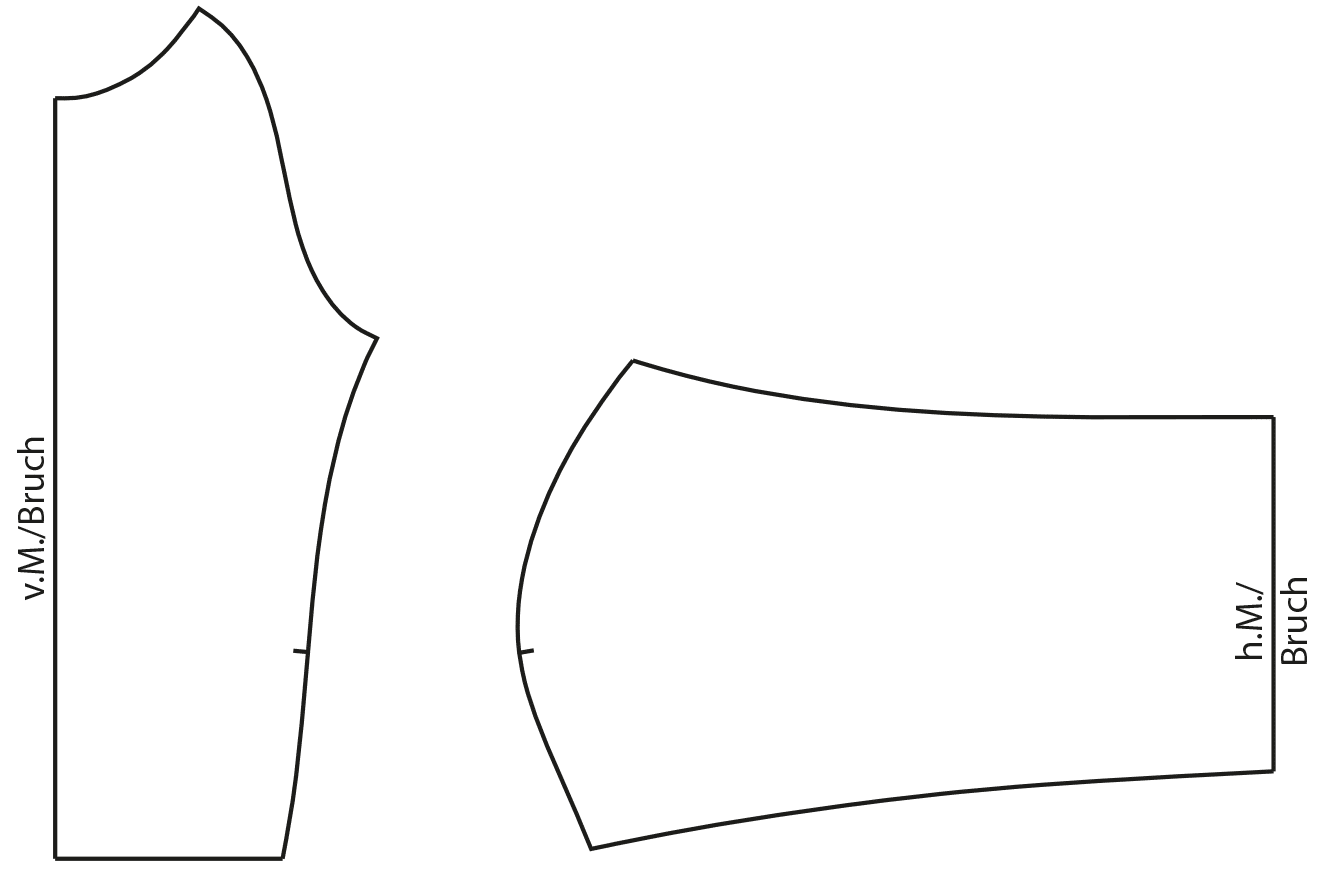
Close the intake at the front pitch line and on the back pattern and blend the armhole. Blend the upper and lower edge on the back pattern after closing the intake. Mark the grainline along the centre back. The centre back is cut on the fabric fold.
Neckline, Armhole and Hem Binding
Measure the neckline, armhole and hemline on the front and back pattern. Cut the bindings a bit Shorter than the measured lengths for the stretch of the fabric.

Neckline Binding
Shorten the measured length around 1 cm. Remove 1.5 cm each side at the centre back for the back closure. This amount depends on the width of the back closure. The finished binding is 1 cm wide.
Armhole Binding
Shorten the measured length around 1 cm for the front and 1 cm each for the side and the back. The finished binding is 1 cm wide.
Hem Binding
Shorten the measured length around 1 cm. The finished binding is 1 cm wide.
Front and Back Pants
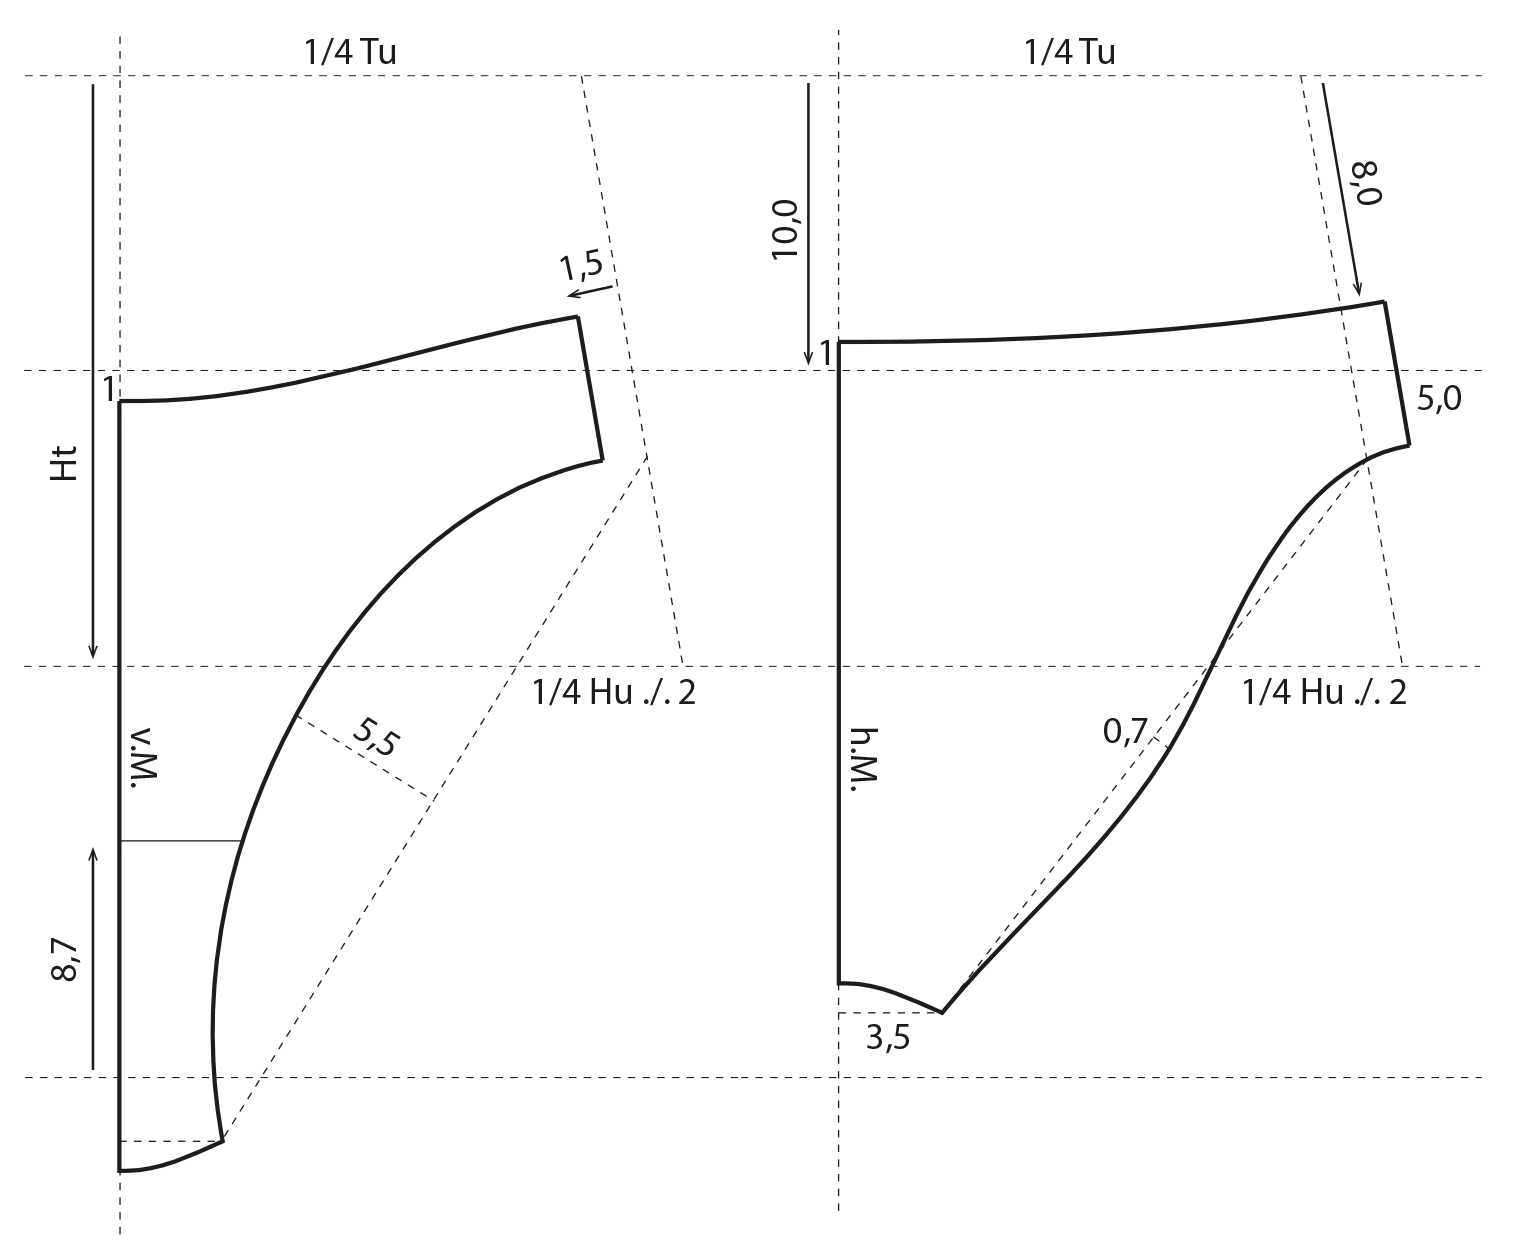
The front and back pants are shown separately for a better overview. Usually the basic front and back pants block is drafted onto each other. the Basic formation is mesh. Correspondingly, the basic pants block is drafted with the reduced measurements. Lower the waistline 10 cm at the vertical baseline and 8 cm at the slanted sideseam.
For a nicely shaped waistline, lower the centre front an additional 1 cm and raise the centre back 1 cm. Mark the sideseam 5 cm wide. Shift the sideseam 1.5 cm forward. Draw the leg shape as shown in the illustration. Mark the crotch 3.5 cm wide and the crotch gusset 8.7 cm long.
Front and Back Pants
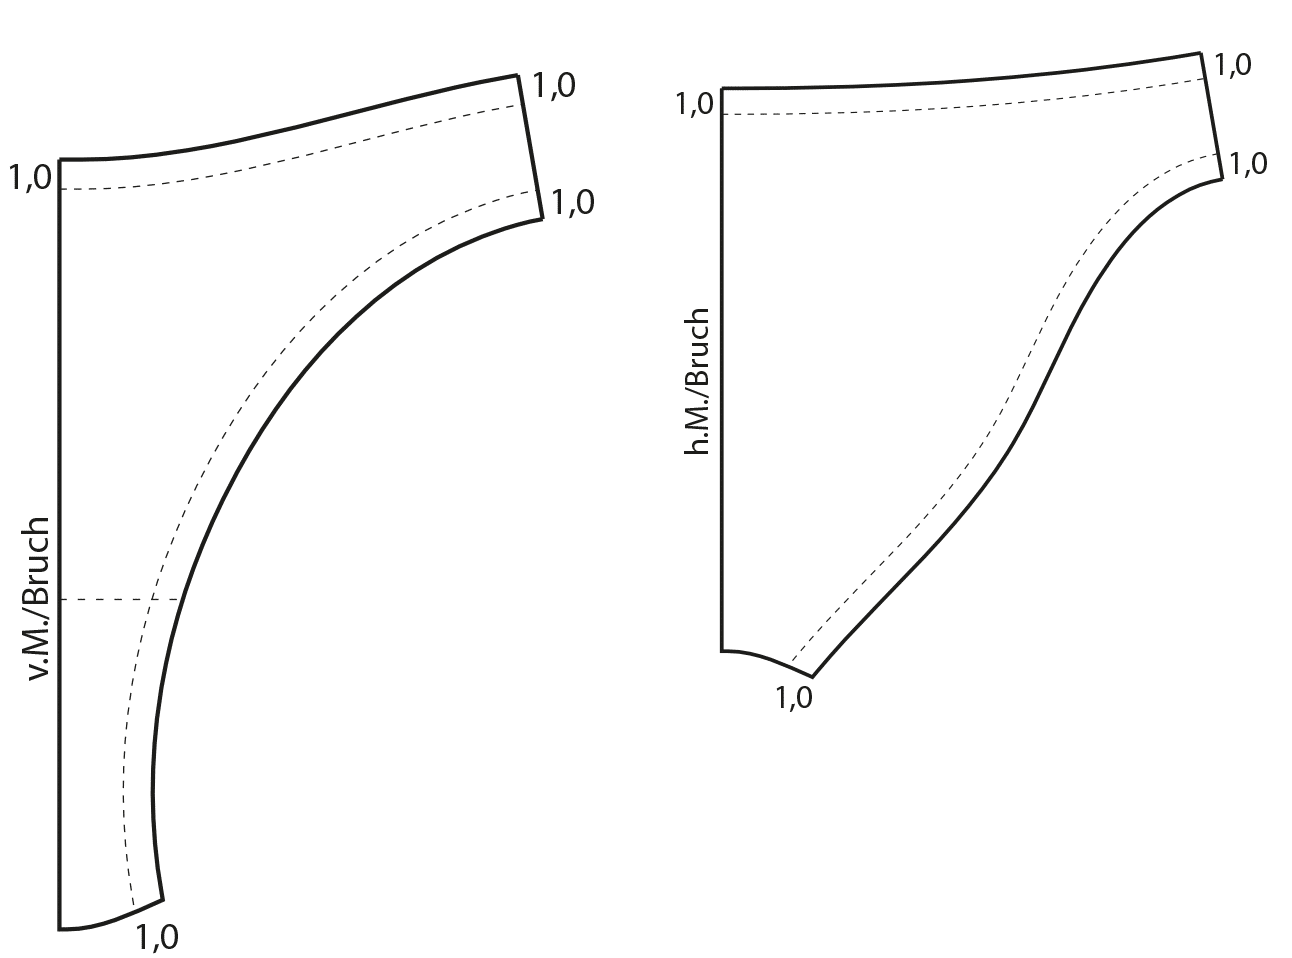
Copy the front and back pants pattern and mark the 1 cm wide bindings at the waistline and the front and back leg.
Waistline and Leg Bindings
Measure the waistline and the leg curve on the front and back pattern. Cut the bindings a bit shorter than the measured lengths for the stretch of the fabric.

Waistline Binding
Shorten the measured length around 1 cm. The finished binding is 1 cm wide.
Leg Binding
Shorten the measured length around 1 cm. The finished binding is 1 cm wide.
Finished Pattern Pieces
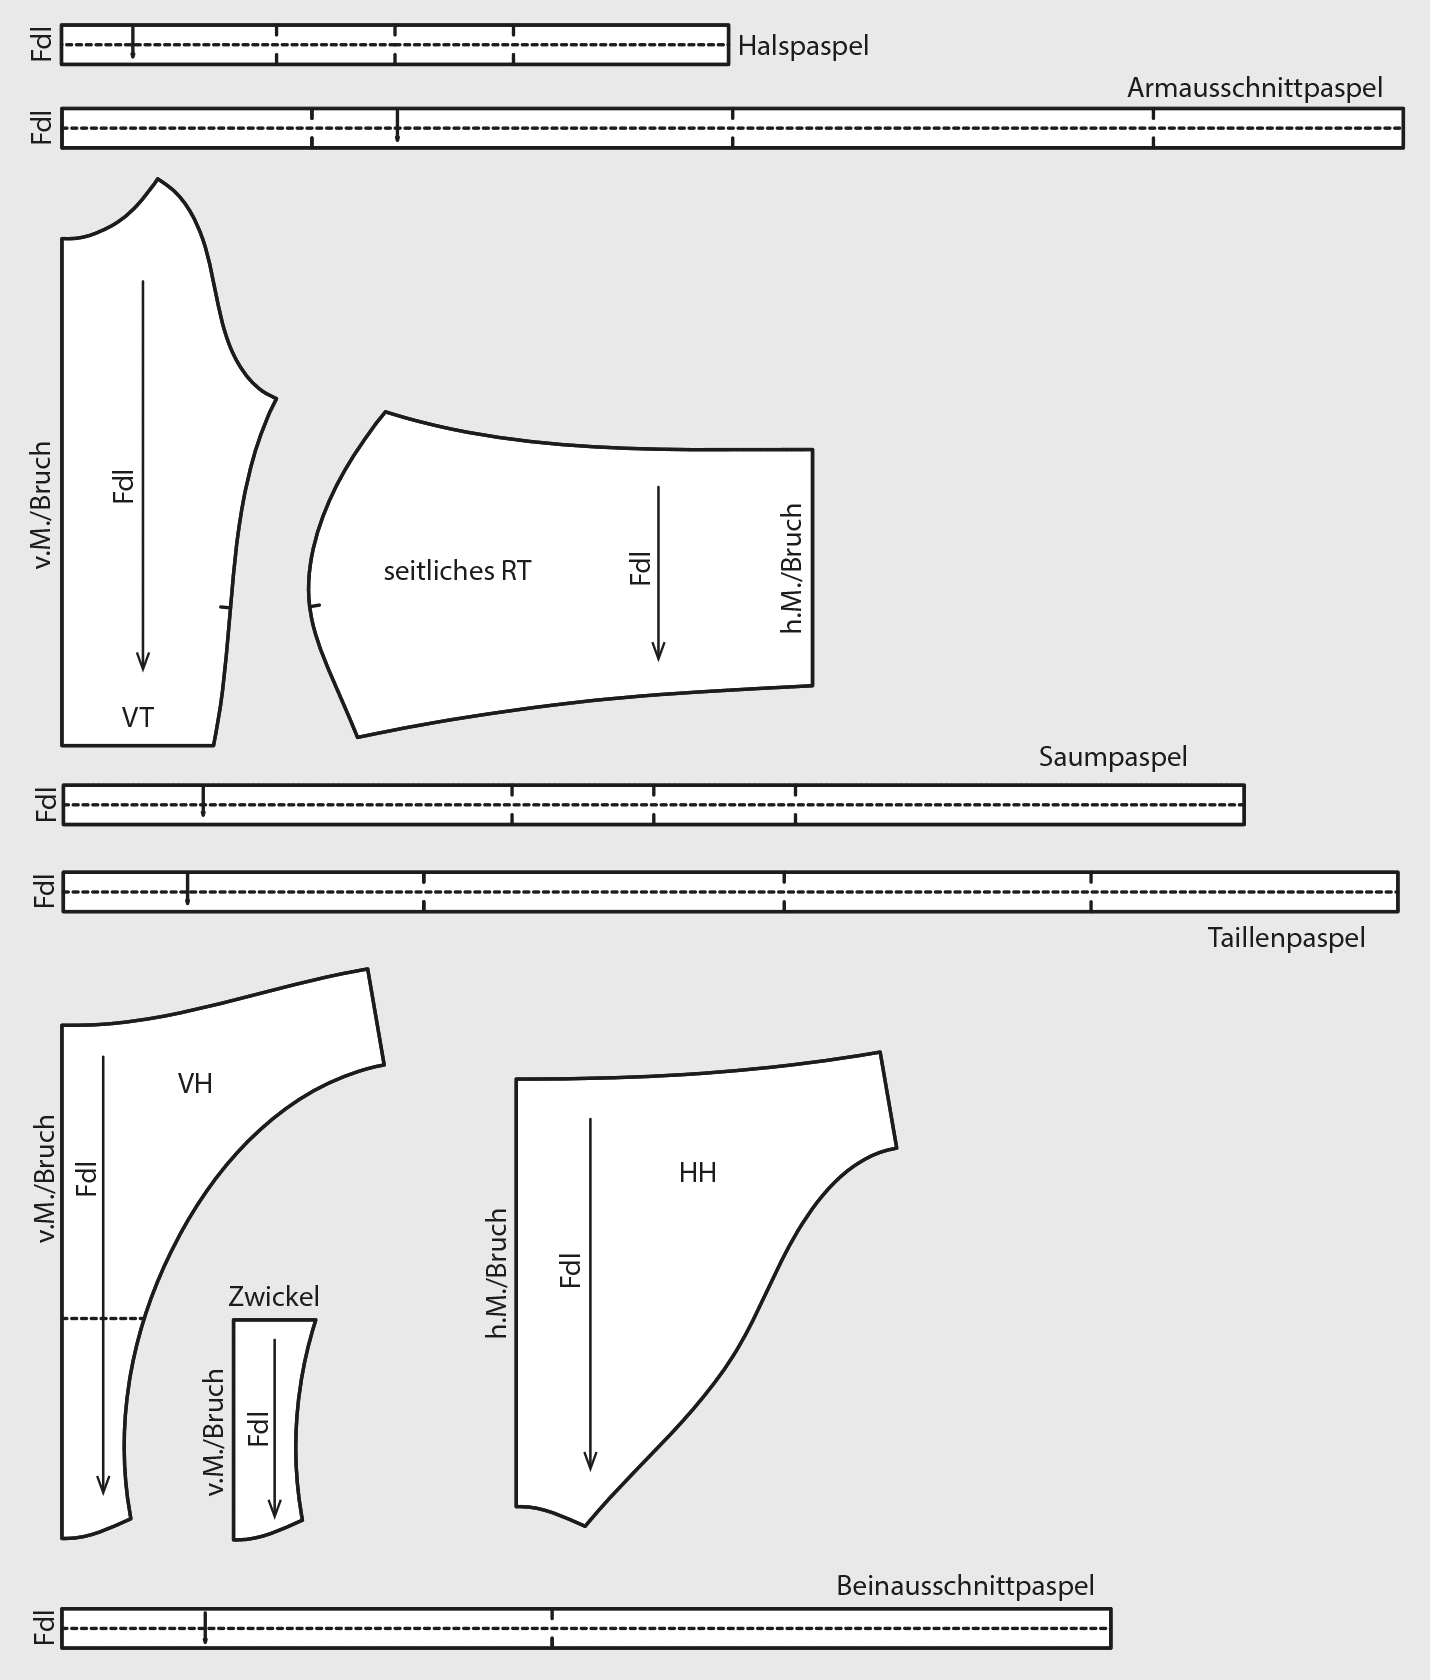
Cutout Bikini
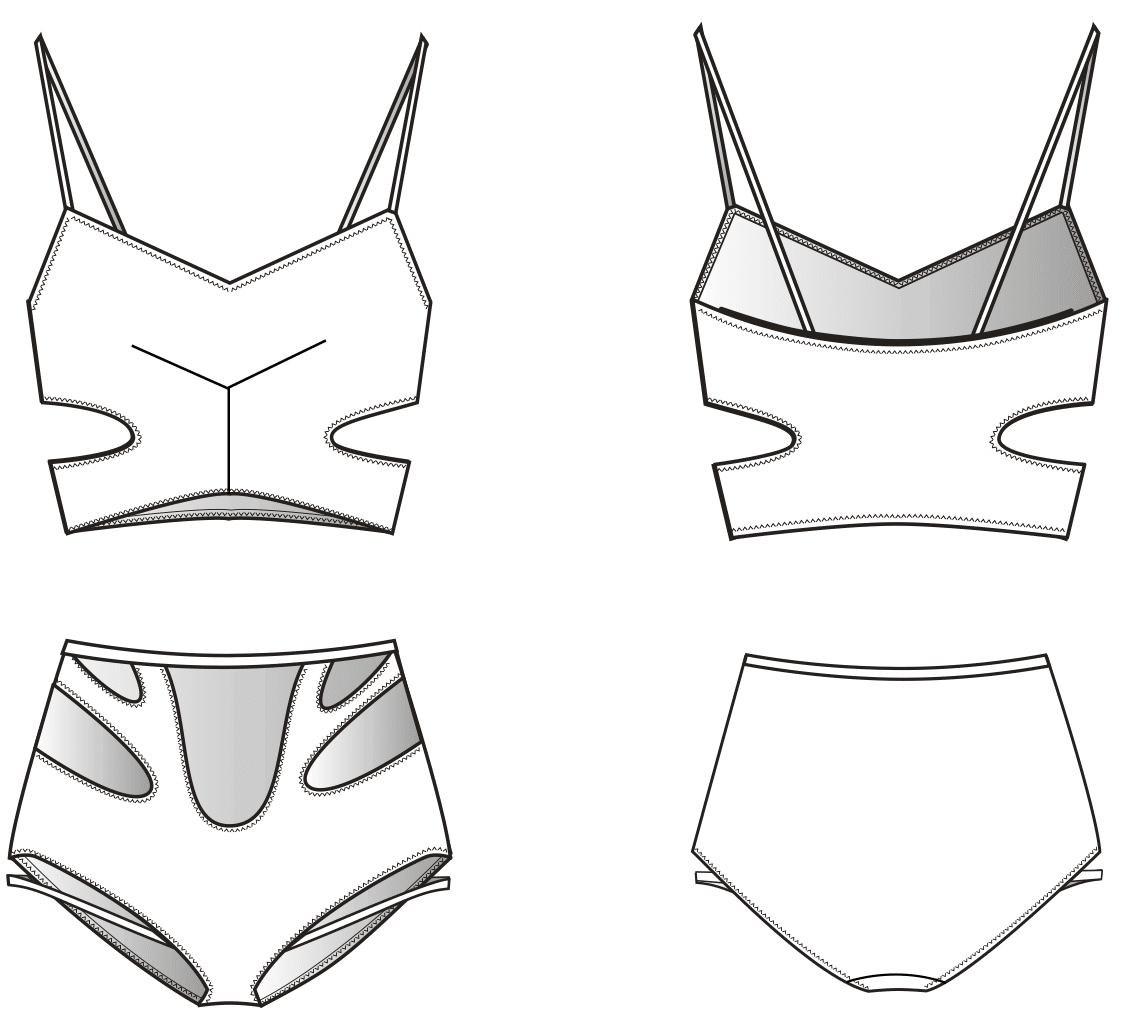 (Photo Credit: Technische Zeichnung C. Sievers)
Finished Pattern Pieces
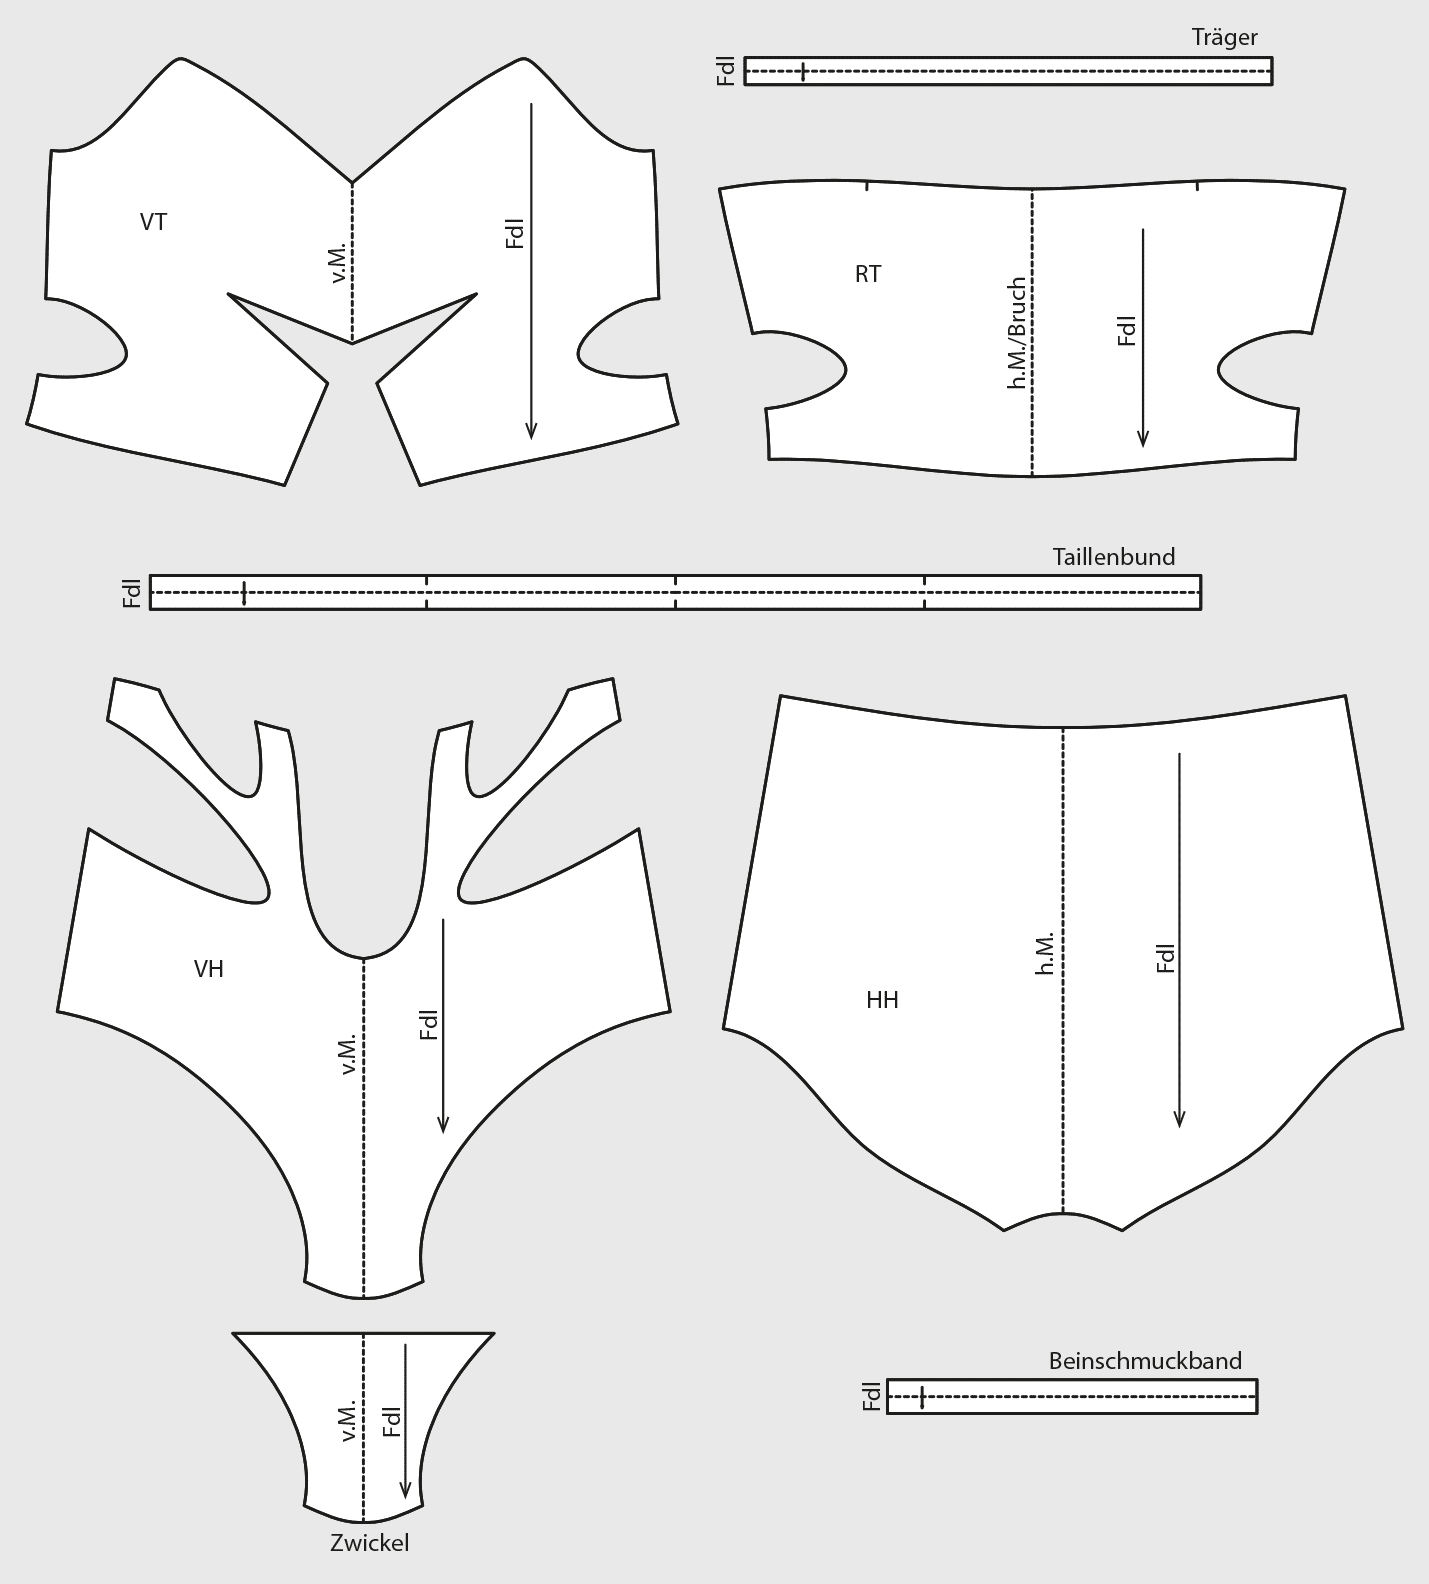
Wrap-Bikini
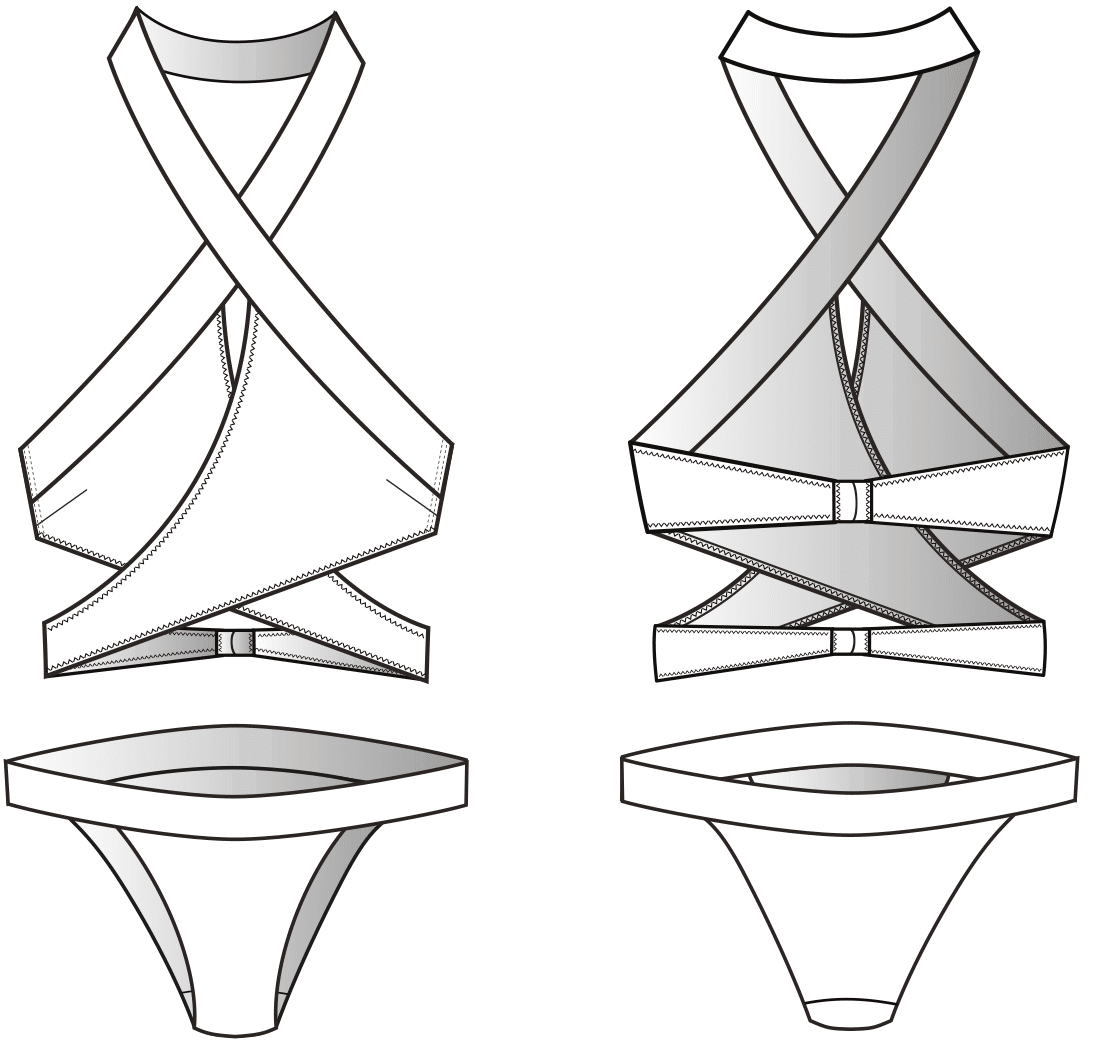 (Photo Credit: Technische Zeichnung C. Sievers)
Finished Pattern Pieces
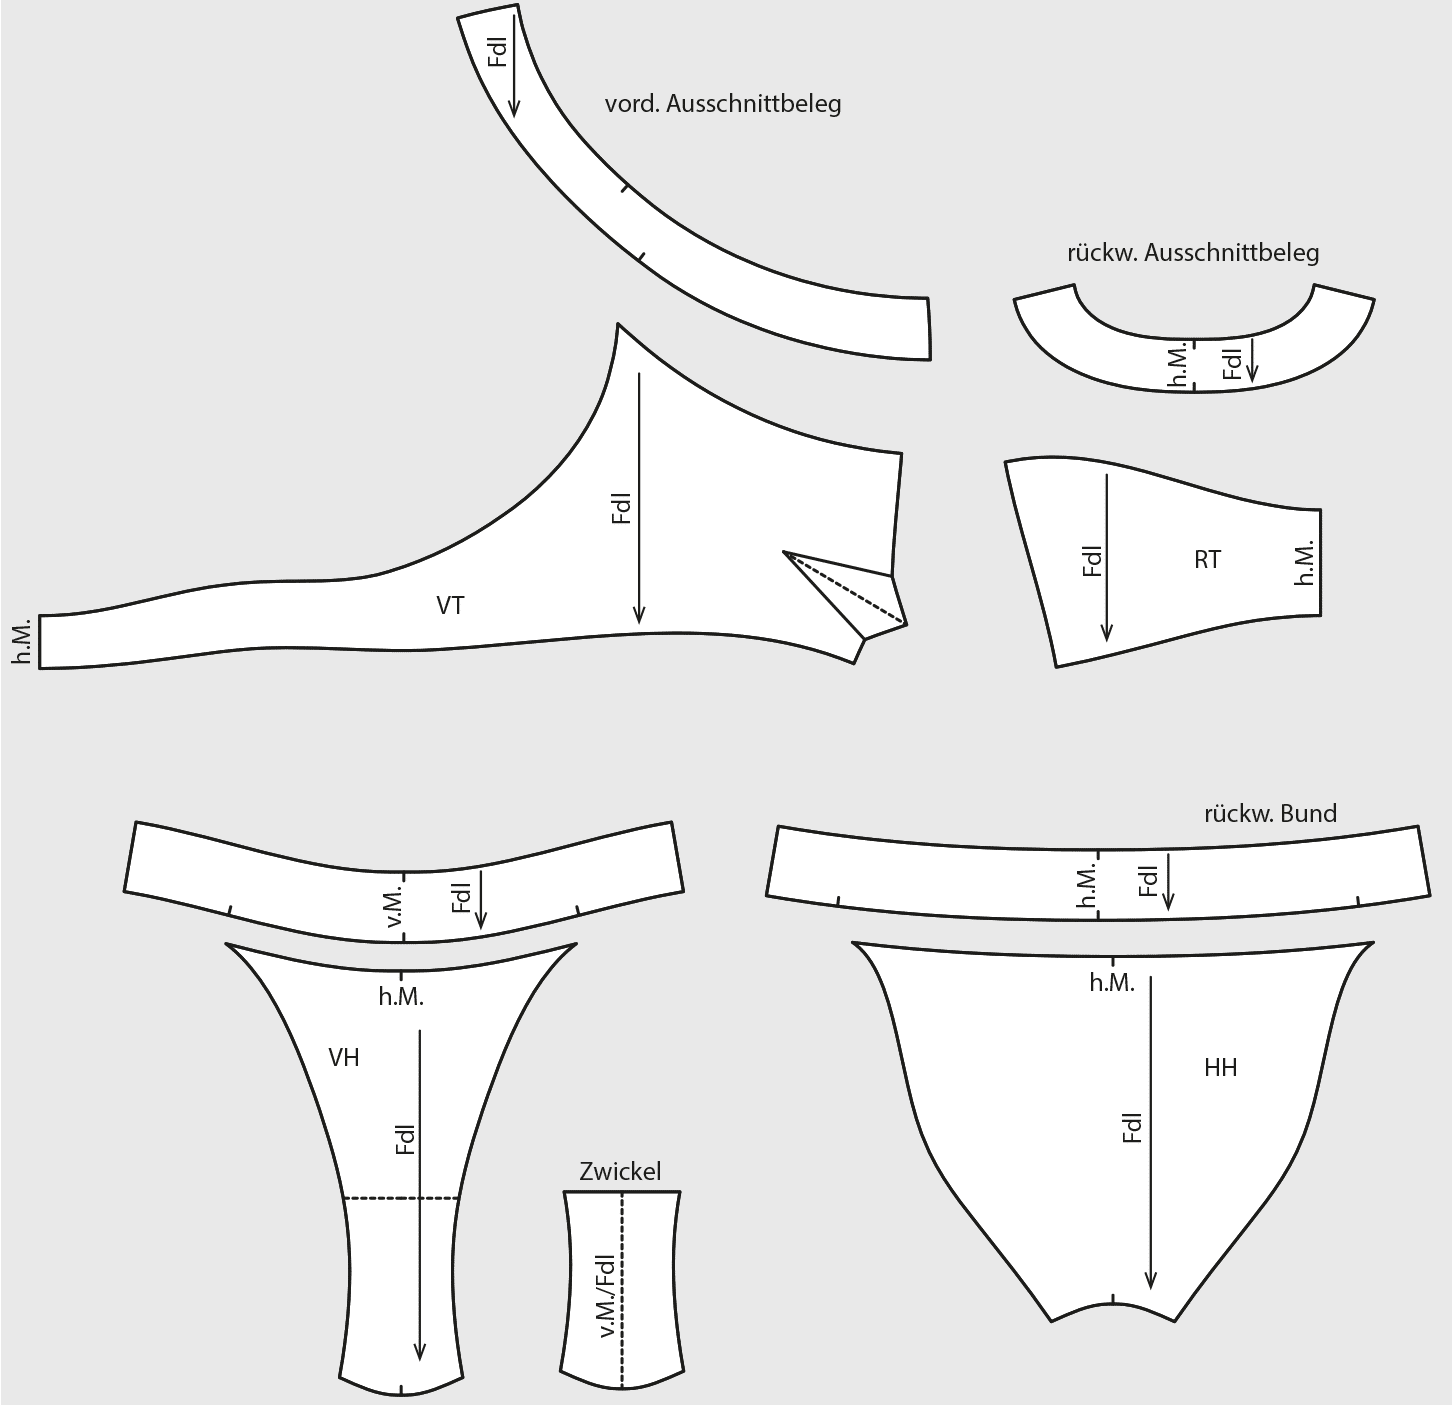
Corsage Bikini
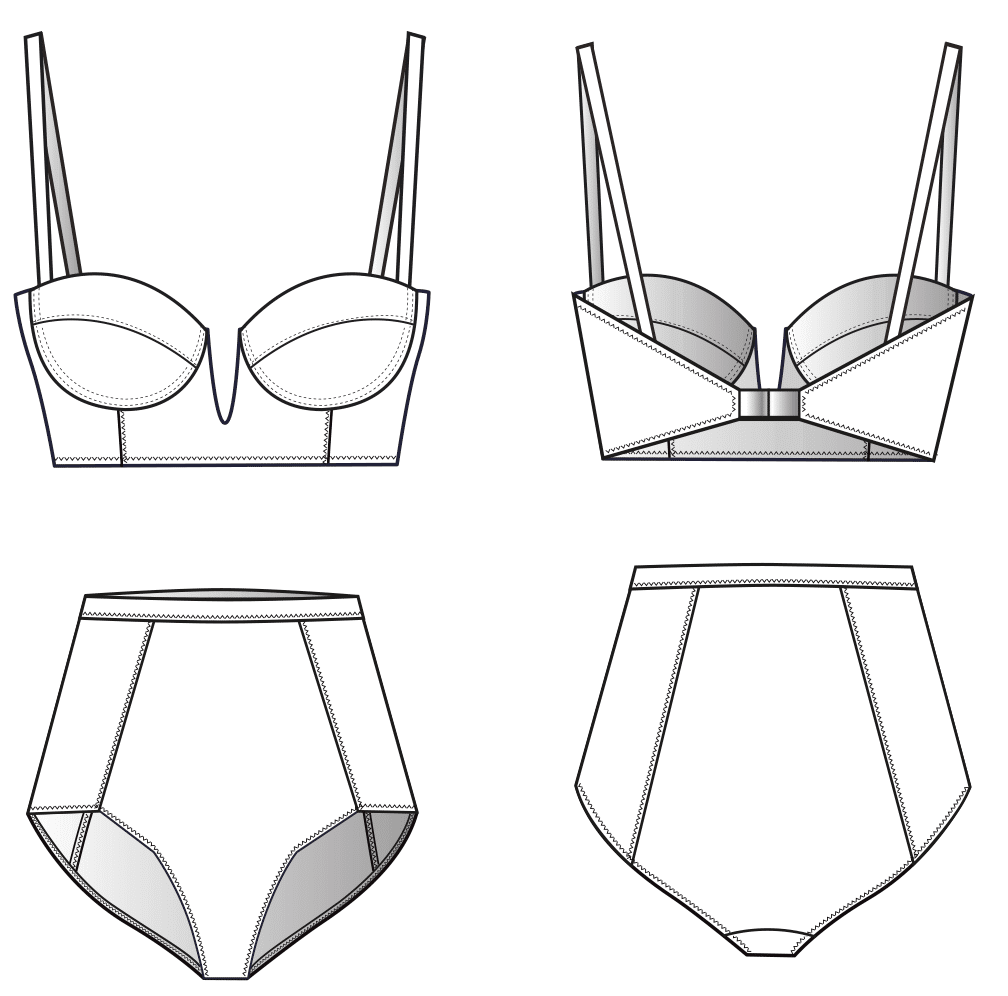 (Photo Credit: Technische Zeichnung C. Sievers)
Finished Pattern Pieces
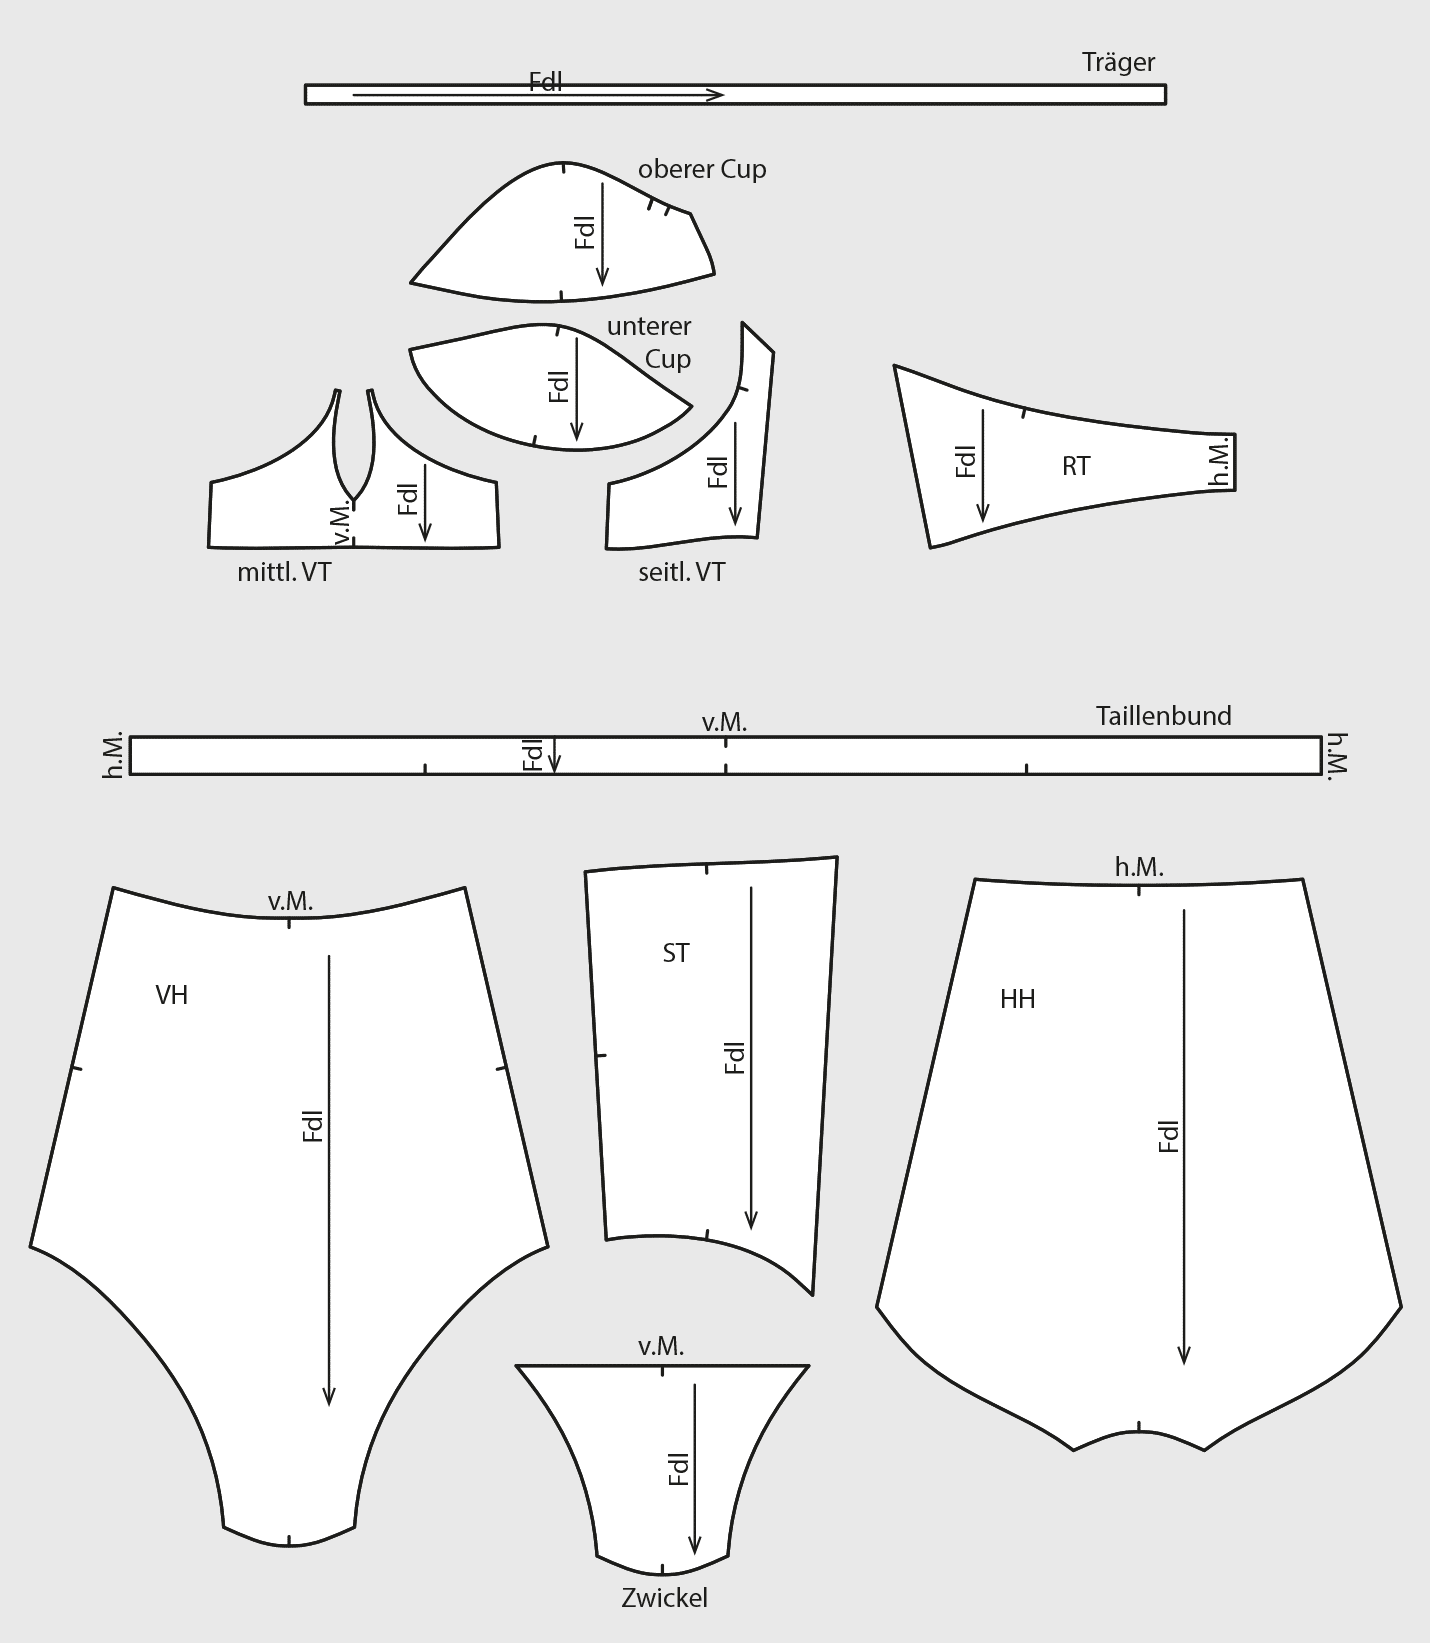
Bikini with Mesh Inserts
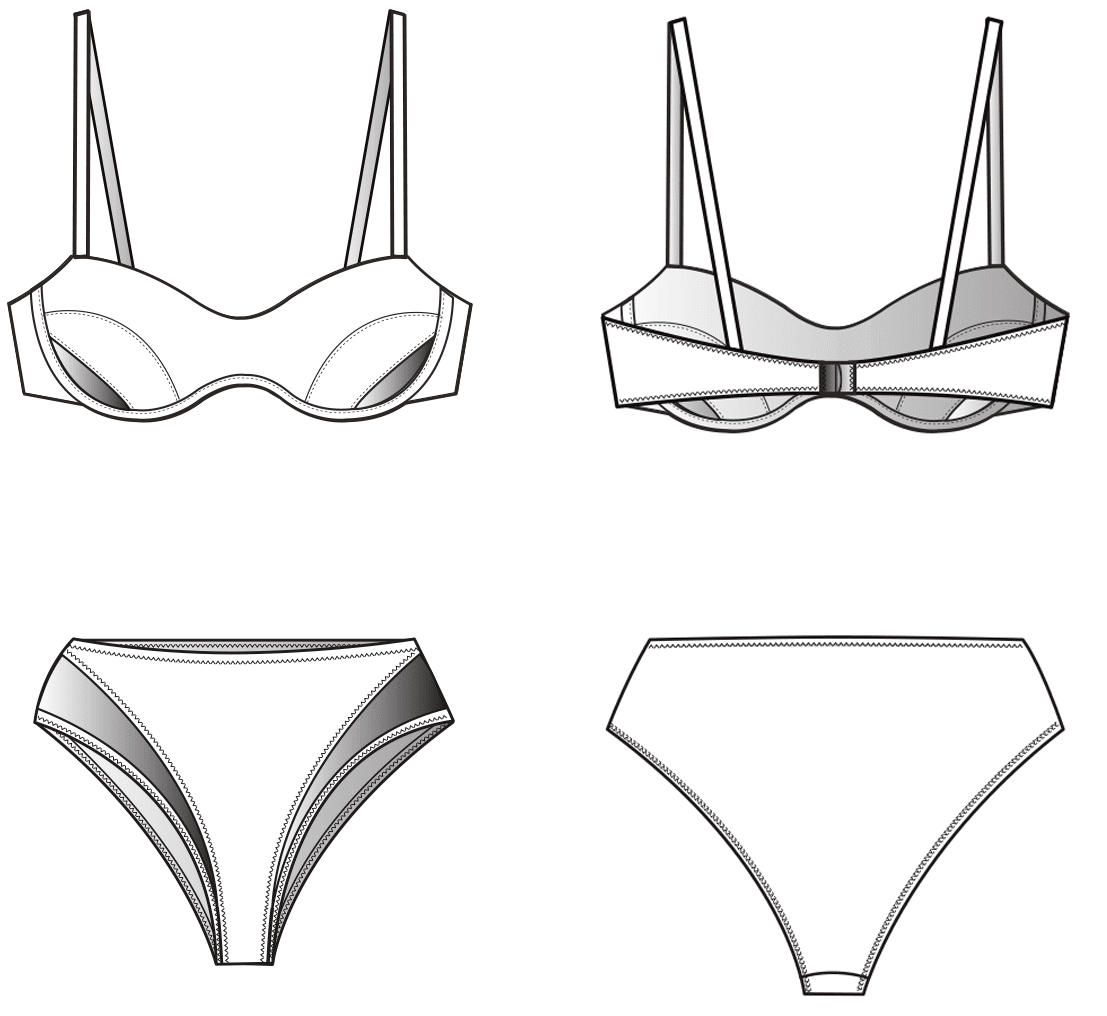 (Photo Credit: Technische Zeichnung C. Sievers)
Finished Pattern Pieces
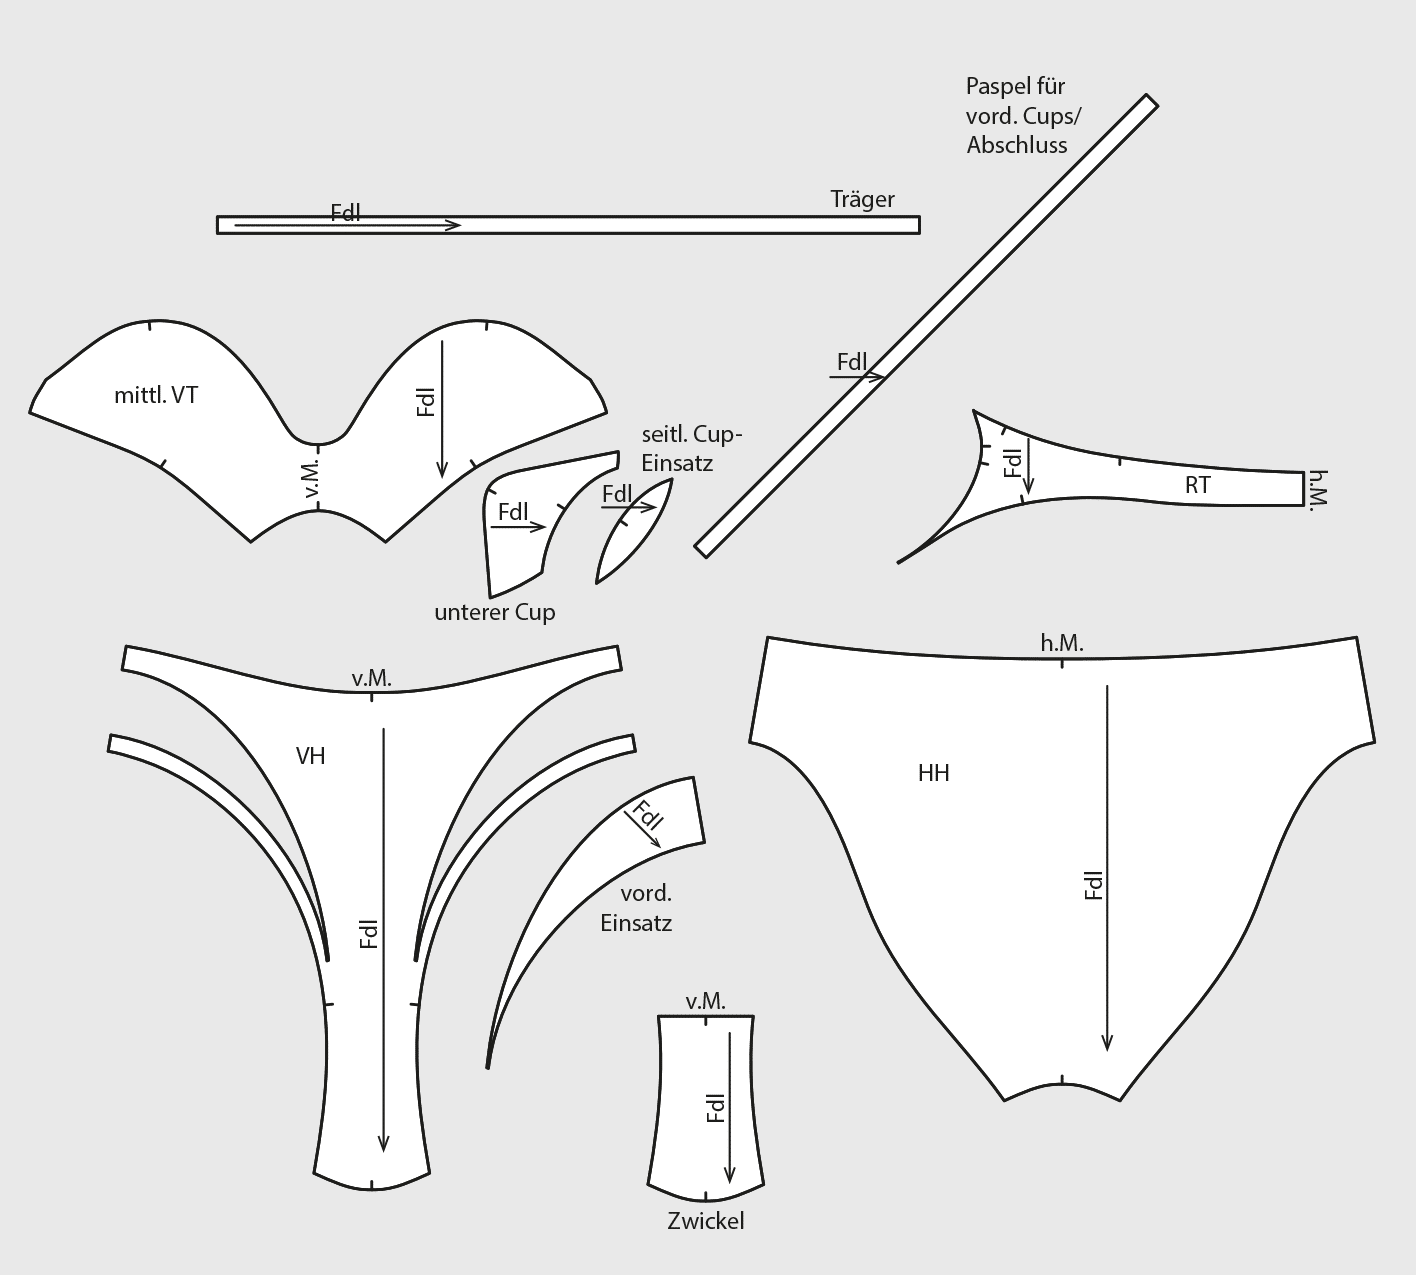


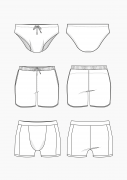
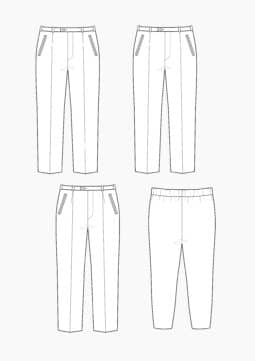
I want to buy
Dear Katy, you can order the issue (Rundschau für Internationale Damenmode 6/2017) with an english translation of the pattern making part through our customer service: kundenservice@ebnermedia.de
How can I get more information on the construction of bikinis please
You can buy the e-dossier Pattern Making for Bikini and order an englisch translation thru our customer service:
https://www.muellerundsohn.com/shop/schnitt-technik-bikinis/
Could you please provide the meaning of the symbols and abbreviations? For example what does this mean ./. Thank you!
Hello Sophia, the symbol ./. means minus.
How can I buy this in English?
Hello Paulina, so far the pattern making instruction for the bikinis are only available in German. The instruction for swimsuits are already available in English. But we are working on it to offer all instructions in English as well.
Pattern Construction Swimsuits (English) https://www.muellerundsohn.com/en/shop/pattern-making-swimsuits/
Pattern Construction Bikinis (German) https://www.muellerundsohn.com/shop/schnitt-technik-bikinis/
Pattern Sheet Swimwear (German) https://www.muellerundsohn.com/shop/schnittmuster-bademode/