10 Machine Seams
Deutsch
 (Photo Credit: © CATWALKPIX.COM)
Techniques for connecting seams, serging seams and decorative seams
Techniques for connecting, serging and decorative seams that not only create connection but also give a garment that certain something. Seams that certainly every fashion maker has seen before and most likely also sewn with the sewing machine. The most common variants in the atelier life are: Top stitch, Stay stitch and Hem stitch. The article shows a practical overview for teachers and students with 10 different seams that can be sewn with the sewing machine, where they are used and what else needs to be considered.
A contribution from Rundschau für Internationale Damenmode 03.2019
Facing seam

Seam type: Serging seam
Usage: The facing is used for neat finishing of fabric edges, for example on pocket openings, necklines and armhole cut-outs, hems or any pockets.
Seam allowance: Depending on the garment, 1 – 2 cm.
Processing: Stitch the reverse on reverse fabric side together, 1 cm from the raw edge. Press the entire seam allowance towards the side of the fabric that will later be inside. Stitch the fabric back from the right side on the seam allowance through all layers 1 – 2 mm away from the seam. Close the fabric wrong sides together and iron the edge of the fabric so that the seam is on the inside and the edge is in the fold.
Plain lockstitch seam

Seam type: Connecting seam, decorative seam
Usage: The plain lockstitch seam is the most common seam to connect two pieces of fabric together. It can be found on just about any type of garment.
Seam allowance: Depending on the garment 1 – 2 cm.
Processing: Serge the raw edges of the fabric. Topstitch the fabric pieces right sides together at a distance of 1 cm from the raw edge. Then iron apart smoothly.
Double stitched seam
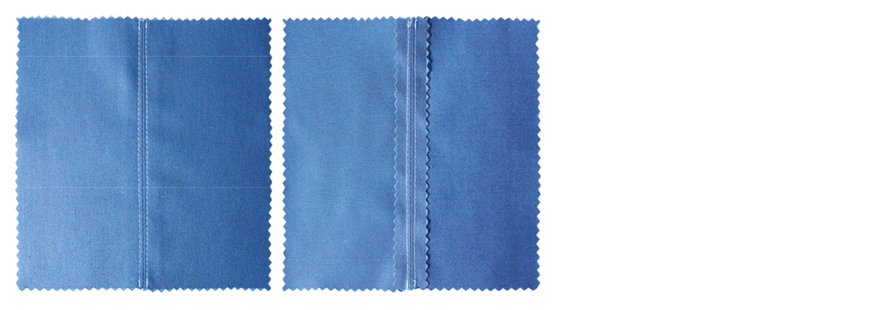
Seam type: Connecting seam, decorative seam
Usage: This double-stitched seam often appears as a decoration on caps, pants, shirts or jackets. It also gives the seam stability.
Seam allowance: Depending on the garment 1 – 2 cm.
Processing: Serge the edges of the fabric. Topstitch the fabric pieces right sides together at a distance of 1 cm from the cut edge. Then iron apart smoothly. Topstitch from the right at the required distance of 1 – 2 mm from the sewn seam. Iron dry well so that no waves appear.
Flat felled seams
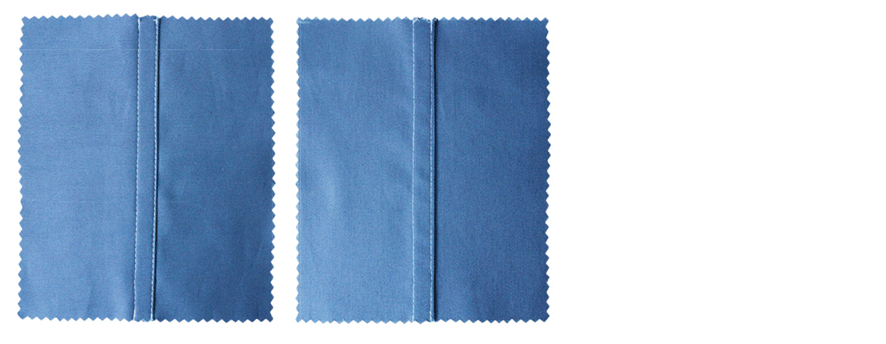
Seam type: Connecting seam, decorative seam
Usage: The true flat felled seam is a very robust seam. It is mainly found on jeans, jackets or sportswear.
Seam allowance: 1 cm
Processing: Iron one seam allowance of the fabric edges to the reverse side, the other to the right side by 1 cm. Join both pieces of fabric at the edge so that the seam allowances interlock and the fabric edges are no longer visible. Topstitch on the seam allowance from the right or left narrow edge to the folded edge.
French seam
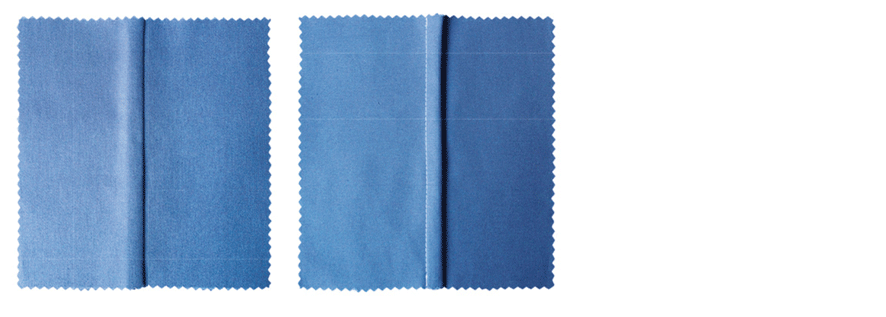
Seam type: Connecting seam, serging seam
Usage: The french seam is good for unlined garments or bags. It makes the open edge of the fabric disappear and is therefore a very neat serging seam.
Seam allowance: Depending on the garment 1,5 – 2 cm.
Processing: Topstitch the fabric pieces reverse sides together at a distance of half the later visible “seam allowance” from the raw edge, in this case 0.5 cm apart. Press the seam smooth and join the fabric right sides together so that the seam lies along the edge. Then topstitch at double the distance, here 1 cm from the seam edge. Press the seam smooth.
.
False flat felled seams
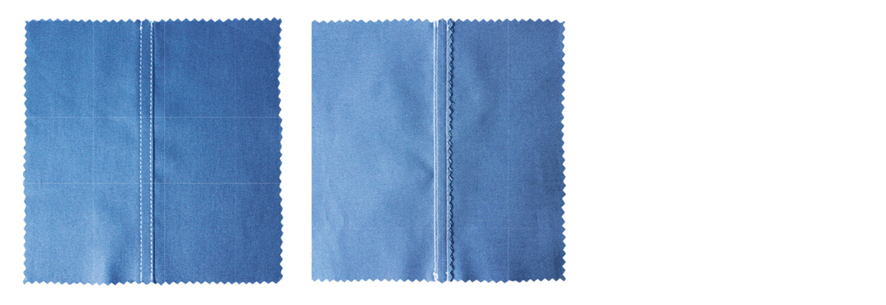
Seam type: Connecting seam, decorative seam
Usage: The false flat felled seam is a very robust seam, just like the real one. It differs in the processing.
Seam allowance: 1 – 1,5 cm
Processing: Stitch the fabric right sides together, depending on the allowance, here 1.5 cm from the edge of the fabric and then serge together. Press the seam allowance in the required direction. Topstitch the seam allowance from the right or left side at the required distance from each other.
Hem seam
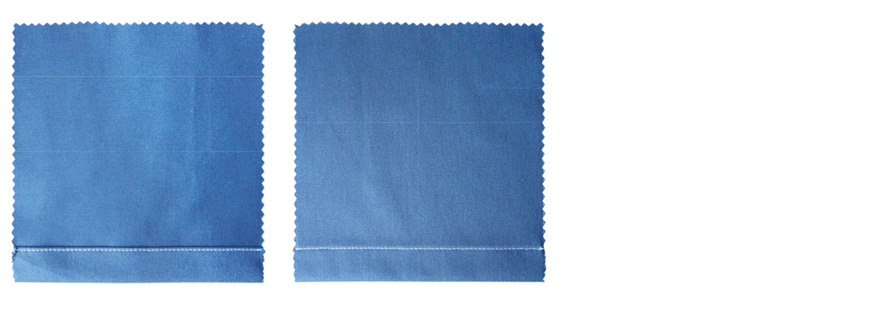
Seam type: Serging seam
Usage: The hem seam is a popular variant for finishing sleeves and hems, for example on dresses, skirts, pants or shirts. But this type of seam is also suitable for home textiles such as tablecloths.
Nahtzugabe: Depending on the garment 1,5 – 6 cm or more.
Processing: Iron the fabric at the finished hem line to the wrong side in fold. Turn the seam allowance in to the inner folded edge and topstitch the hem on the seam allowance with narrow edges.
Piping seam
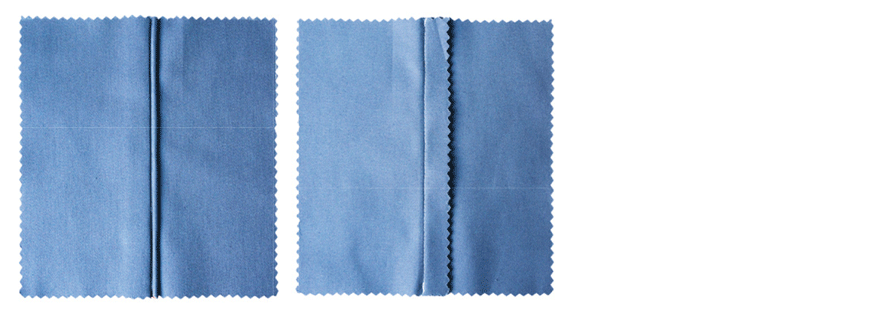
Seam type: Connecting seam, decorative seam
Usage: The piping seam is a decorative and connecting seam in one, the focus is on the decoration. It can be seen on sleeve and hem edges or on dividing seams. Likewise, the piping seam is often used on home textiles such as comforter covers and pillows or on accessories such as caps.
Seam allowance: Depending on the strength of the piping, 3 – 4 cm or more.
Processing: Cut a bias strip that includes the circumference of the cord and the seam allowance. Close the bias strip tightly around the cord with the wrong side of the fabric and baste in place. Neaten the edges of the fabric. Join the piping created here between two pieces of fabric, right sides together, so that all the seam allowances lie edge to edge. Using a narrow sewing mashine foot, close-edge stitch all the fabric layers together along the piping. Press the seam allowances either in one direction or apart.
Gathered ruffle seam
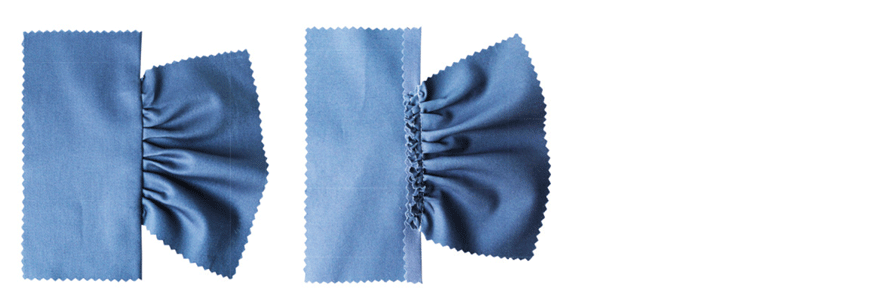
Seam type: Connecting seam, decorative seam
Usage: The gathered seam is a decorative and connecting seam in one, the focus is on the decoration. You can see this seam on skirts, pants, blouses, dresses, lingerie or accessories.
Seam allowance: Depending on the garment 1 – 2 cm.
Processing: Serge the edges of the fabric. Topstitch with a large stitch length along the the edge of the fabric piece, width as the sewing machine foot, and let the left over thread hang long. For the desired ruffles, pull one thread at a time and the fabric will ruffle. Then place the ruffled fabric right sides together on the other fabric piece and topstitch both fabrics together at a distance of (here) 1 cm from the edge. Remove the basting thread and iron the seam.
Tucked seam
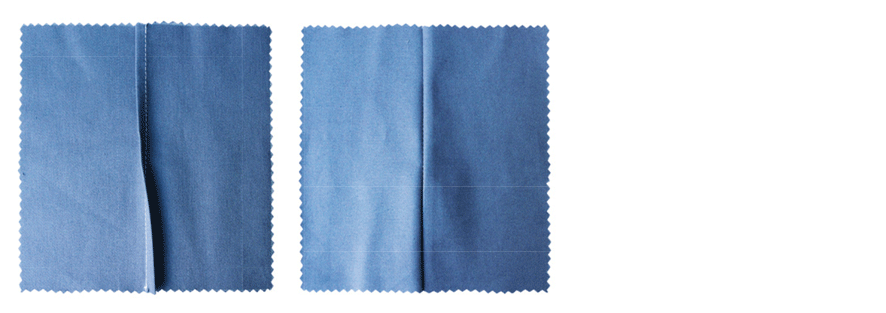
Seam type: Decorative seam
Usage: The pintuck seam is solely a decorative seam. This seam is often seen on blouses, dresses, skirts or accessories such as hats or gloves.
Seam allowance: Depending on the required tuck width 0,75 – 2 cm.
Processing: Place the fabric in the desired position reverse sides together or lightly iron in fold. Topstitch the fabric at the required distance from the folded edge, in this case 0.5 cm. Iron the pin tuck in the chosen direction.


