Basic BIock – Dress Pattern
Deutsch
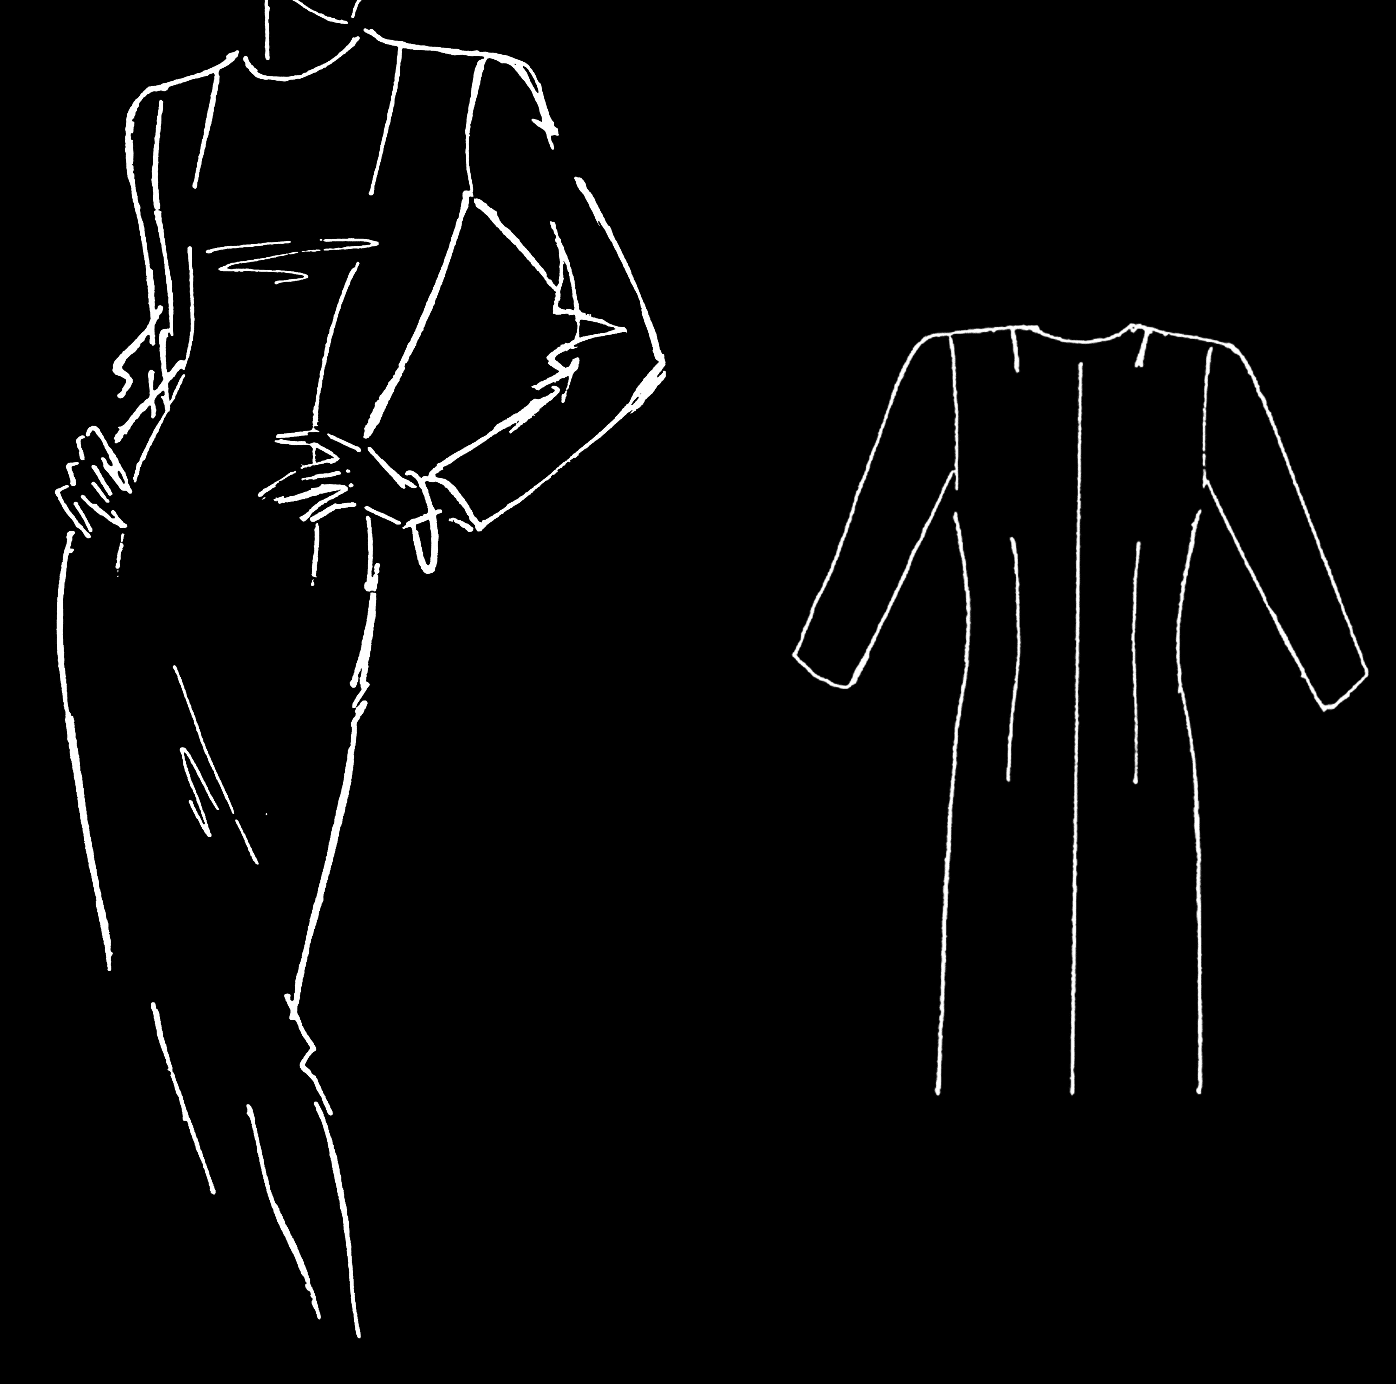
Design pattens for the apparel industry or for tailoring studios are always developed from basic blocks. The basic block is the foundation for the design and includes the necessary allowances for movement and comfort (wearing ease) but not the fashionable details yet This chapter shows several basic blocks. Various forms of basic pattern constructions for dresses and blouses can be found in the book Metric Patternmaking for Dresses & Blouses. In the following article, we will show a sample of the construction of a basic dress block, the construction of the pattern for a basic dress. With this tutorial you can create a custom pattern for a dress or with the help of the Measurement Charts a ready-made pattern. You can find instructions on how to take measurements of the body for a bespoke dress in the article Taking Measurements. Later on, you can use this pattern to create a variety of dress shapes.
Basic Dress Block
The development of the first basic dress block is shown in several steps. We use a measurement chart with body measurements taken at the client as weil as calculated measurements. The calculation formulas can be found on page 17. You can identify a measurement chart based on body measurements at the measurements of the bust depth 1 and the front length 1, which can be only taken directly at the body. Keep the same order of the measurements in all your calculations. Always verify the measurements and the included ease as shown here since consistency makes pattern drafting so much easier.
Pattern Construction
The basic dress patten starts with a long vertical baseline on which all of the measured or calculated lengths are measured from the nape of the neck downward. Mark the start point as N (= nape of the neck) and later as number 1.
Place the tape measure on point N (point 1) and measure 1-2 Scye depth plus ease = 21 cm 1–3 Back width length = 41 cm 1-4 Hip depth = 60.7 cm 1-5 Finished length The tape measure remains at point 1, until all back measurements are noted. Square out to the left and draw perpendicular lines from all points to the left.
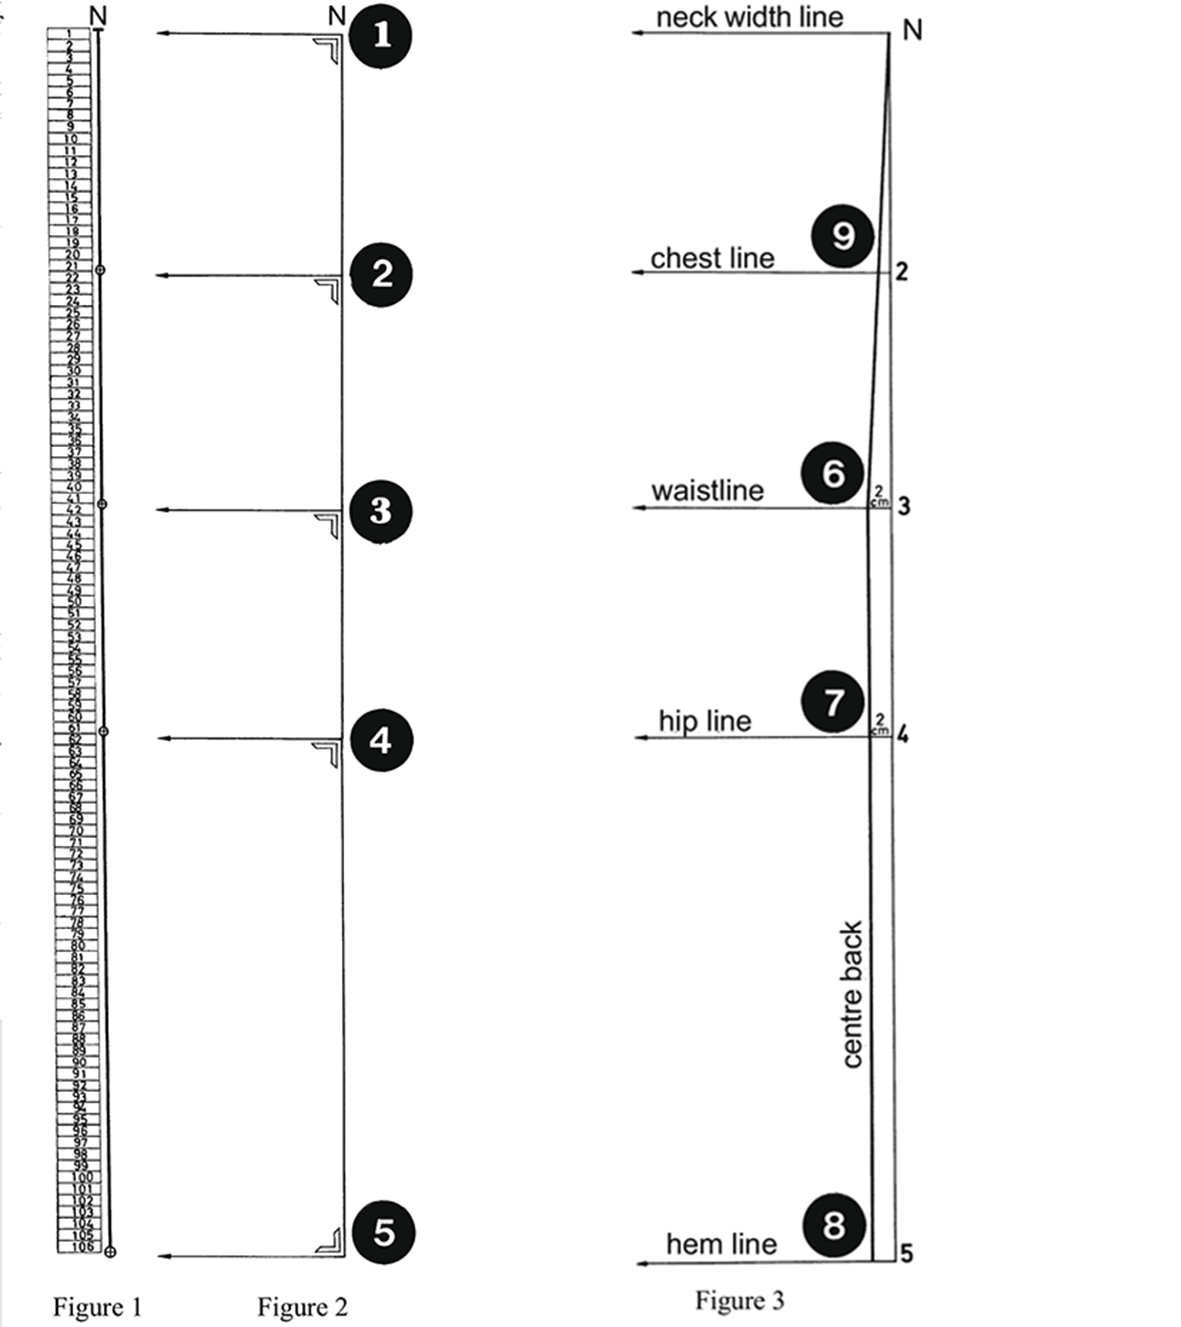
From the centre back, measure 2 cm on the waist and hip line to the left = 3-6 and 4-7. Draw the centre back from point 6 over point 7 to point 8 (also 2 cm away from point 5). For the upper part of the centre back, connect point 6 and point 1 with a straight line and mark point 9 at the intersection with the ehest line (taper the patten at the hip only for cutting the centre back on the fabric fold). This amount might vary for certain figure proportions (see chapter X, “Difficult figures’).
General explanation of the drawings
The points necessary for the description of the section are marked with large numbers and the measurements are represented by corresponding indications in cm. Auxiliary lines are thin or dotted and seam layers are thickly drawn. Double dotted lines and thick seam layers.

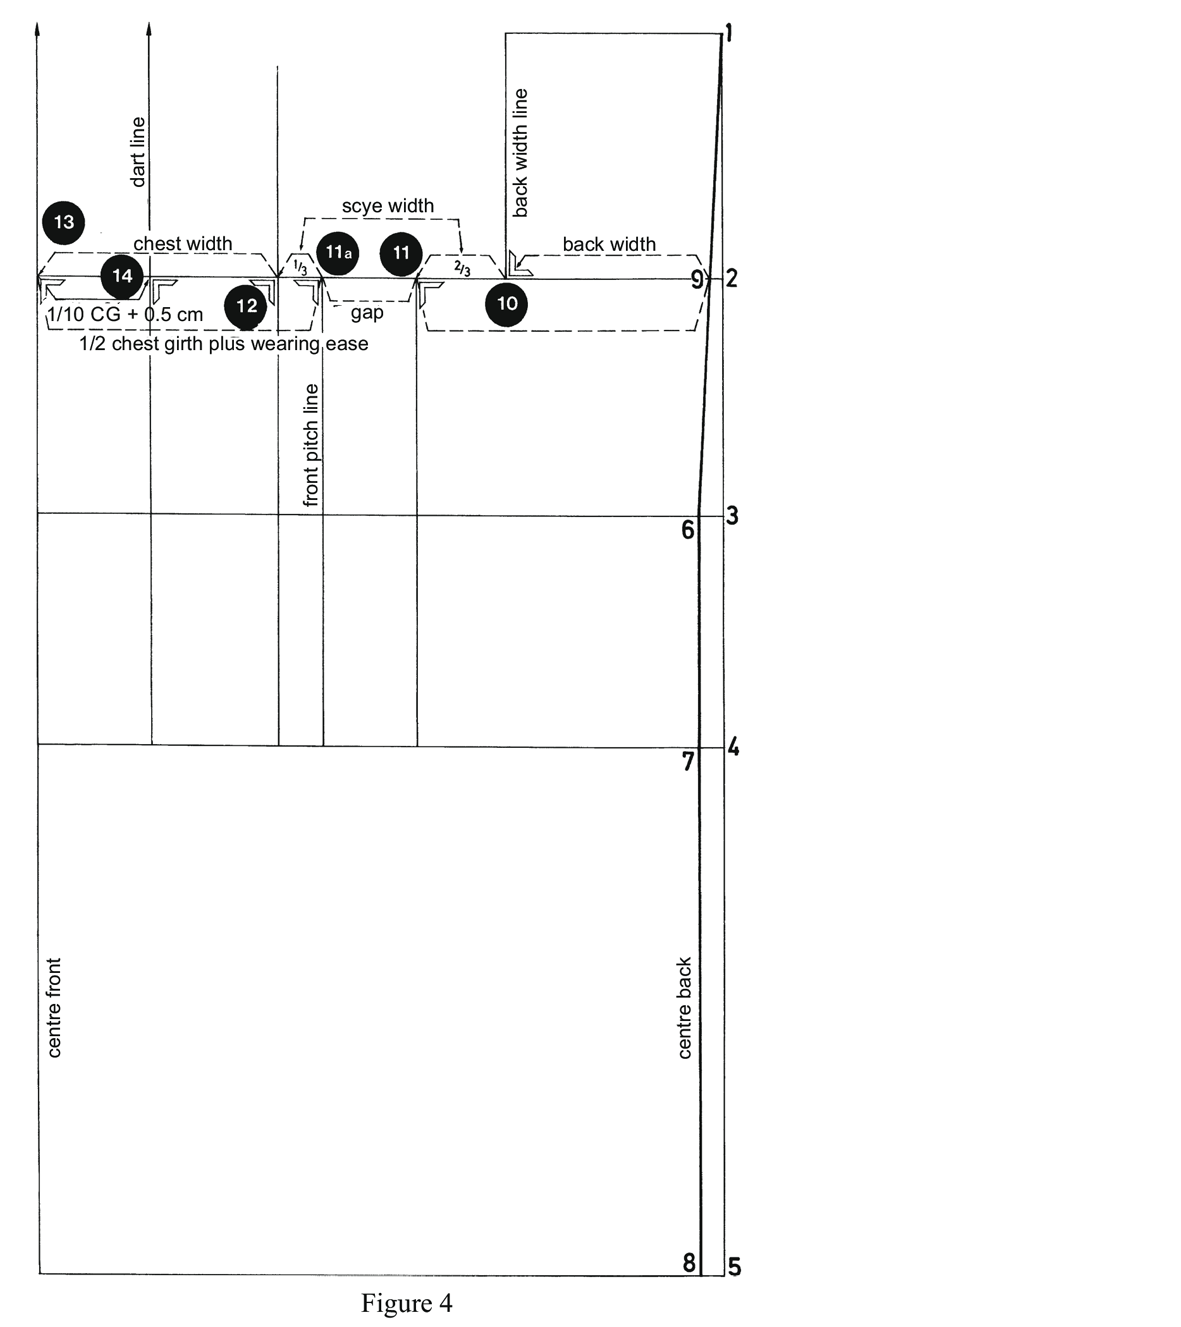
9-10 Backwidthplus ease= 17.5 cm. Leave a gap between the back and front pattern for separating the pattern pieces at the side seam without overlapping lines. Therefore divide the scye widlh plus ease in one third and two lhirds. The total scye width plus ease = 11 .5 cm. 213 ofthe scye width = 7.7 cm 1/3 ofthc scye width = 3.8 cm. 10–11 Measure 213 of the scye width for the back pattem = 7.7 cm 11–12 Mcasure 6 – 10 cm for the gap betwccn the front and back pattern.
You will find many more pattern instructions and patterns for sewing dresses in our online shop.


