Tracksuit pattern construction
Deutsch
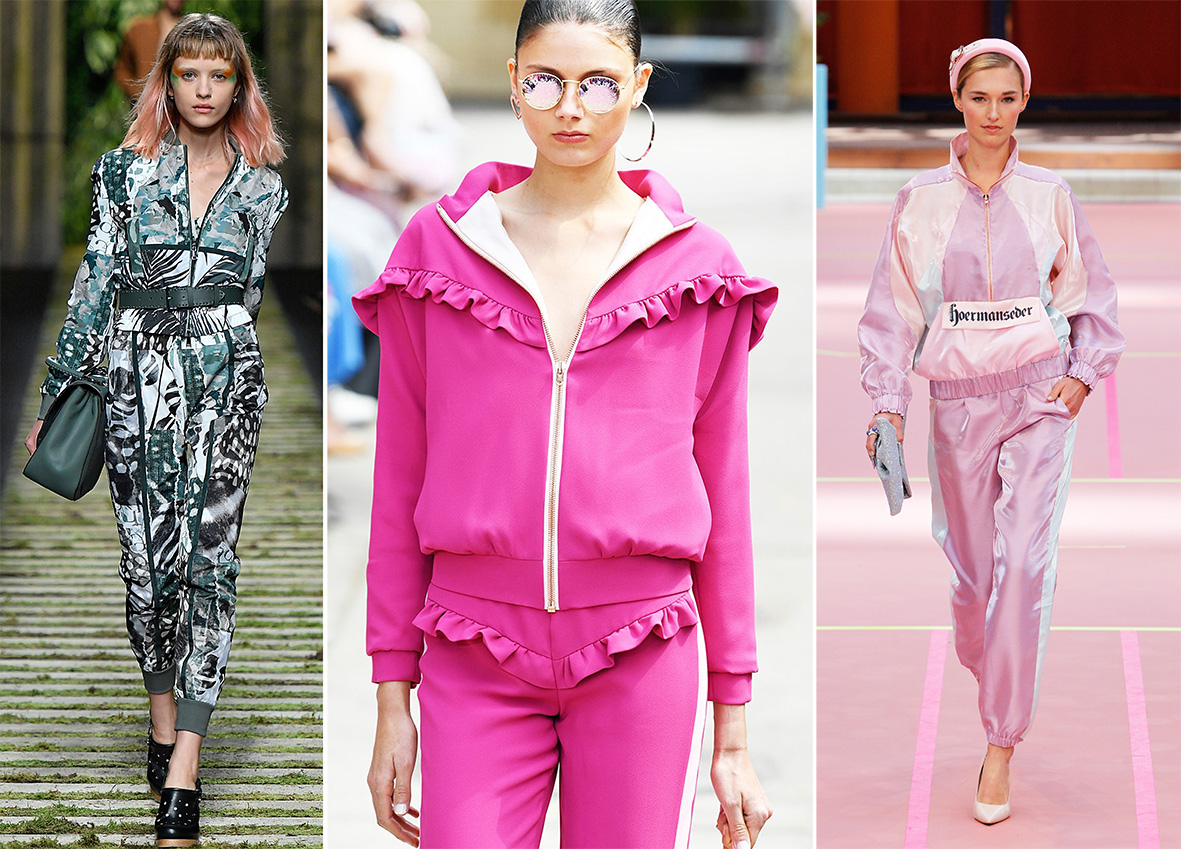
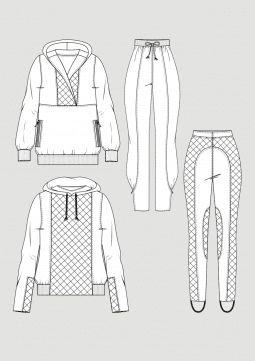
Sportswear meets couture. Athleisure Wear is the key word here. The word Athleisure Wear describes the fashion trend in which sportswear is worn in everyday life outside the gym. Functional sportswear is no longer only intended for training, it can also be worn in everyday life. The casual jogging suits can now also be worn for shopping, as a business outfit or in a party look. Functionality and comfort are combined in this current fashion trend. Fitness, jogging, yoga and hiking are the designers’ sources of inspiration.
This article is an excerpt from the Schnitt-Technik der Damen-Rundschau 4.2017. All instructions for the pattern constructions according to the M.Müller and Sohn system of the models shown can be found in this issue in our online shop. Please contact our customer service for en english translation > kundenservice@ebnermedia.de . If you want to start sewing a tracksuit right away, you can also order a finished sewing pattern.
Content
- Sporty Jacket with Quilted Yoke and Elastic Waist
- Basic Jeggings Block
- Jeggings with Quilted Knee Patches
- Jacket with Shawl Collar and Rib Knit Cuffs
- Sweat Pants
Sporty Jacket with Quilted Yoke and Elastic Waist
Template: Basic Jacket Block
Draw the basic block according to the measurement chart and the wearing ease included.
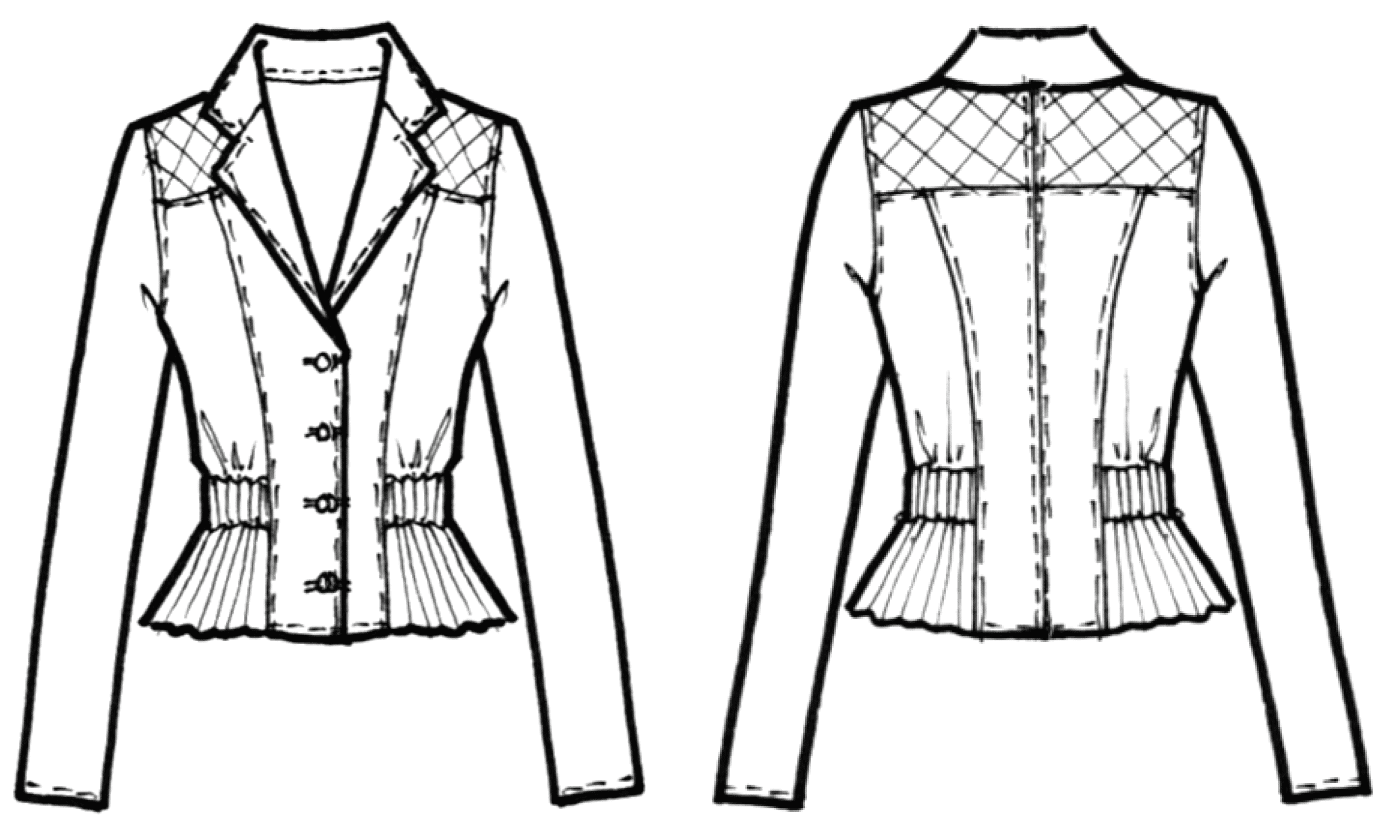 (Photo Credit: Technical drawing A. Wenzel)
Front and Back Pattern
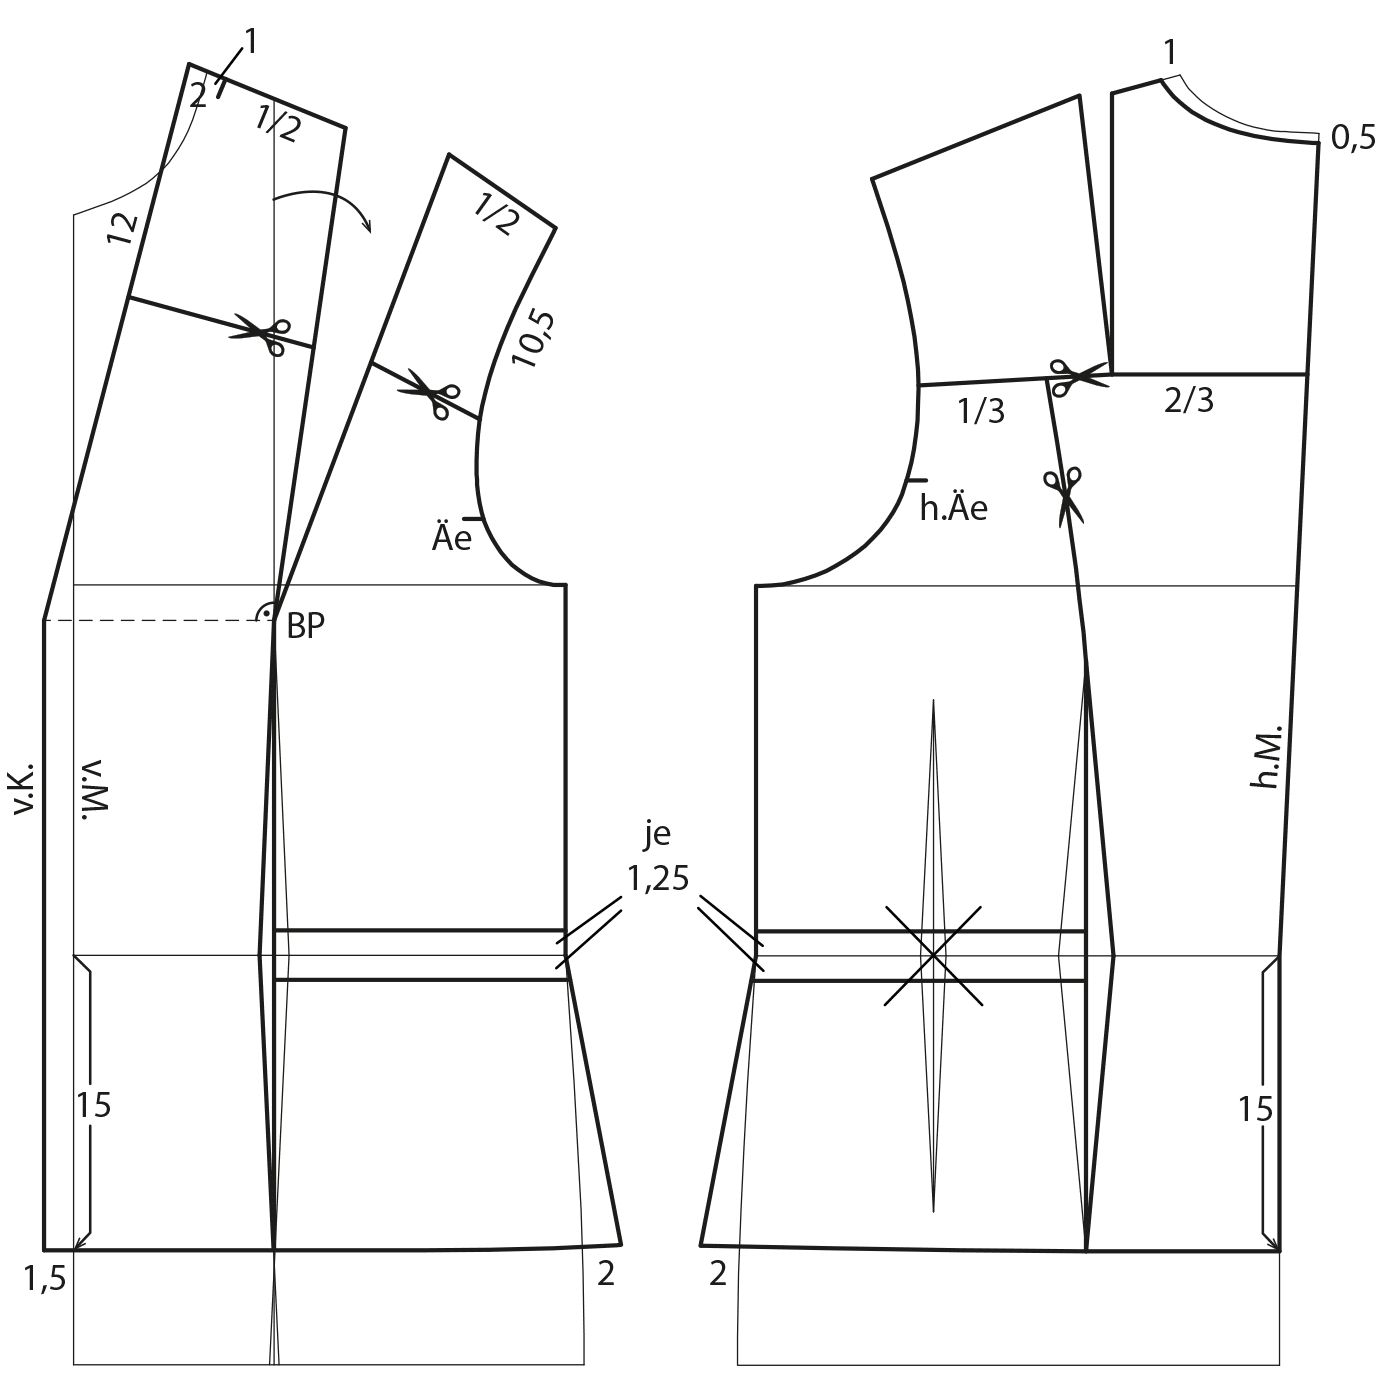
Mark the length 15 cm below the waistline. Extend the hem 2 cm at the sideseam. Mark the waistband as shown in the illustration. Cross out the side back dart. Add 1.5 cm overlap parallel to the centre front. Lower the neckline 1 cm at the shoulder and 0.5 cm at the centre back. Draw the new back neckline. Draw the back yoke line over the shoulder dart endpoint. Draw the back panel seam from the waist dart to one third of the yoke line. Relocate the bust dart to one half of the finished shoulder seam. Measure 2 cm from the lowered neck point to the left and draw the lapel break line as shown in the illustration. Measure 10.5 cm along the front armhole and 12 cm along the lapel break for the front yoke line. Close the bust dart temporarily and draw the front yoke.
Finished Pattern Pieces
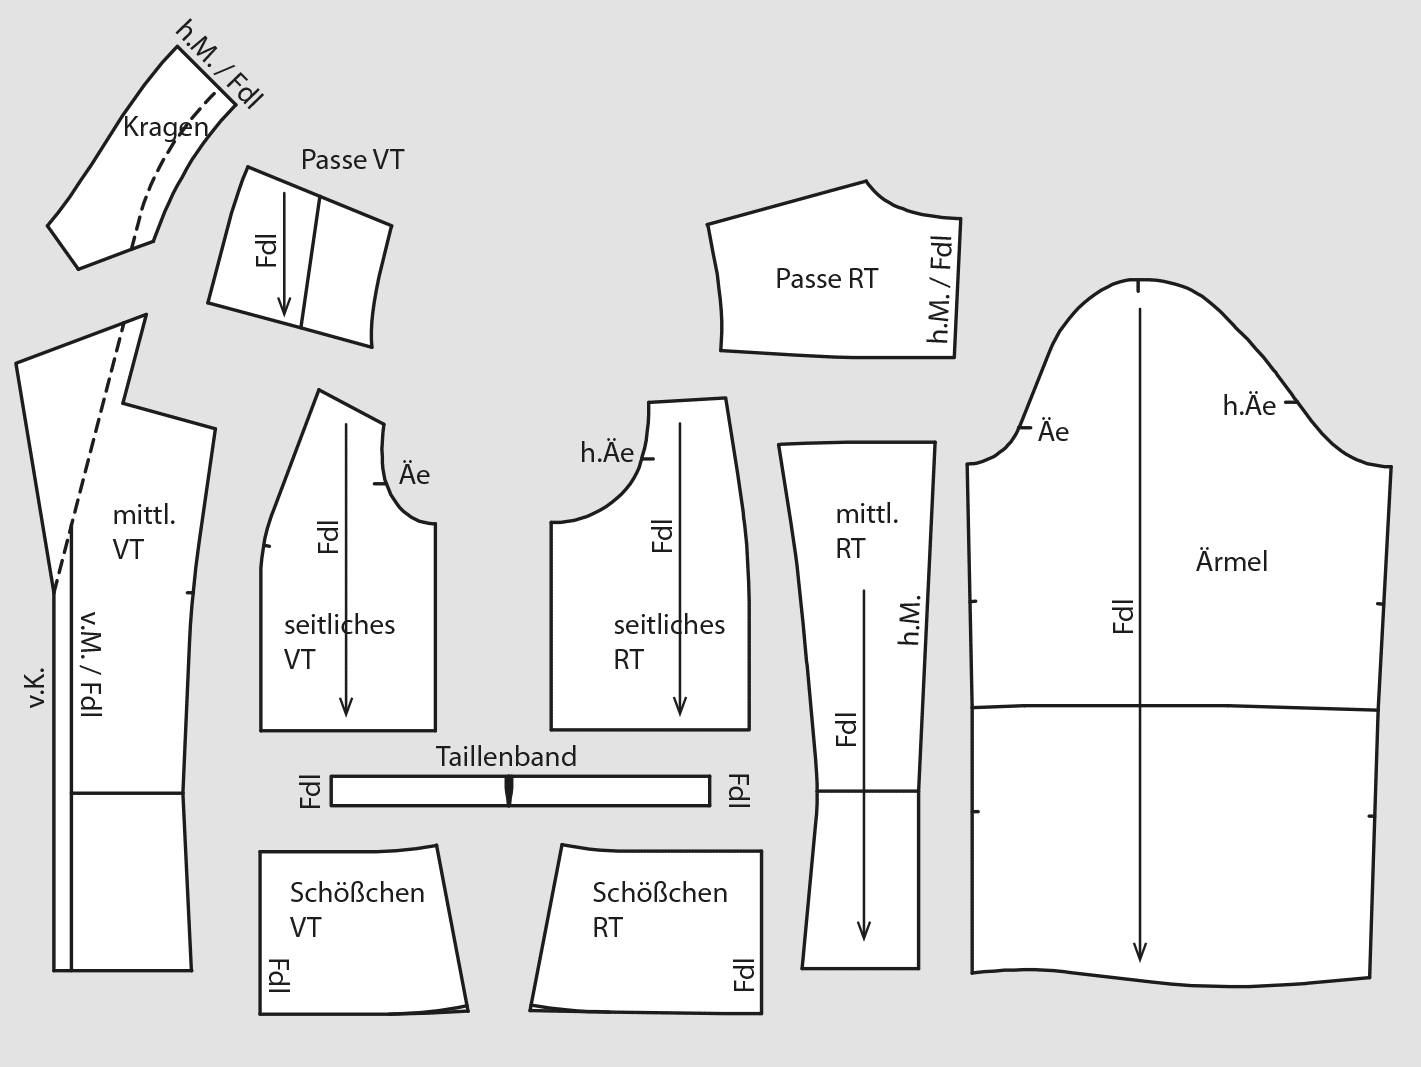
Copy all pattern pieces. Close the darts on the yoke pieces. Check all seam transitions and blend the seamlines if necessary. Draw the sideseam straight at the waistband and join the waistband pieces together. Mark the grainline.

Basic Jeggings Block
Use a two-way stretch (crosswise) for the following pattern. The stretch percentage is 10%.
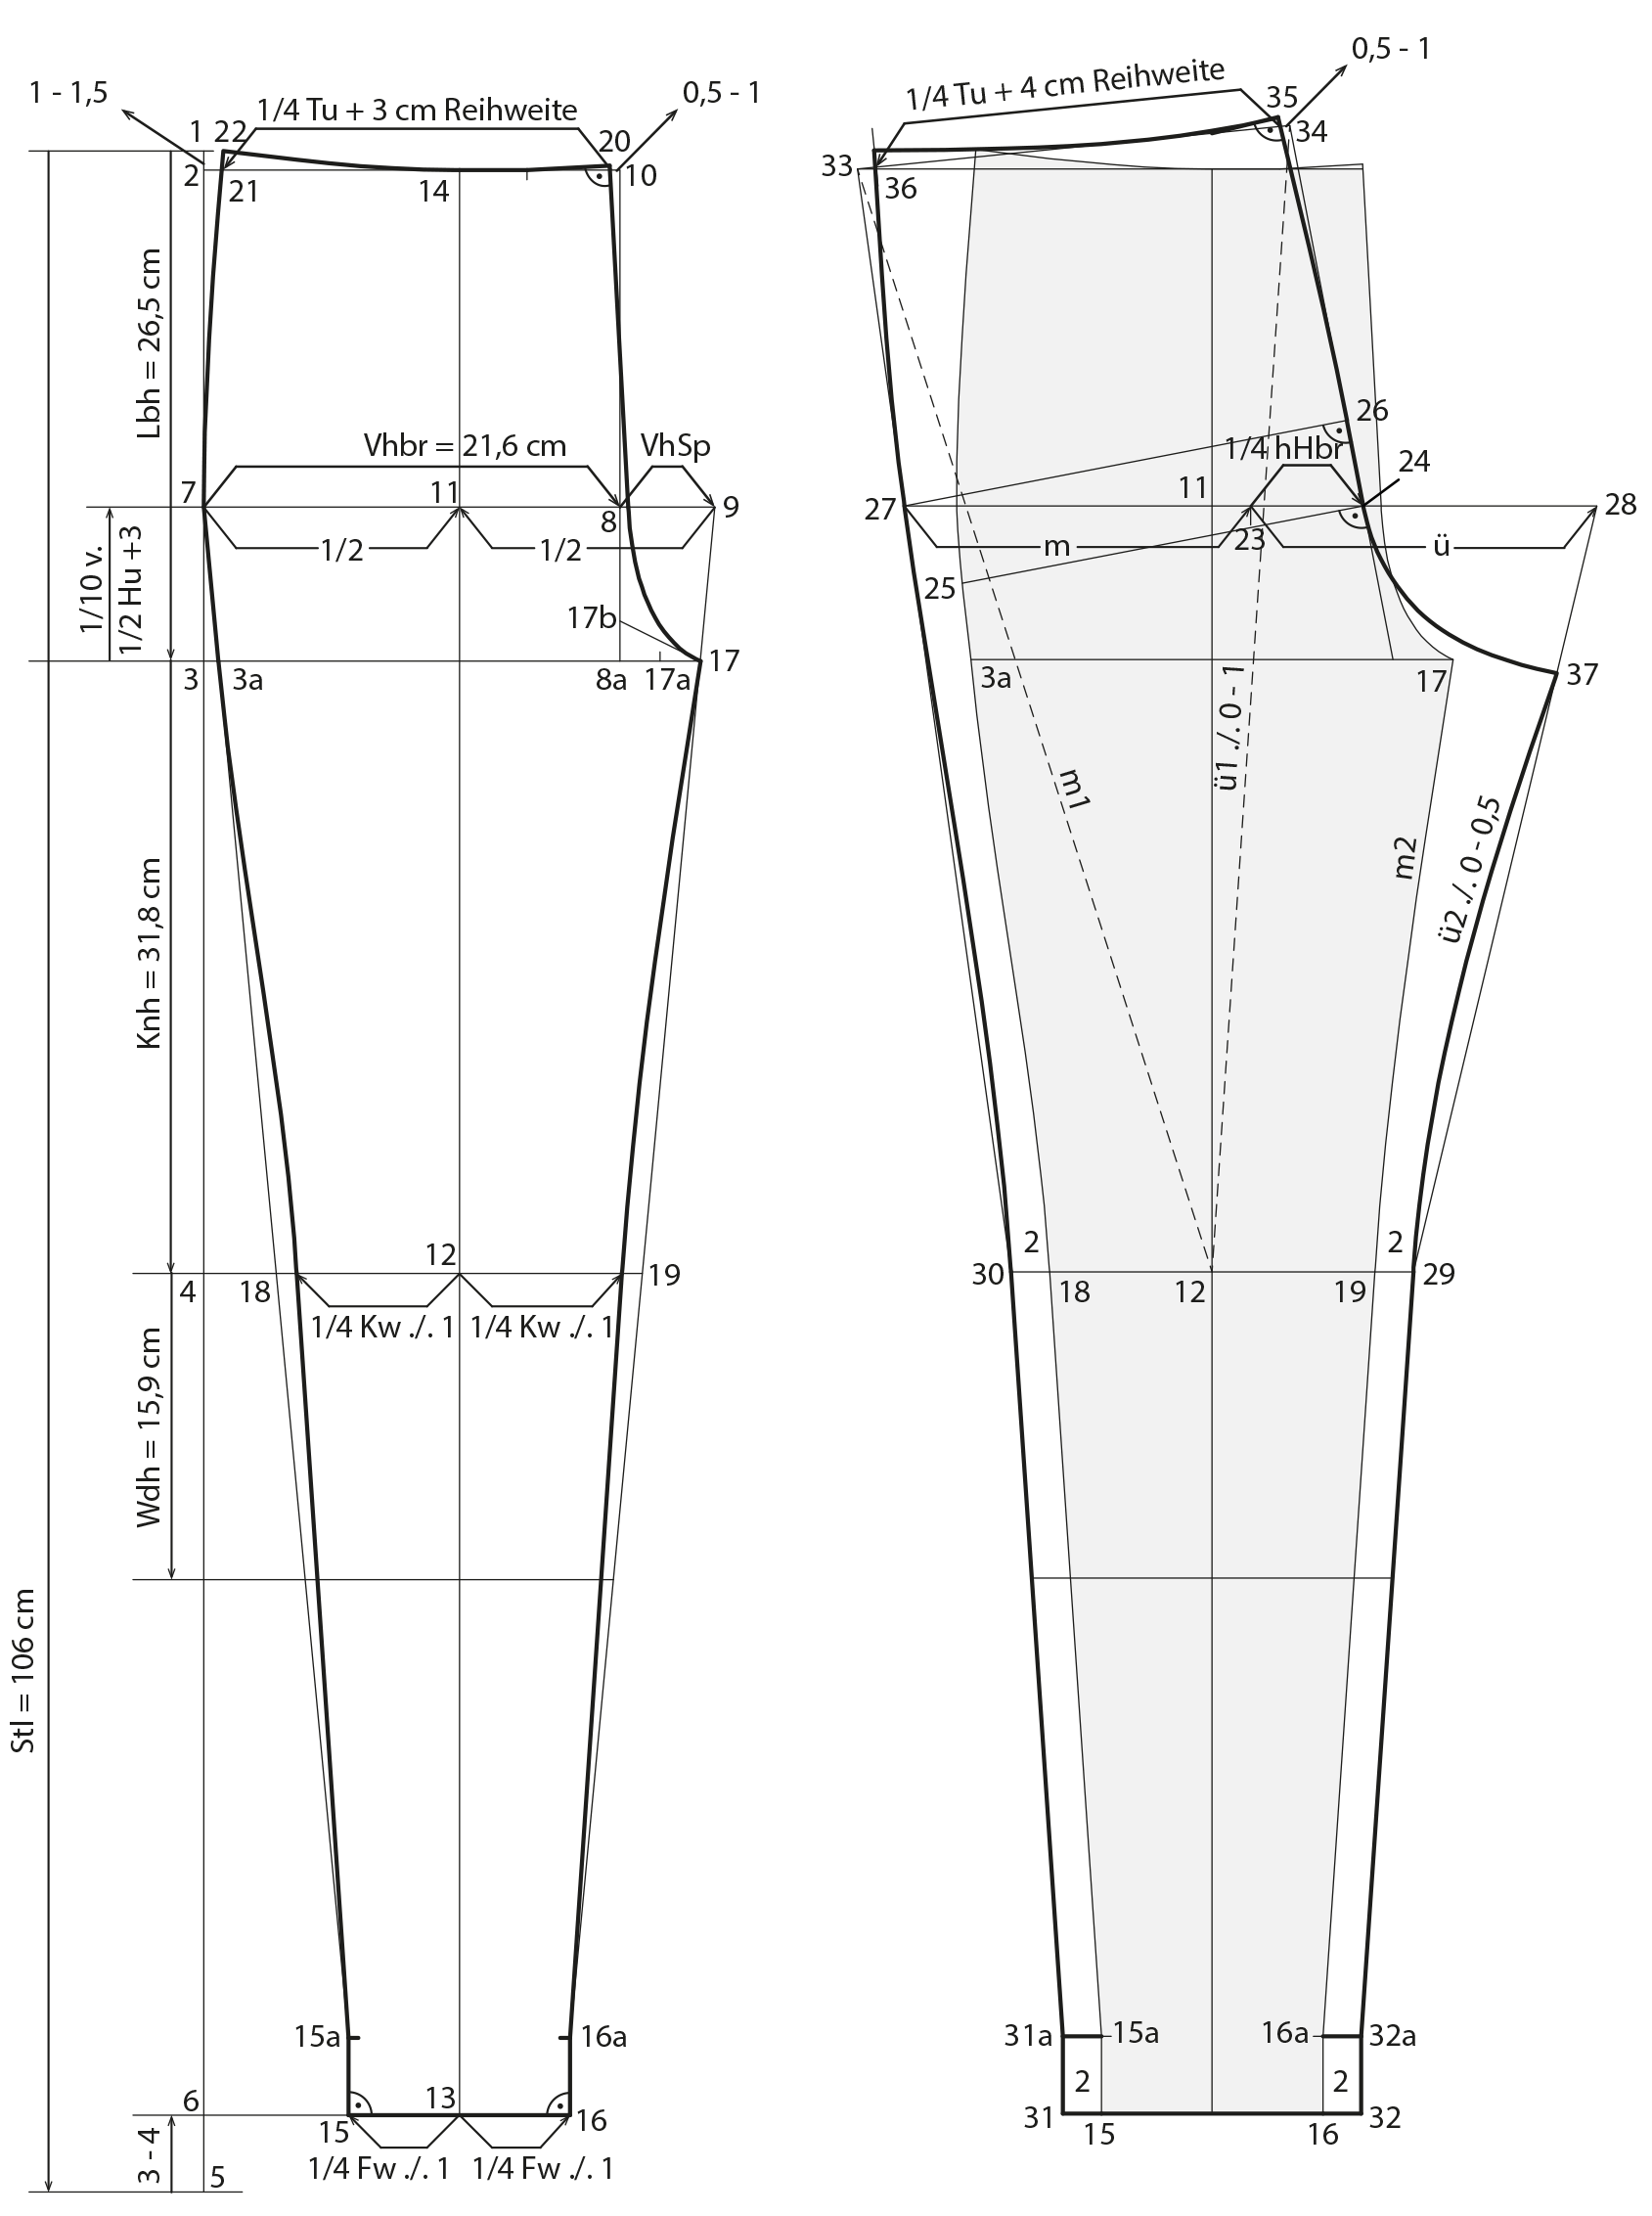
Front Pattern
On a vertical line, measure the following downward:
1 – 2 1 – 1.5 cm depending on the hip curve.
1 – 3 Body rise (here 26.5 cm).
3 – 4 Knee height (here 31.8 cm). Measure the calf height from point 4 downwards as a control point for the finished width later.
1 – 5 Sideseam length (here 106 cm).
5 – 6 Shorten the hem.
3 – 7 1/10 of 1/2 hip girth + 3 cm (here 8 cm). Use the original hip size (100 cm) for this length measurement.
Square out to the right from points 2, 7, 3, 4 und 6.
6 – 8 Front trouser width (here 21.6 cm).
8 – 9 Front crotch width: 1/10 of 1/2 of the hip girth + 0 – 0.5 cm. Use the 10% reduced hip measurement (90 cm) for this width measurement.
Square up and down from point 8 for point 8a and point 10.
Mark point 11 midway on 7 – 9.
Square up and down from point 11 for points 12, 13 and 14.
Measure 1/4 hem width minus 1 cm from point 13 to the left and right. Mark points 15 and 16.
Sqaure up 4 cm from points 15 and 16. This results in points 15a and 16a.
Connect 7 – 15a and 9 – 16a with a straight line. Mark points 3a, 18, 17 and 19.
10 – 20 Taper the centre front 0.5 – 1 cm at the waist.
Measure 0.4 – 0.5 cm from point 8 to the right.
Mark point 17a midway on 8a – 17. Transfer the same distance from point 8a upwards and connect points 17b. 17 and 17b with a straight line. Draw the centre front and the front crotch seam from point 20 to the extension beside point 8 and further to point 17.
Measure 3 – 4 cm from point 14 to the right (depending on the waist girth) and draw a perpendicular line to the centre front.
20 – 21 1/4 waist girth + 3 cm for the elastic waistband.
21 – 22 Measure 1–1.5 cm upwards (same as 1–2).
Draw the waistline curve from 20 to 22.
Measure 1/4 knee width minus 1 cm from point 12 to the right and left. Mark points 18 and 19.
Draw the sideseam and the inseam straight to the hem and slightly curved to points 3a and 17.
22 – 7 Finish the sideseam.
Back Pattern
Back Pattern
Trace a copy of the front pattern and draw the back pattern on the copied front pattern.
11 – 23 Relocate the back creaseline 1 – 2 cm.
23 – 24 Measure 1/4 of the back trouser width (here 5.9 cm).
3a – 25 Measure 1 – 3 cm upwards for the slant of the centre back.
Connect point 25 and point 24 with a straight line and square up and down. Extend the waistline to the left and the hipline to the left and right.
26 – 27 Measure the back trouser width (here 23.4 cm) perpendicular to the centre back and touching the extended hipline. Measure the distance 27–23 and transfer this measurement from point 23 to the right. Mark point 28.
Below the knee line, draw the back sideseam and inseam 2 cm parallel to the front pattern and marl points 29, 30, 31, 31a, 32 and 32a.
Draw a line from point 30 to point 27. Extend this line upwards and mark point 33 at the intersection of this line and the extended waistline.
Connect point 29 and point 28 with a line.
Measure the distance 33 – 13 and transfer this length minus 0 – 1 cm from point 13 to the centre back. This results in point 34.
Connect point 34 and point 33 with a straight line.
34 – 35 Taper the centre back 0 – 0.5 cm and draw the upper part of the centre back shaped as shown in the illustration.
Extend the centre back slightly and draw a short perpendicular line from the waist to the centre back.
35 – 36 Measure 1/4 waist girth + 4 cm for the elastic waistband.
Square up from point 36 and transfer the length and shape of the front sideseam to the back.
Draw the waistline curve.
29 – 37 Transfer the length of the front inseam minus 0 – 0.5 cm.
37 – 24 Draw the back crotch curve.
Jeggings with Quilted Knee Patches
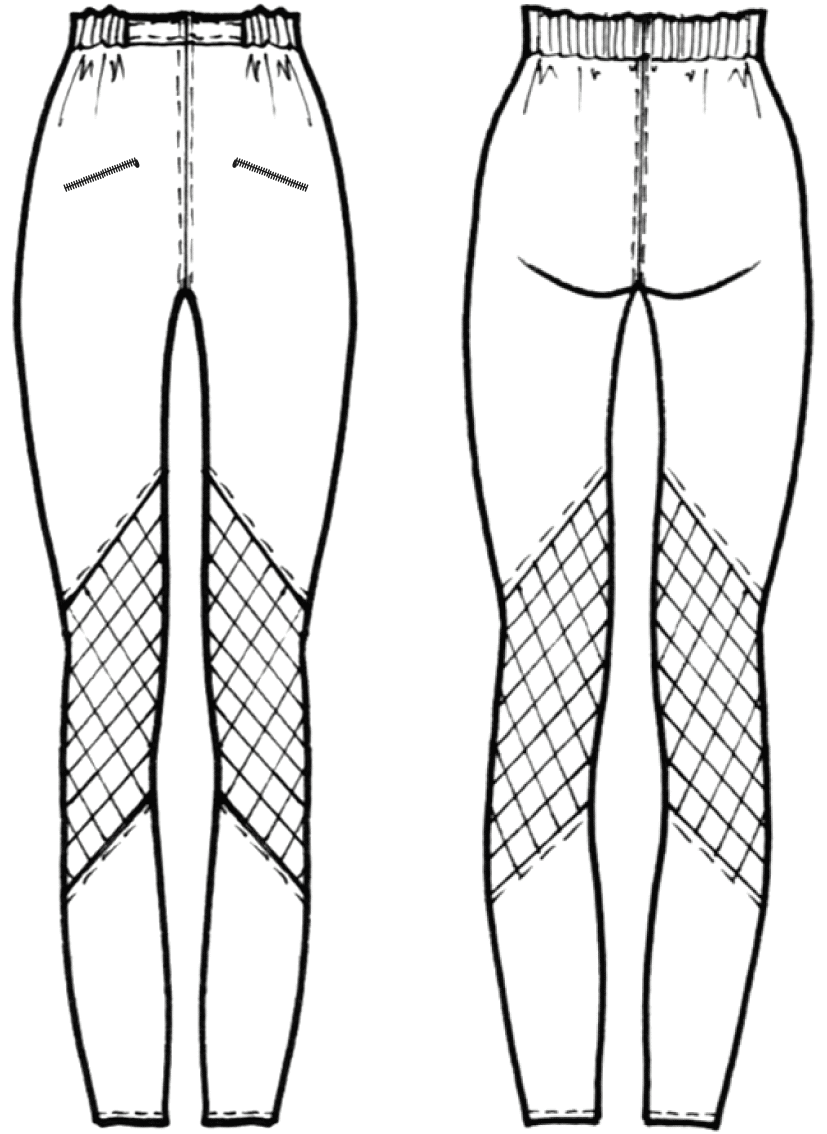 (Photo Credit: Technical drawing A. Wenzel)
Finished Pattern Pieces
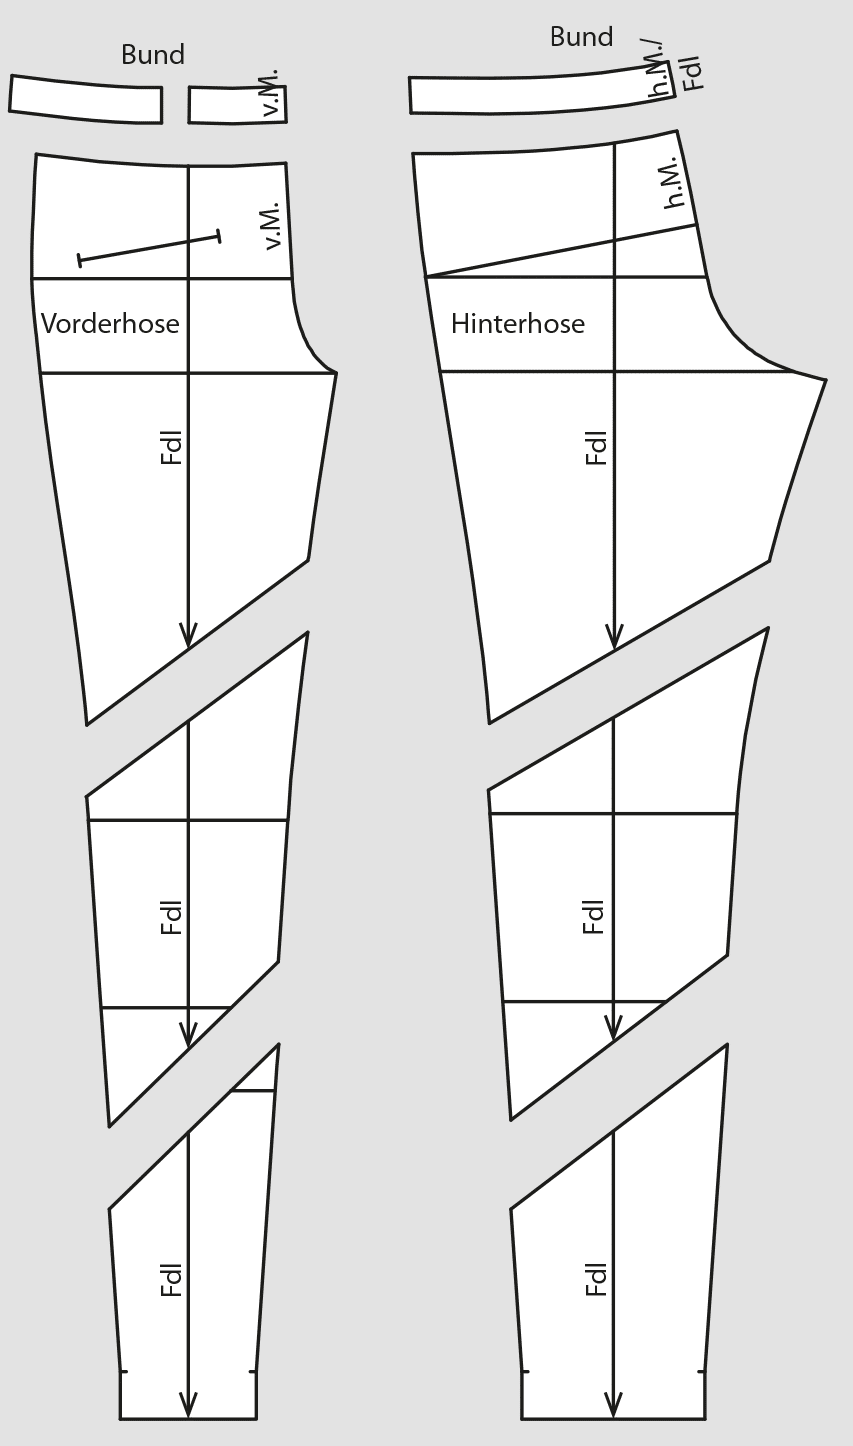
Copy all pattern pieces. Mark the grainline.
Jacket with Shawl Collar and Rib Knit Cuffs
Template: Loose-fitting Jacket Block without Darts. Draft the basic block according to the measurement chart.
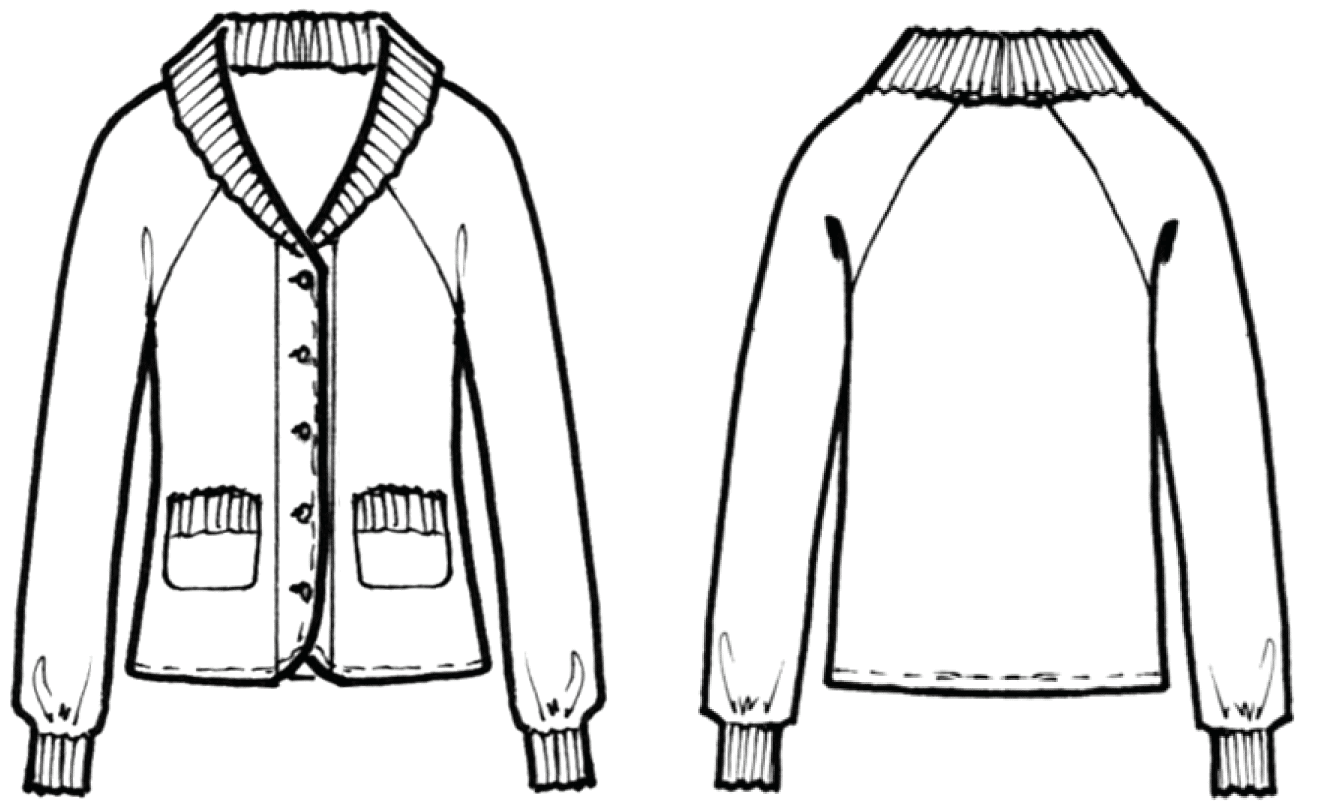 (Photo Credit: Technical drawing A. Wenzel)
Finished Pattern Pieces
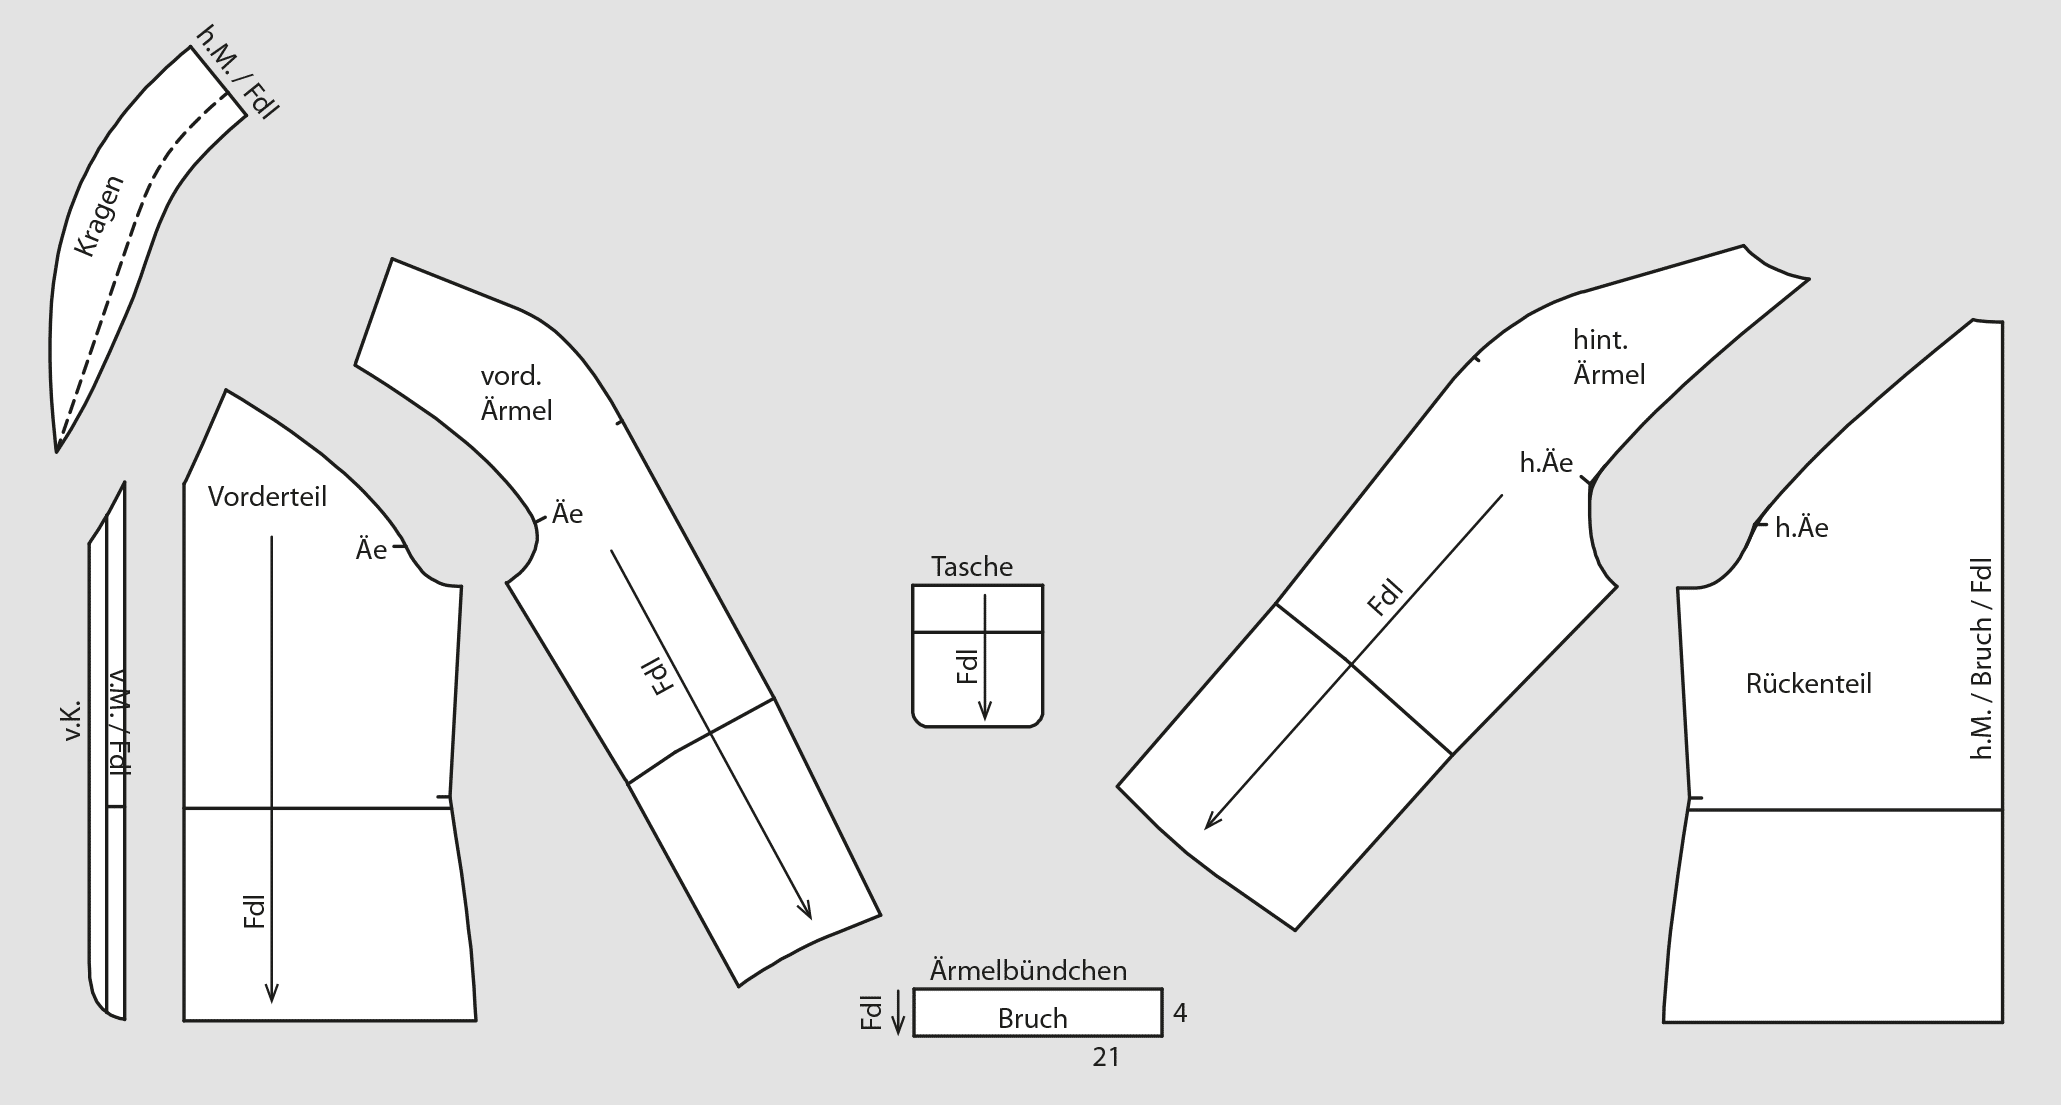
Copy all pattern pieces. Draw the cuff pattern 4 cm wide and 21 cm long. Blend all seam transitions and mark the grainlines.
Sweat Pants
Template: Basic Trouser Pattern with 2 Pleats
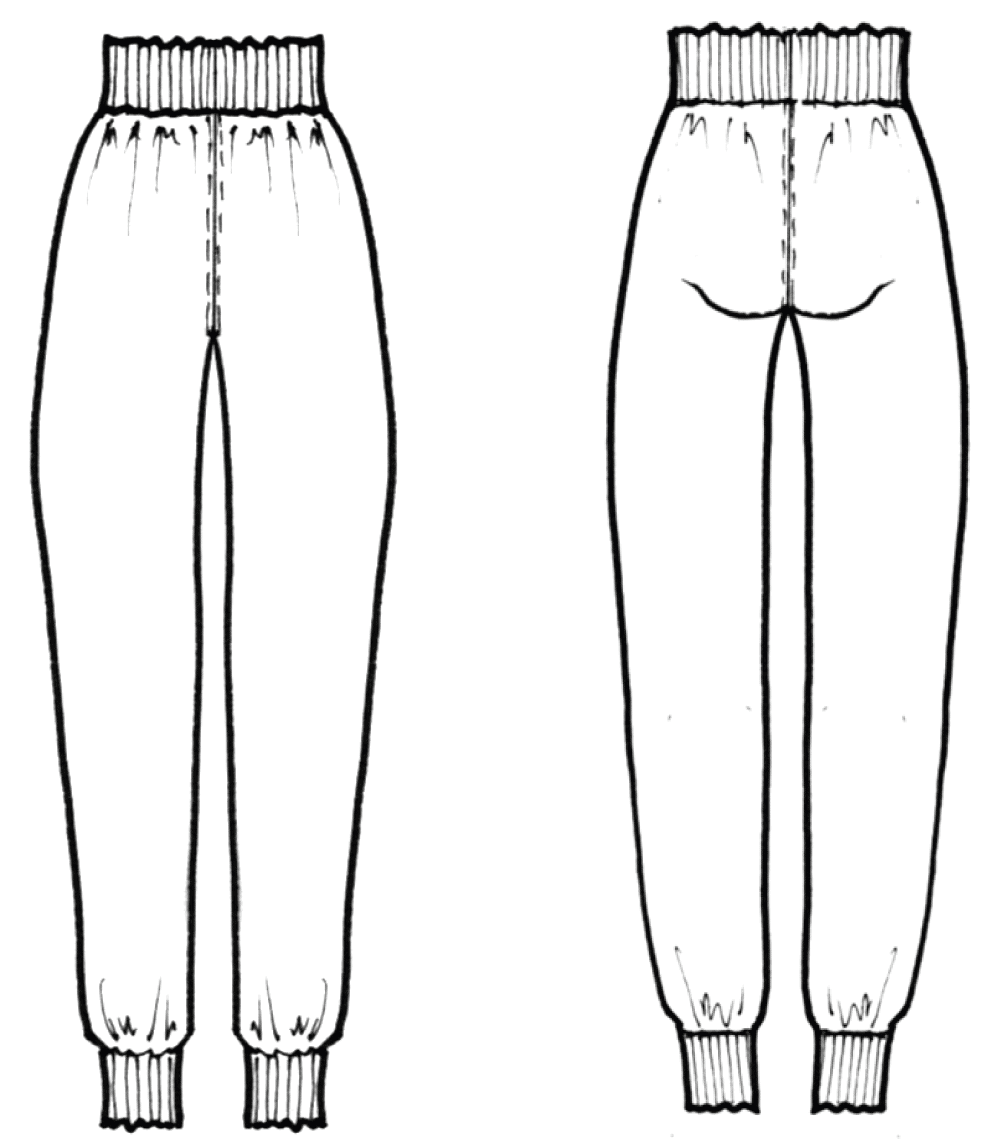 (Photo Credit: Technical drawing A. Wenzel)
Finished Pattern Pieces
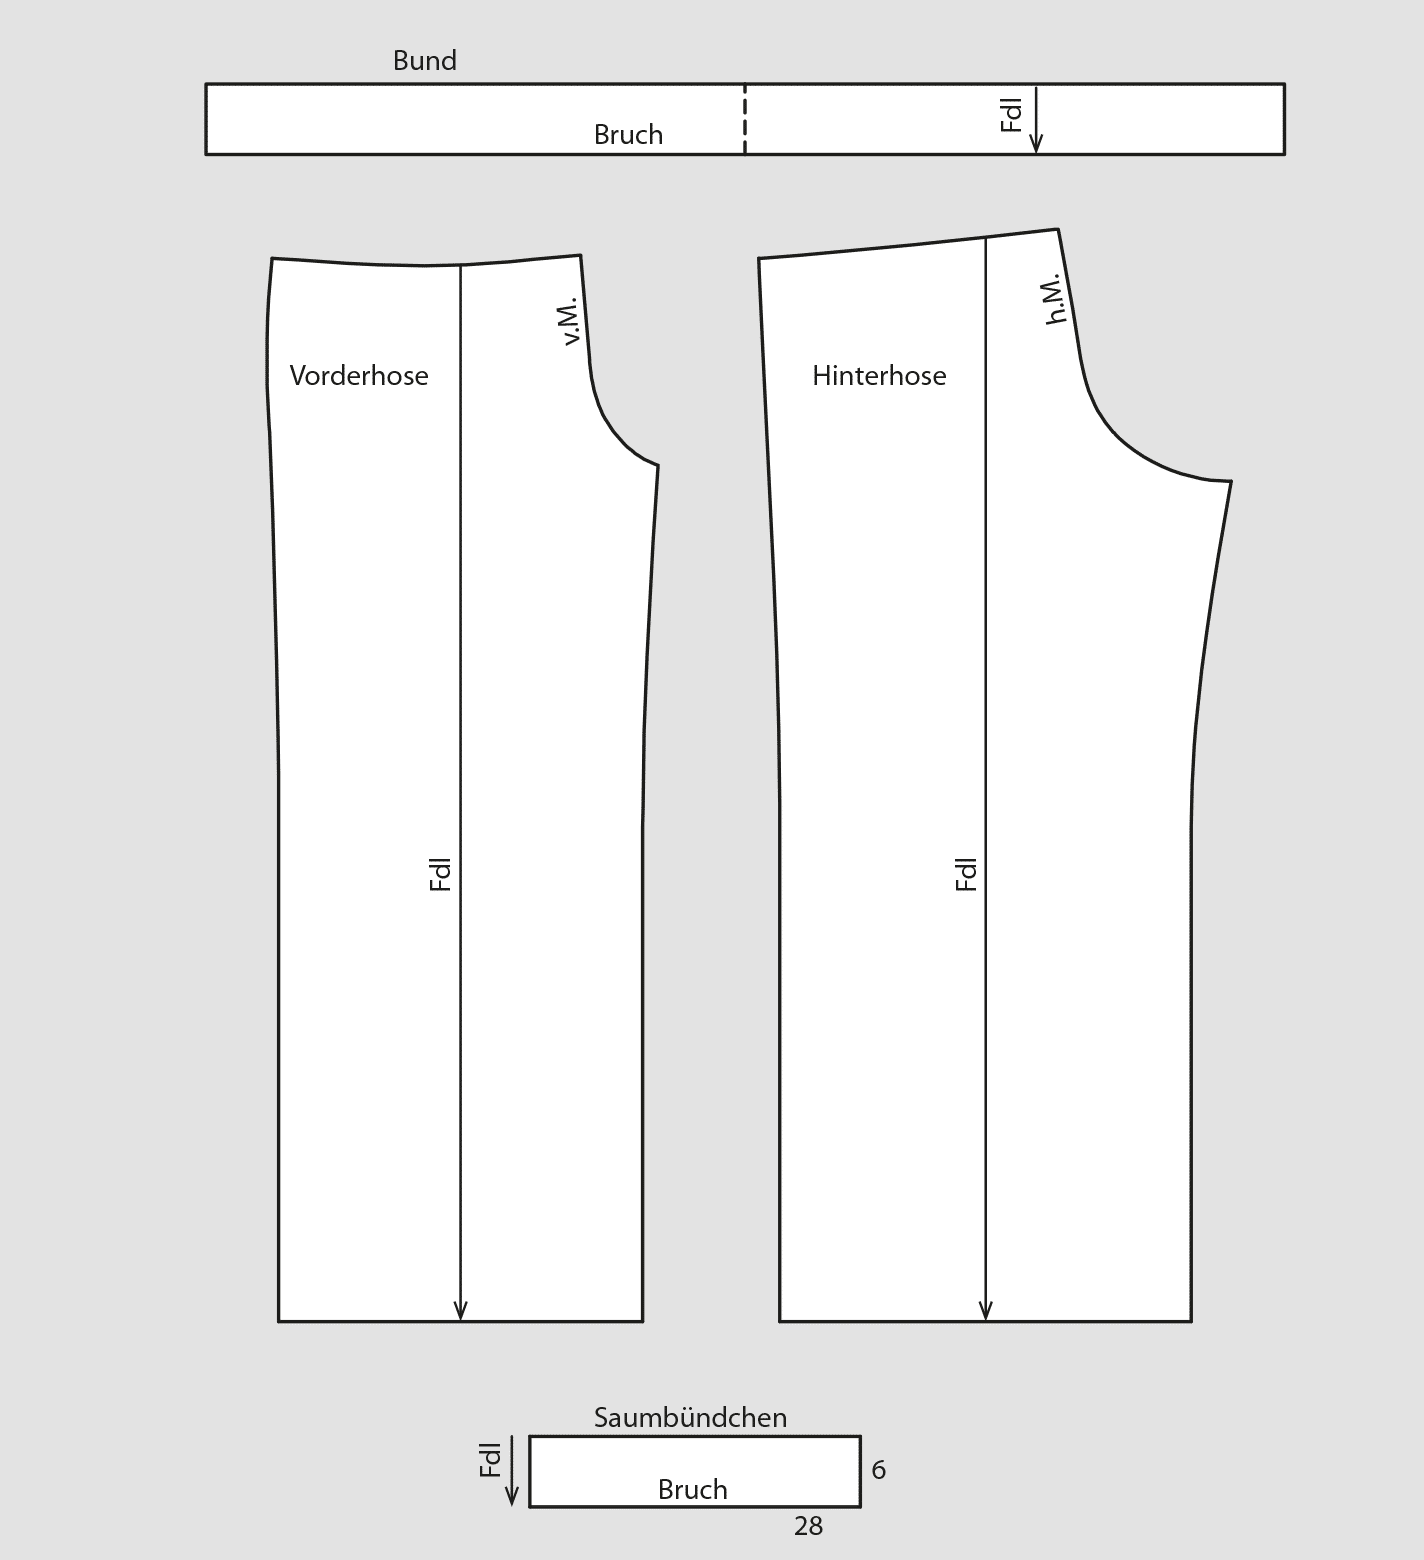
Copy all pattern pieces. Mirror the waistband. Draft the cuff 6 cm wide and 28 cm Long.
Many more pattern instructions and finished patterns for sewing jackets can be found in our online shop.


