Lapel Variations for Double-breasted Jackets
Deutsch

The men’s jacket is available in two forms: single-breasted and double-breasted. The men’s jacket is called a double-breasted jacket if it has two adjacent rows of buttons. There is the double-breasted jacket with one to eight pairs of buttons, but often one to two pairs of buttons are only decoration.
The two-row suit jacket adds an elegant touch to any outfit. For a long time it was considered old-fashioned and conservative. Now it is returning to the catwalks in a wide variety of variations and lapels.
How is the double-breasted suit worn?
- The double-breasted suit is always worn closed.
- The double-breasted suit jacket usually has two slits in the back, which is more comfortable for sitting.
- The double-breasted jacket is usually worn with a tie, but more and more often you can see it styled casually.
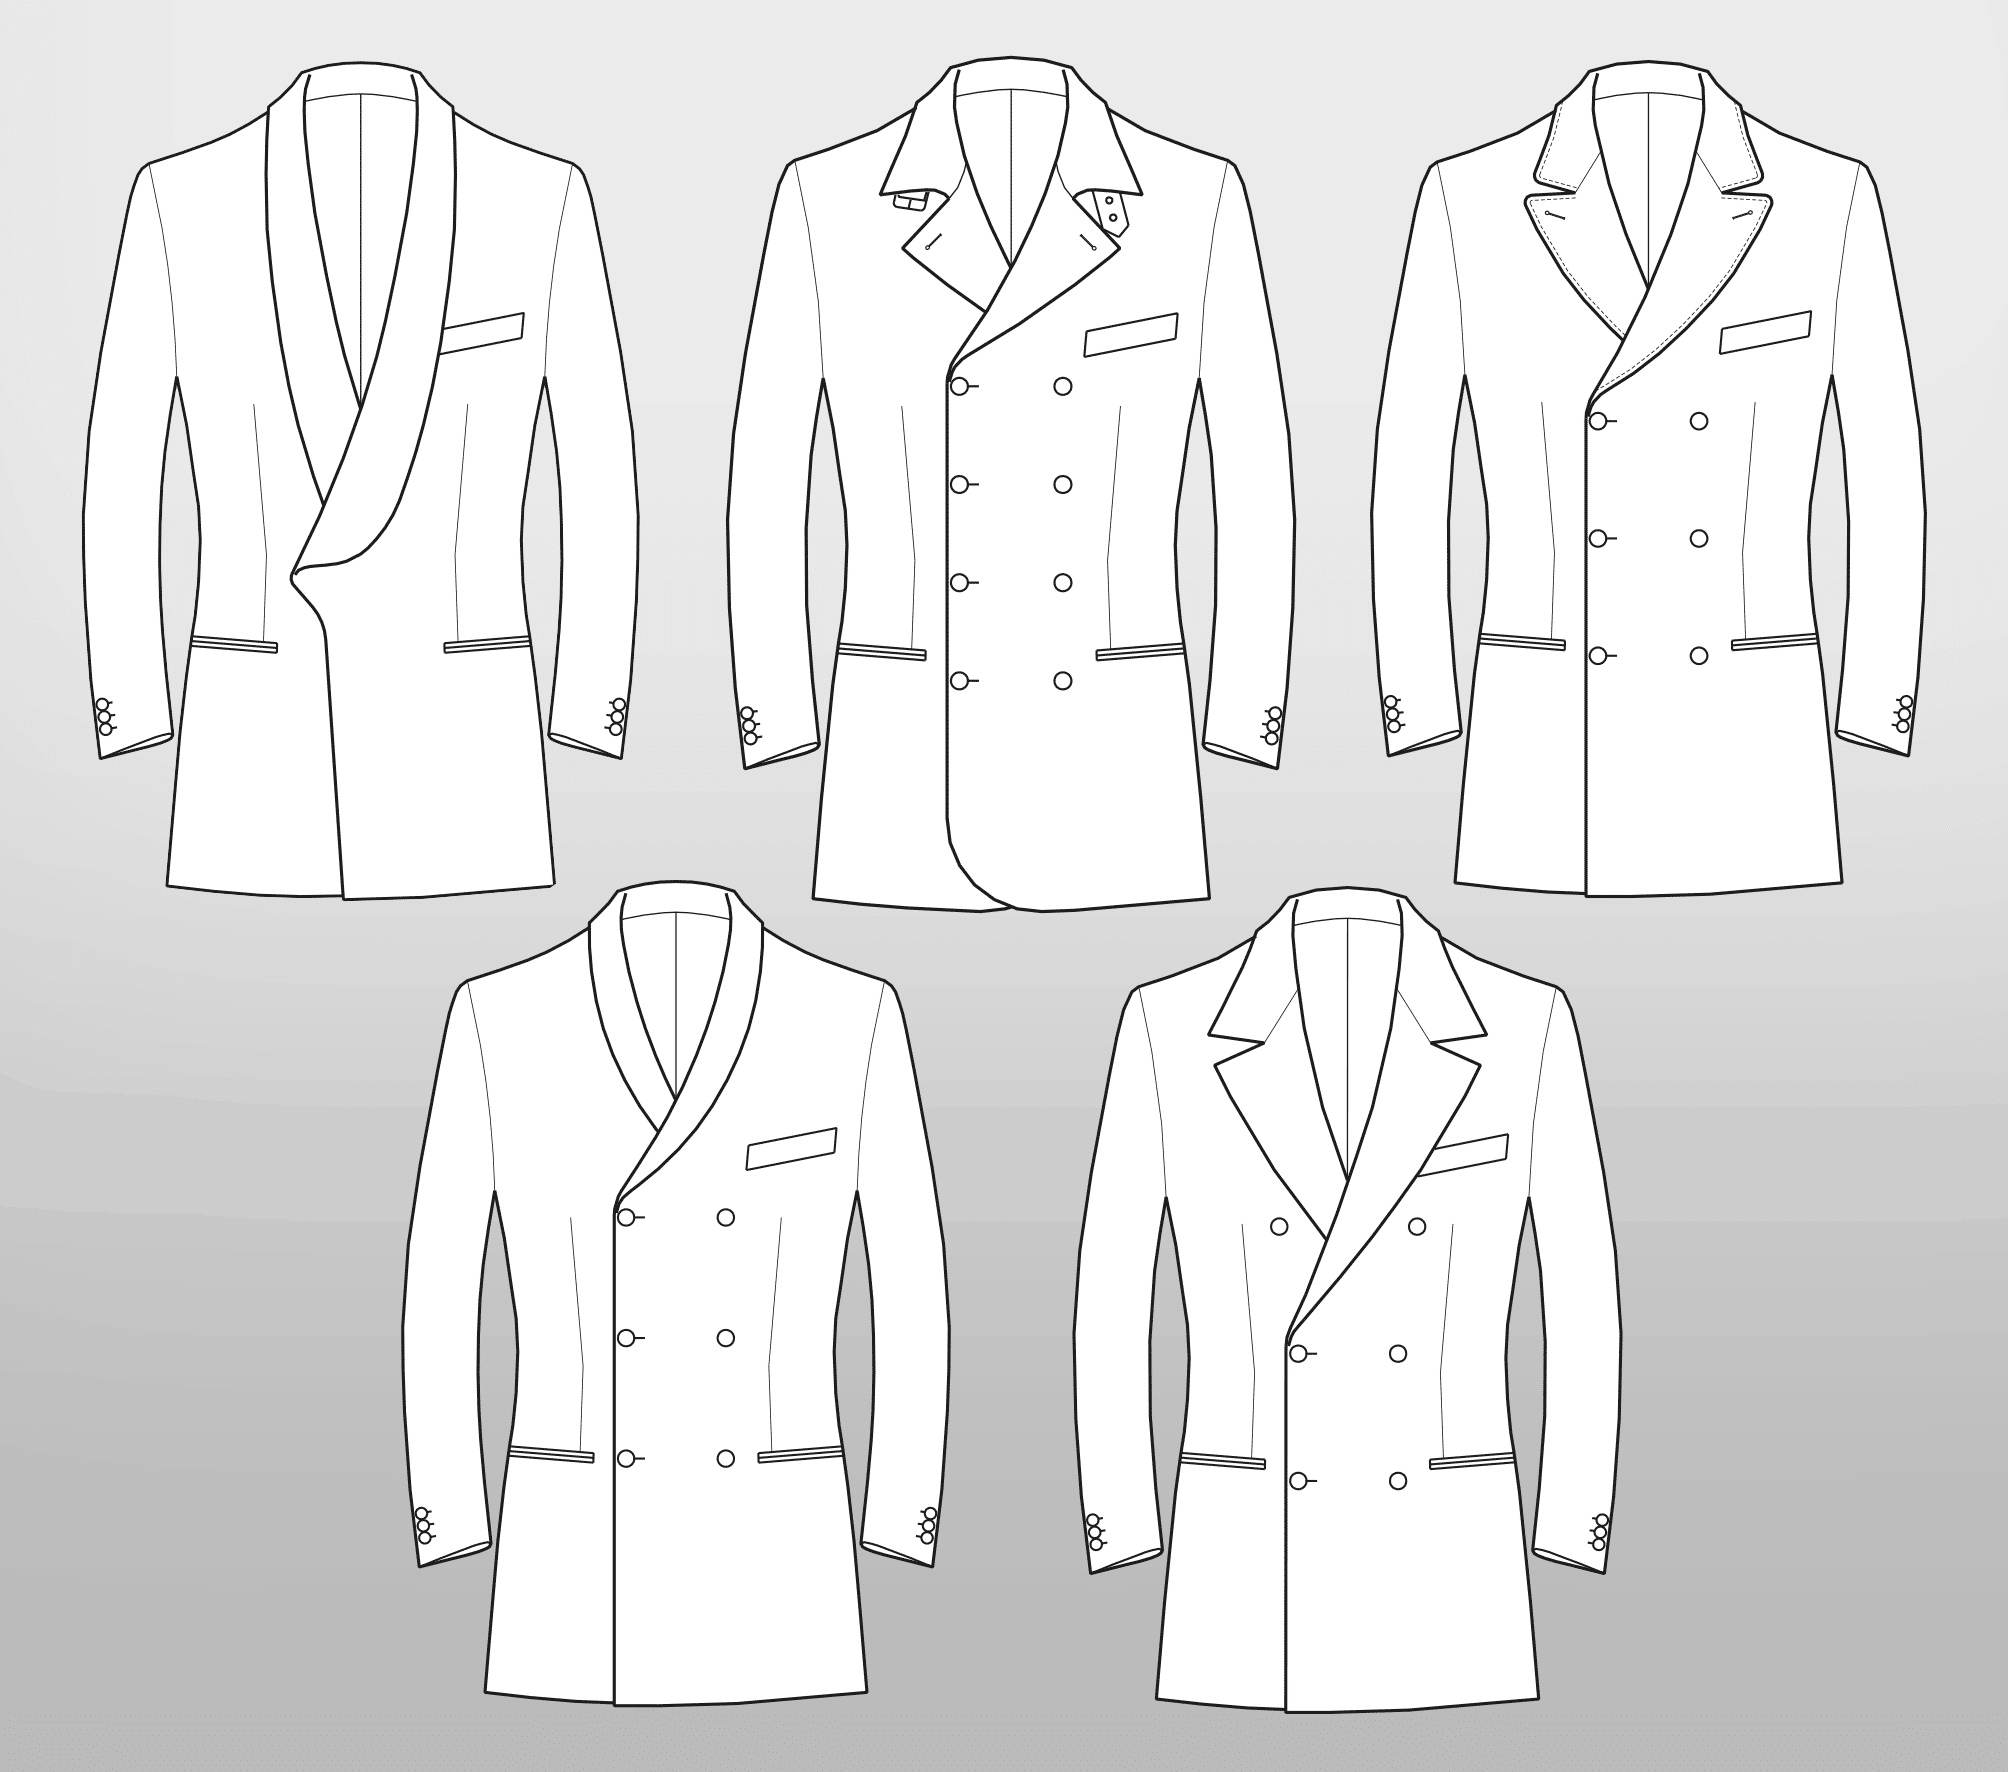
Template for all Lapel Variations: Basic Jacket Block, Size 50, Rundschau for men 10/2013, Page 15 or in our book Fundamentals Menswear
Lapel of a double-breasted men’s jackett
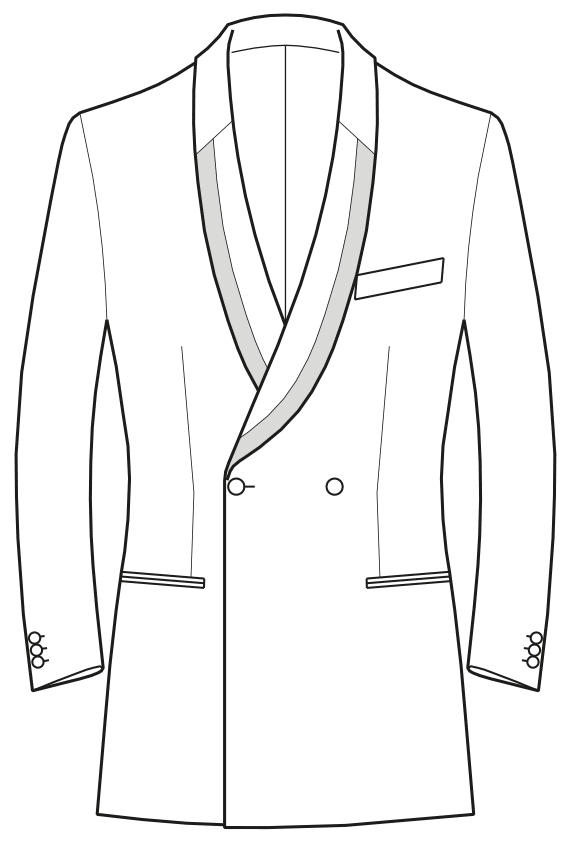
Jacket with Concealed Buttons and Shawl Collar
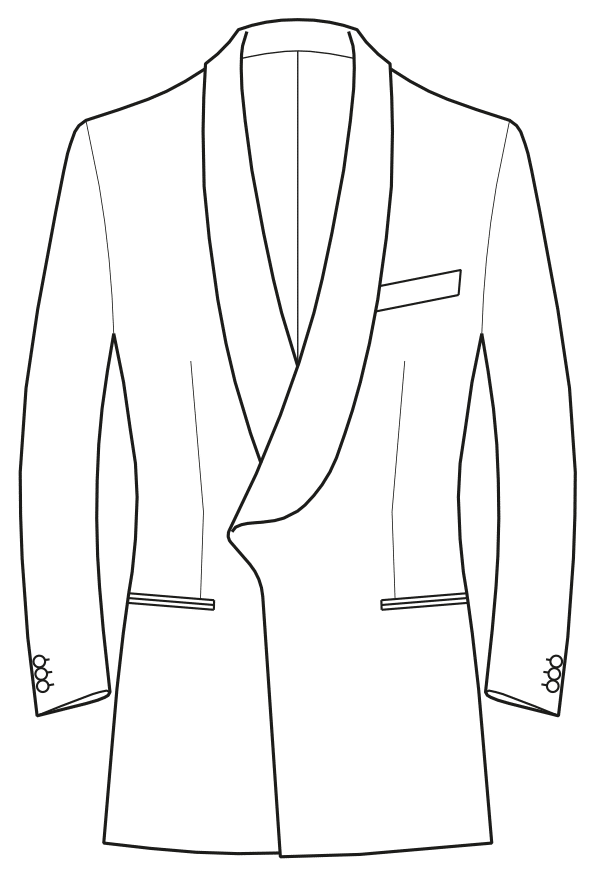
Design Pattern and Collar
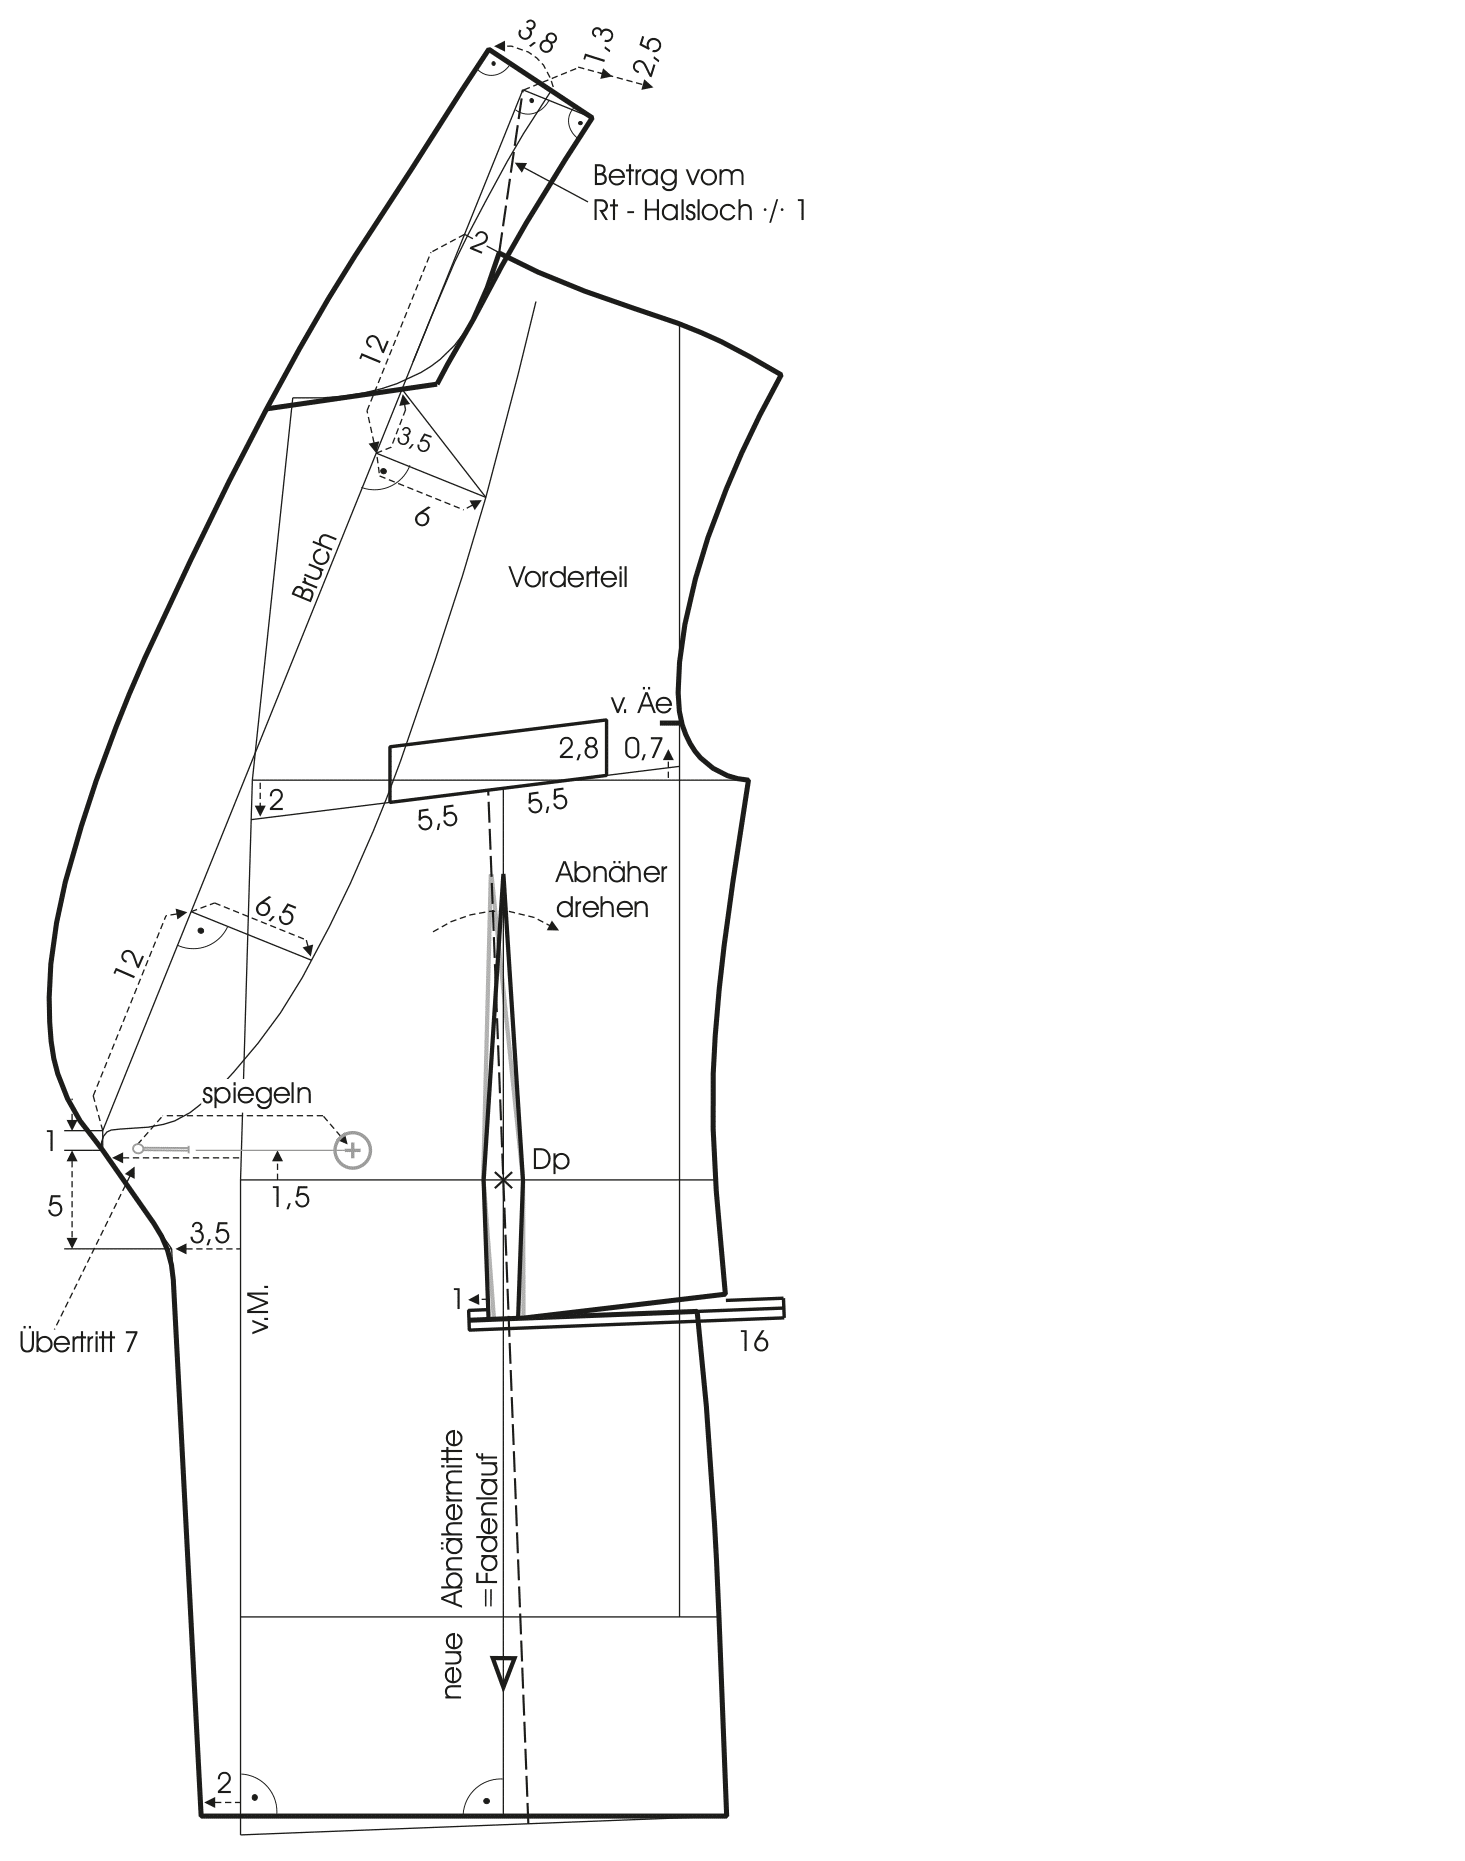
Draw the new front hem from the sideseam perpendicular to the centre front. This change is necessary to prevent the wide underlap of the double-breasted jacket from showing. Rotate the chest dart over the waist point and align it perpendicular to the new hemline. The new dart centre line is also the grainline.
Straighten the pocket position depending on the fabric. Mark the closing button 1.5 cm above the waistline. Add 7 cm overlap parallel to the lower part of the centre front. Mark the buttonhole 1.3 cm away from the edge. Taper the overlap towards the hem and draw the front edge as shown in the illustration. Mirror the button position over the centre front. Sew the concealed buttonhole only in the facing and sew a counter button to the inside.
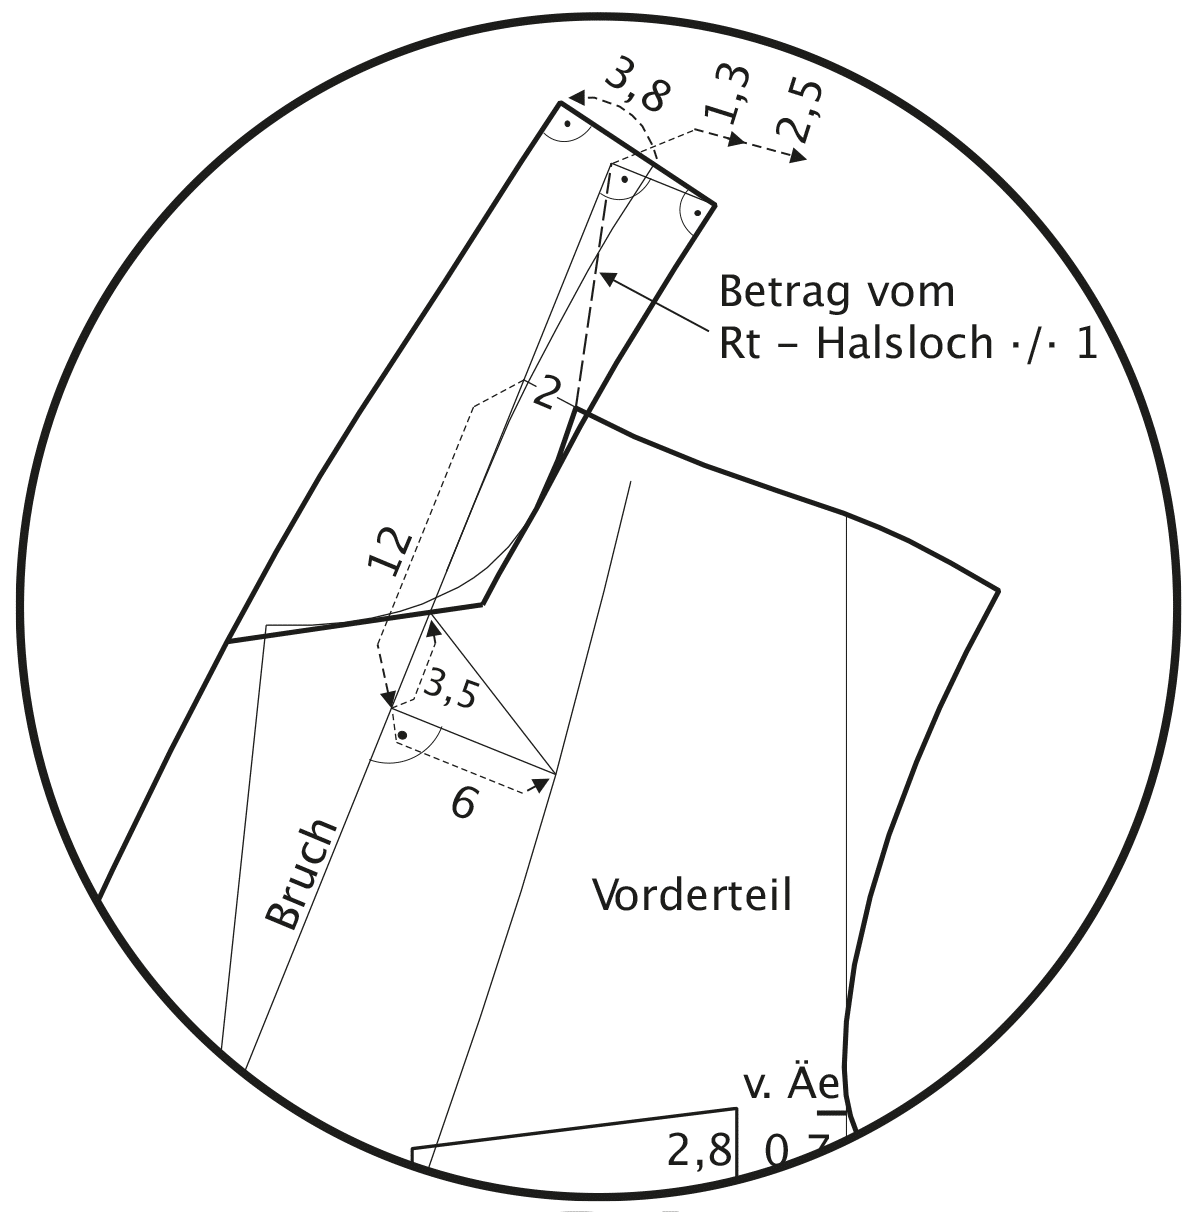
Extend the shoulder seam 2 cm to the left for the lapel construction. Mark the position of the lapel break and plot the lapel according to the illustration. Measure the back neckline for the construction of the felt under collar. Lengthen the lapel break upward. Measure the determined back neckline length minus 1 cm from the front neckline corner to the lapel break. Square out to the right and measure 1.3 cm for the collar roll and 2.5 cm for the collar stand.
Draw the collar seam to the neckline. Draw the centre back perpendicular to the collar seam line. Plot the collar roll and the collar shape according to the illustration. Measure and compare the collar seam and the neckline. The collar seam should be approximately 1 cm Shorter than the neckline, as the collar gets longer when steam-pressed to shape. Plot the double welt pocket and the chest pocket as shown in the illustration.
Jacket with 4 Button Pairs and Wide Notch Lapel
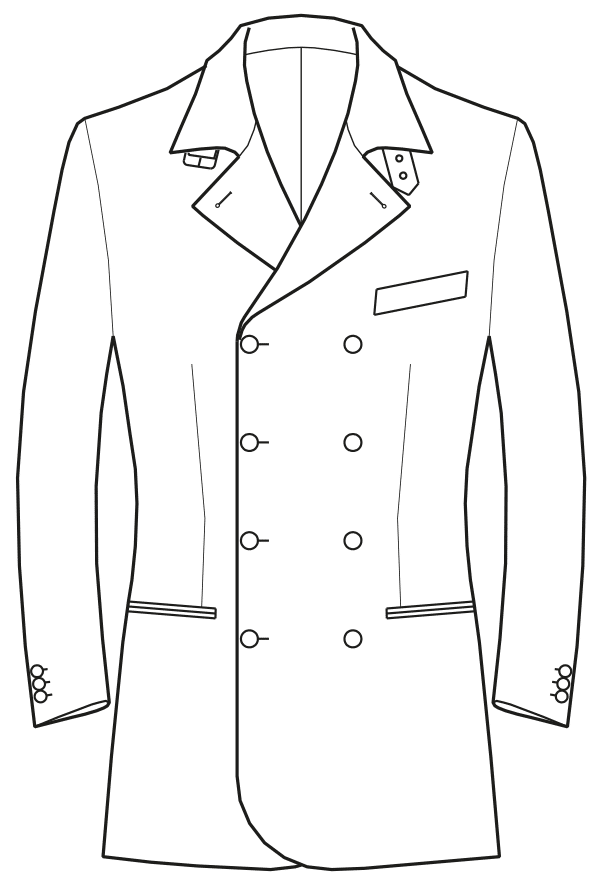
Design Pattern and Collar
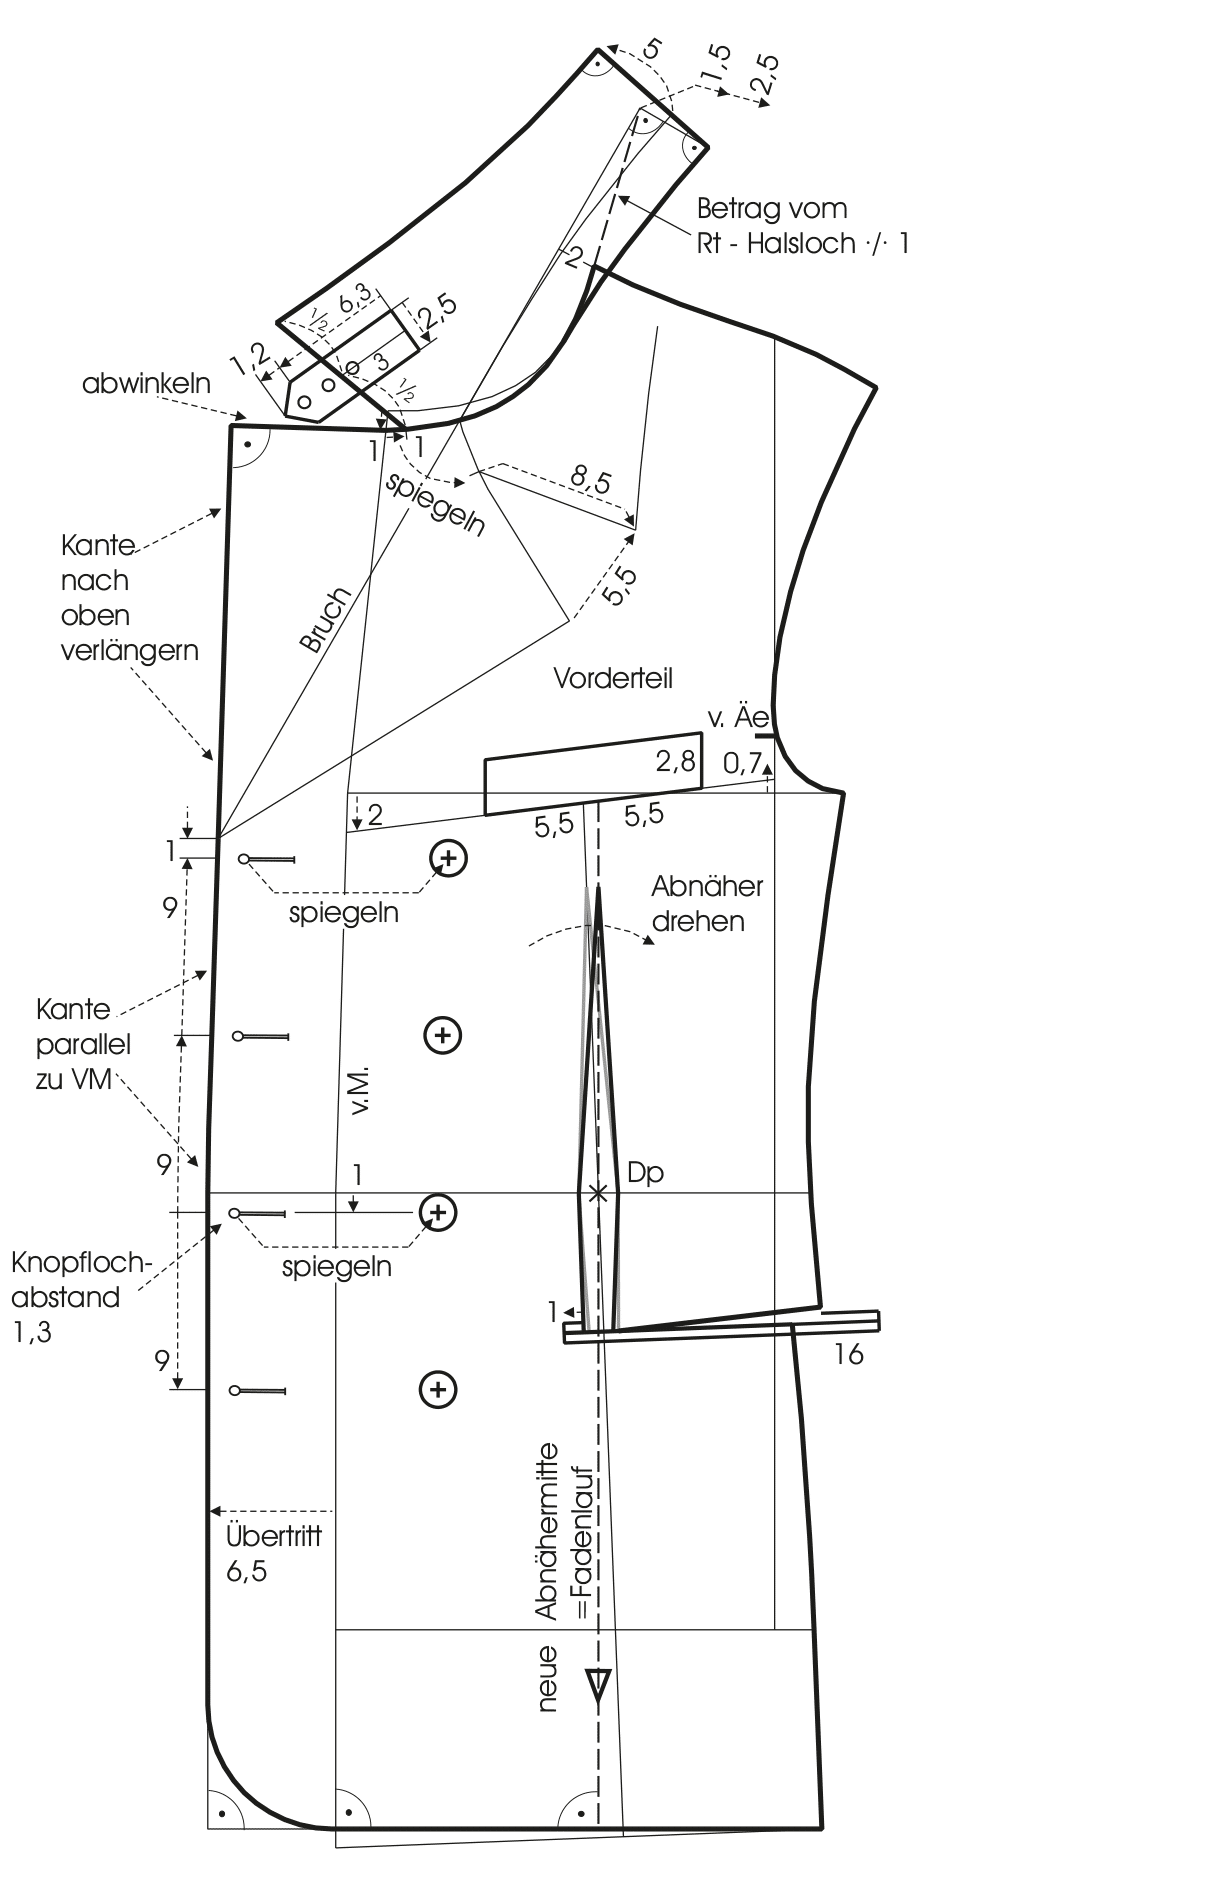
Draw the new front hem from the sideseam perpendicular to the centre front. This change is necessary to prevent the wide underlap of the double-breasted jacket from showing. Rotate the chest dart over the waist point and align it perpendicular to the new hemline. The new dart centre line is also the grainline.
Straighten the pocket position depending on the fabric. Mark the closing button pair 1 cm below the waistline. Mark the upper and lower button pair 9 cm above and below the Closing button. Add 6.5 cm overlap parallel to the centre front and mark the buttonholes 1.3 cm away from the edge. Blend the front edge. Draw the front corner rounded. Mirror the button positions over the centre front to the inside.
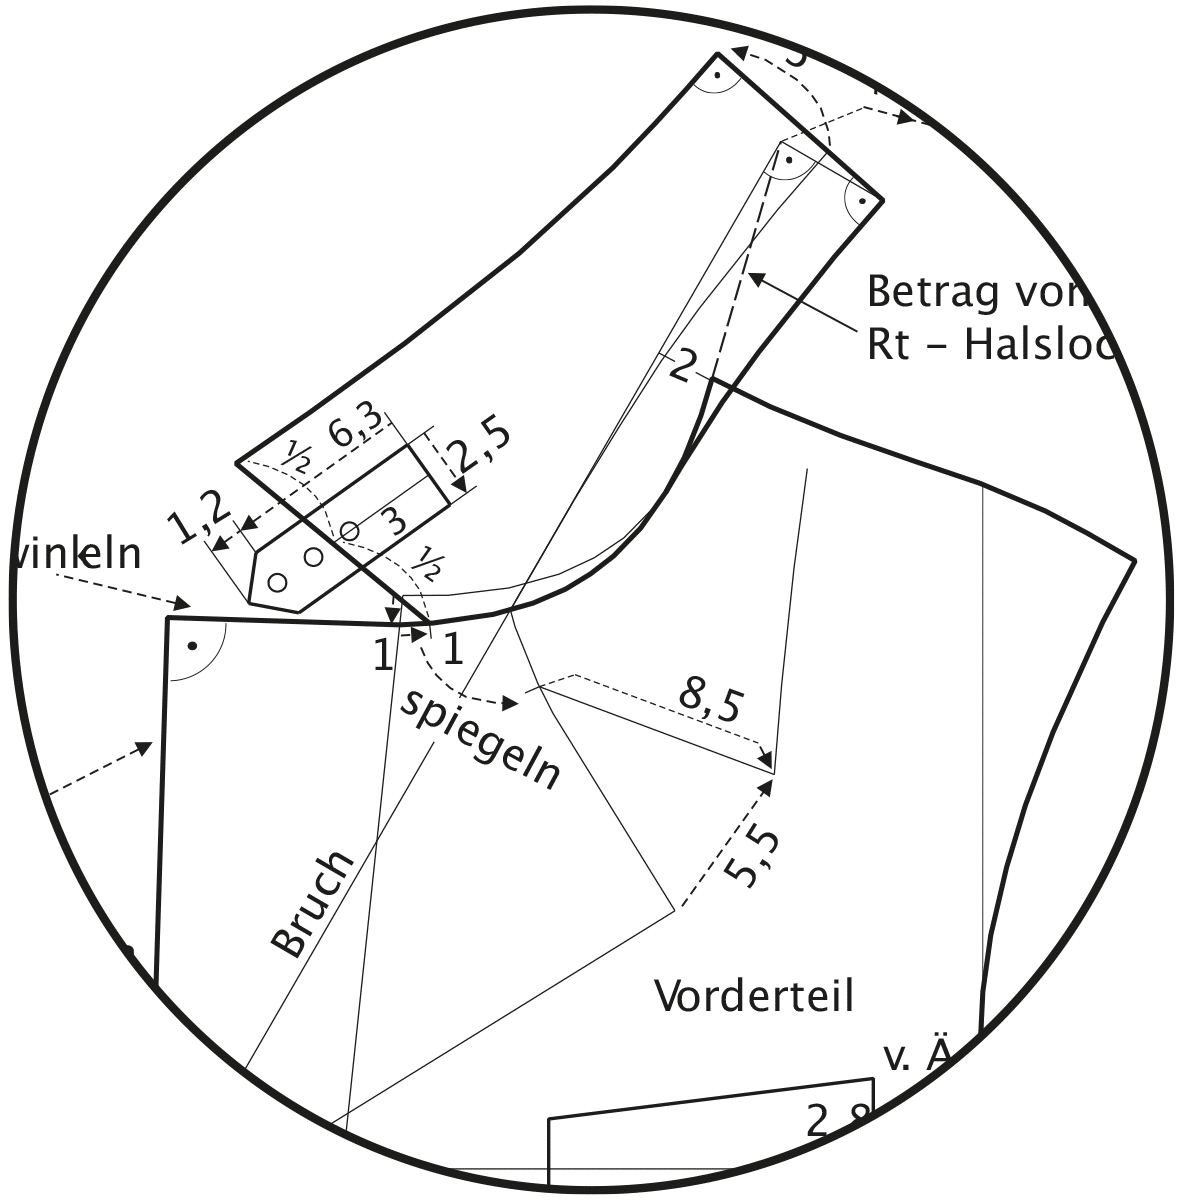
Extend the shoulder seam 2 cm to the left for the lapel construction. Mark the position of the lapel break and plot the lapel break line. Lower the neckline 1 cm at the centre front and draw the new neckline. Extend the front edge upwards and square out to the lowered neckline. Mark the collar point 1 cm away from the centre front. Mirror the lapel and the collar point over the lapel break to the right. Measure the back neckline for the construction of the felt under collar. Lengthen the lapel break upward. Measure the determined back neckline length minus 1 cm from the front neckline corner to the lapel break. Square out to the right and measure 1.5 cm for the collar roll and 2.5 cm for the collar stand.
Draw the collar seam to the neckline. Draw the centre back perpendicular to the collar seam line. Plot the collar roll and the collar shape according to the illustration. Draw the tab on the collar as shown. Measure and compare the collar seam and the neckline. The collar seam should be approx. 1 cm shorter than the neckline, as the collar gets longer when steam-pressed to shape. Plot the double welt pocket and the chest pocket as shown in the illustration.
Jacket with 3 Button Pairs and Wide Lapel
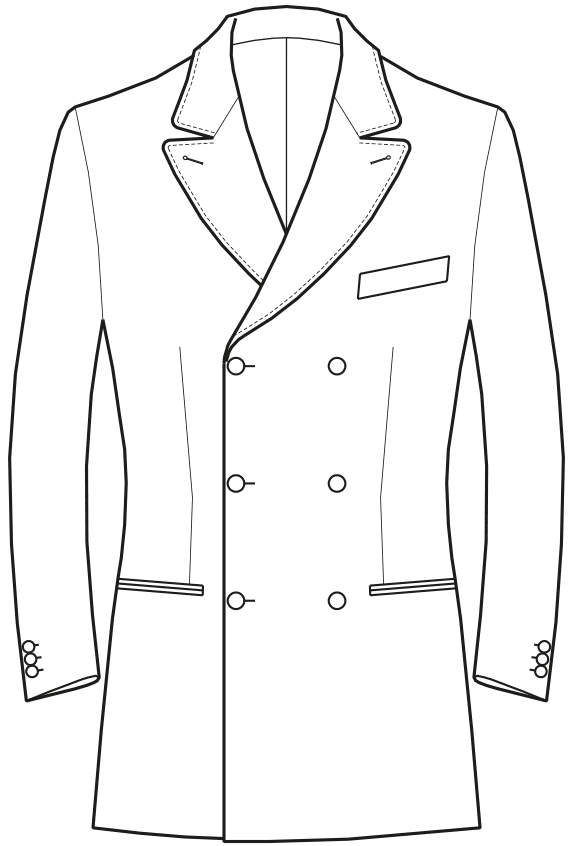
Jacket with 3 Button Pairs and Narrow Shawl Collar
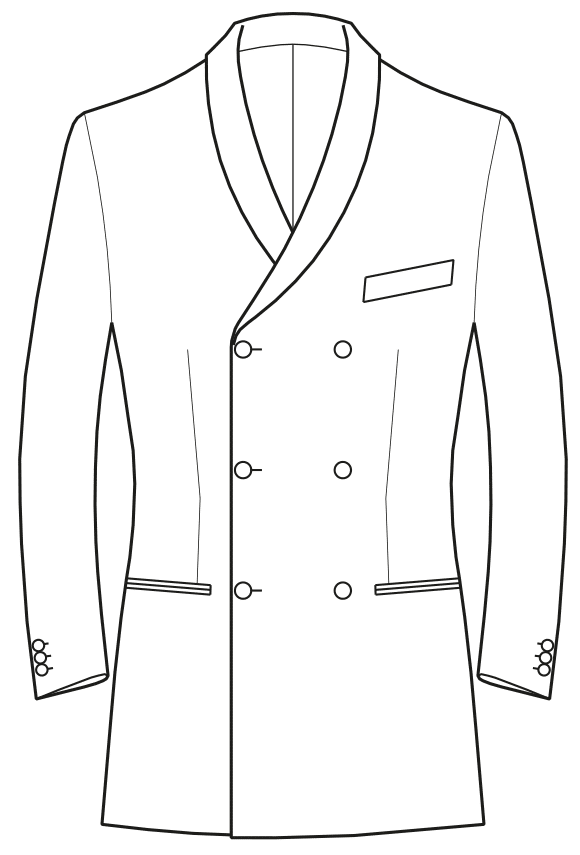
Jacket with 3 Button Pairs and Fish Mouth Lapel
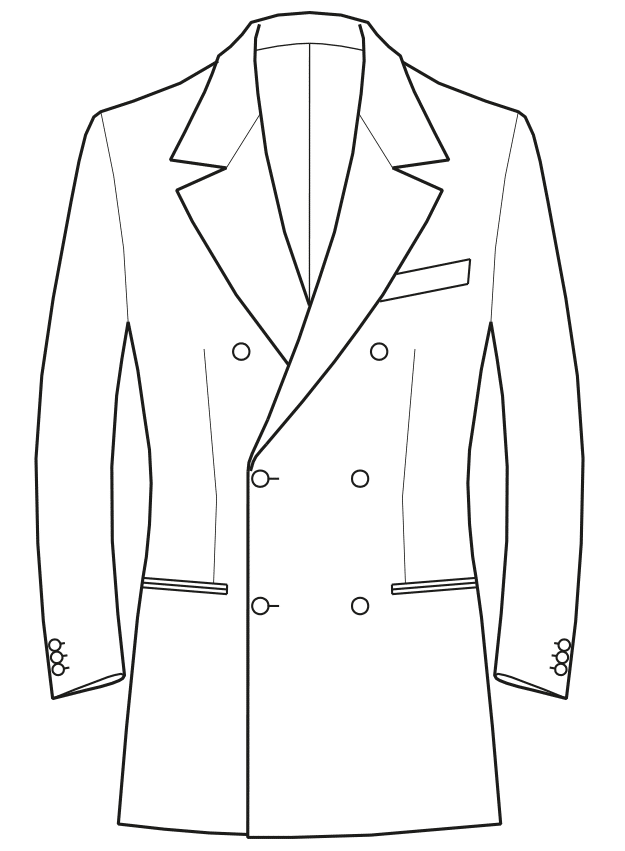
Jacket with 3 Button Pairs and Separated Notch Lapel
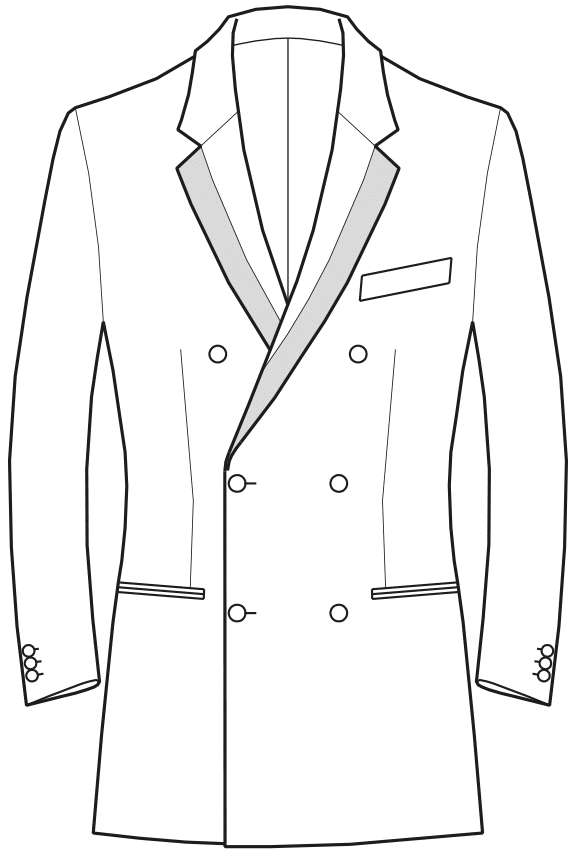
Jacket with 2 Button Pairs and Wide Peak Lapel
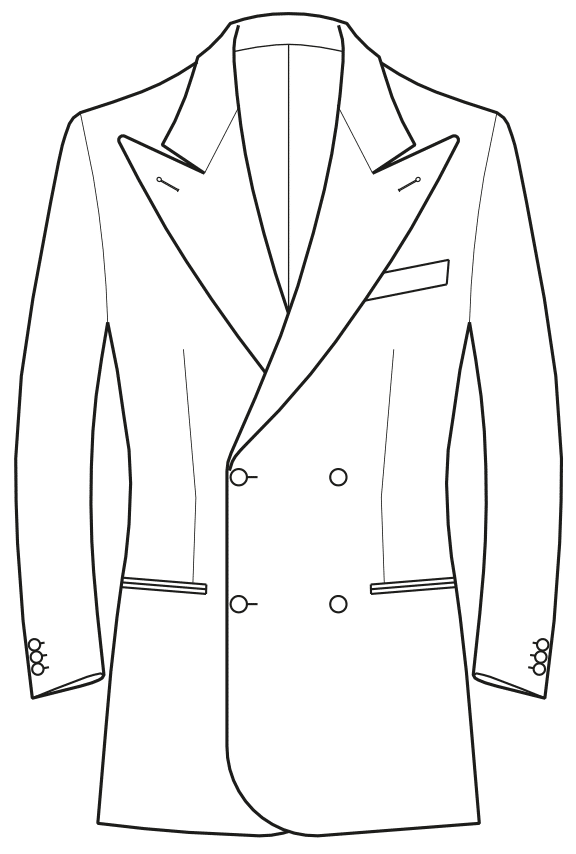
Jacket with 1 Button Pair and Low Peak Lapel
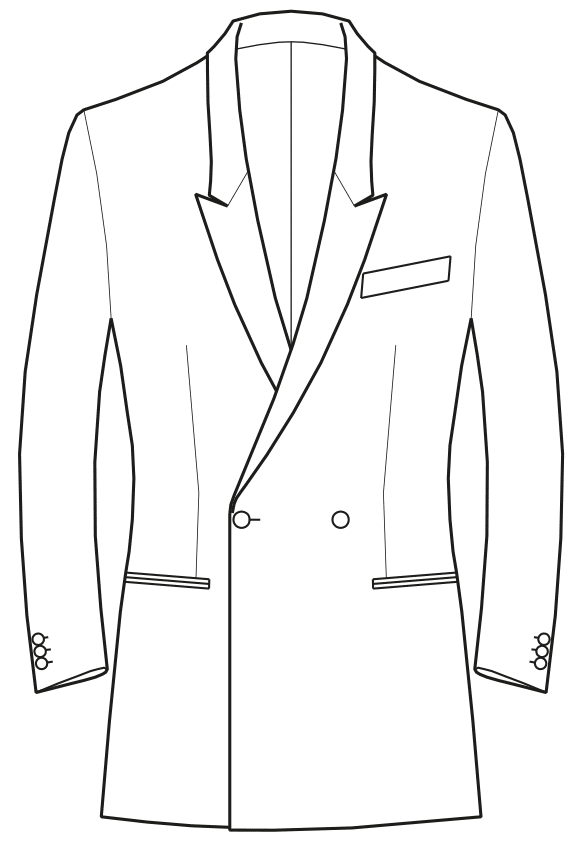
Jacket with 1 Button Pair and Separated Shawl Collar



It really helps me alot <3 thank you so much hope more patterns <3 thank you so much God bless you <3
That pleases us, thank you!