Pattern Construction for Dress Shirts for Musicians and Conductors
Deutsch
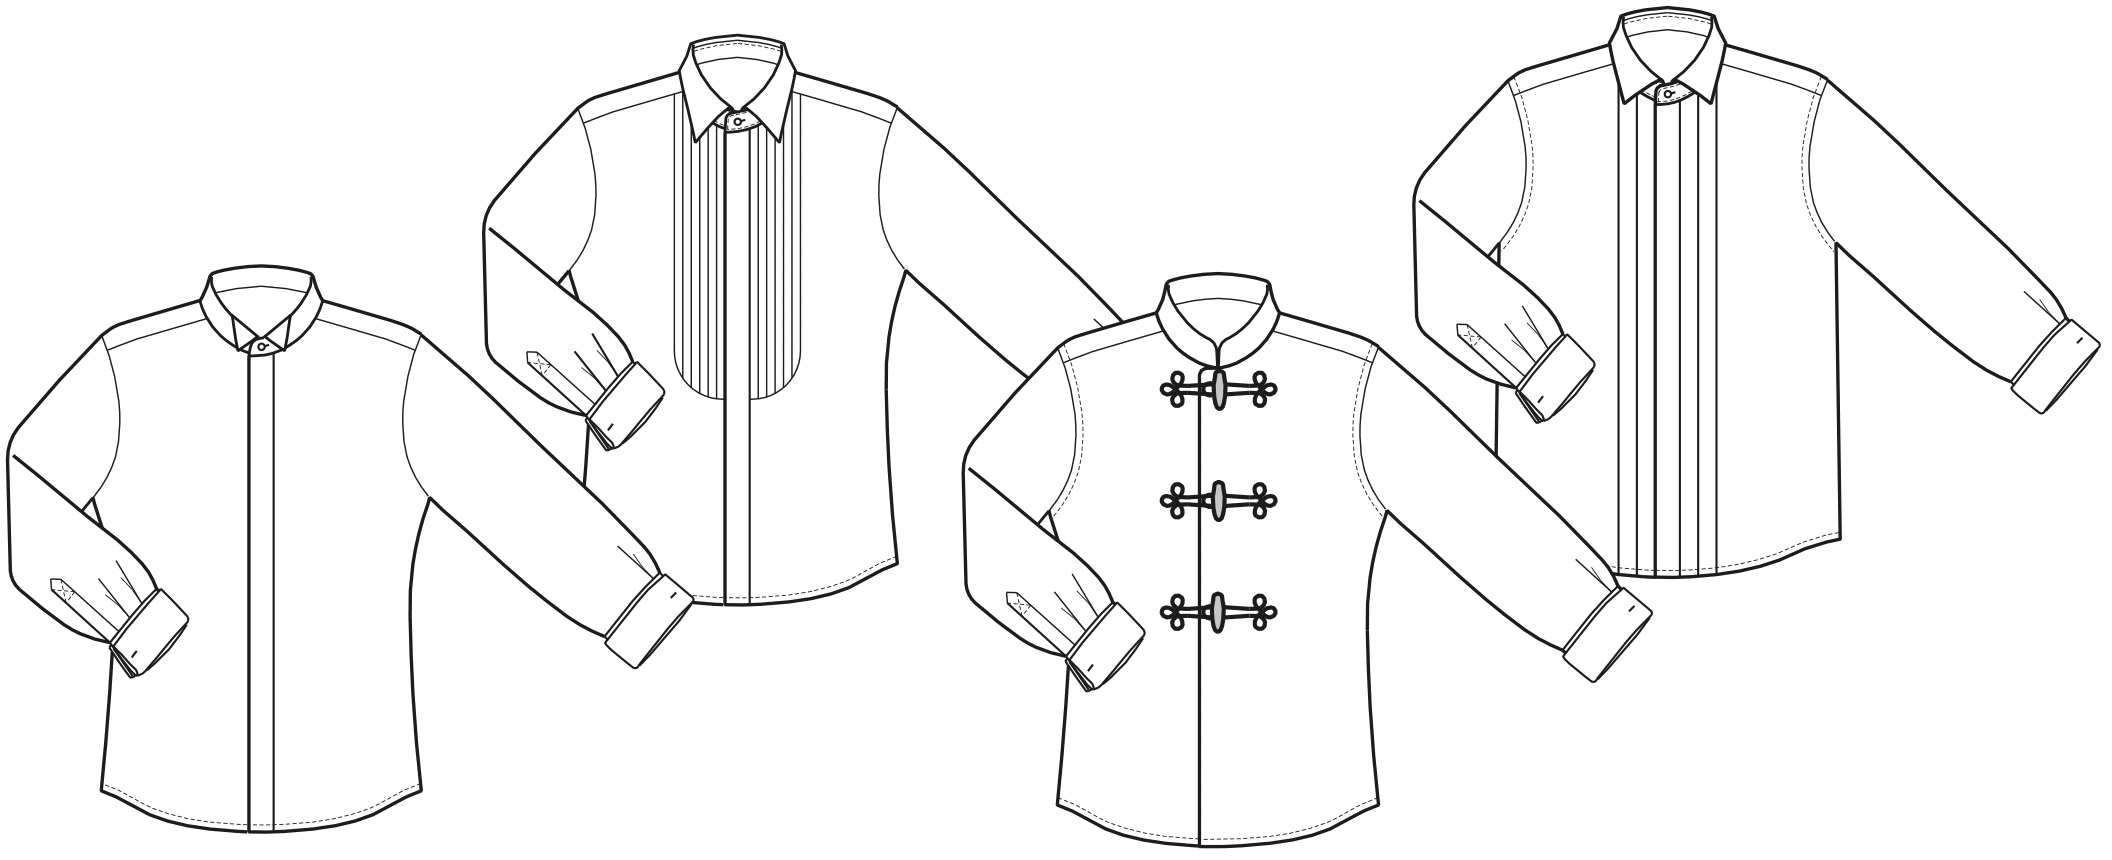 (Photo Credit: Technical drawing A. Sextl)
Find the full pattern construction in our magazine Rundschau for men 7.2017. A translation of the pattern technique can be ordered from our customer service.
Shirts for conductors need above all good freedom of movement in the arm area. Therefore, the sleeve pattern is drafted with a significantly reduced sleeve cap and thus receives a lot of movement length under the arm. This is supported by a narrower construction of the shoulder: the amount of ease included in the back width and chest width remain normal, whereby the addition to armhole depth is increased – proportionally, the shoulder is narrowed. The shirt should also be loose fitting enough to avoid sticking to the body but still fitted enough to be worn under the suit jacket, frock or conductors coat. Extra length is added to avoid slipping out of the trousers and the side slit is also slightly reduced. The basic shirts block in size 50 can be found in the book Fundamentals Menswear on page 49.
Size Comparison
Shirt sizes are defined by the neck girth but the chest girth and waist girth measurements are also needed for the pattern construction.
The corresponding standard sizes and neck sizes can be found in this Chart.
Adding Ease to Achieve Different Fits
The basic shirt block is the foundation for many different shirt styles and fits. Add the appropriate amount of ease according to the ease chart. The ease amounts can be varied but should be applied proportional for a well-balanced look.
This article gives you an insight into the pattern construction for dress shirts for musicans, including the Basic shirt block.
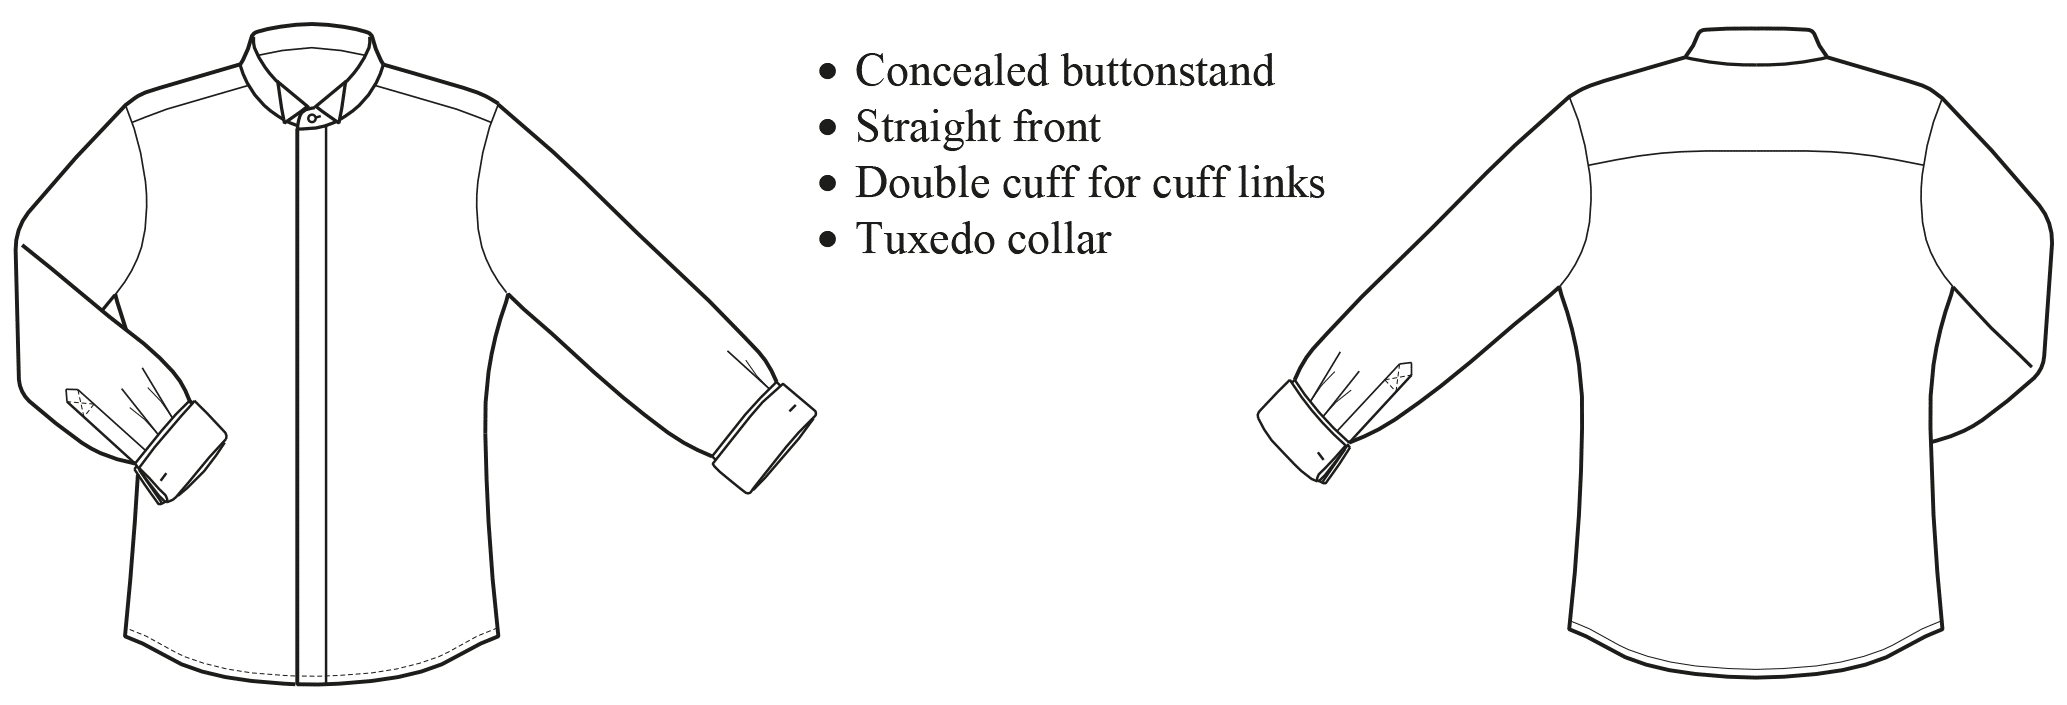
Shirt with Tuxedo Collar
Template: Basic Dress Shirt for Conductors
Front and Back Pattern
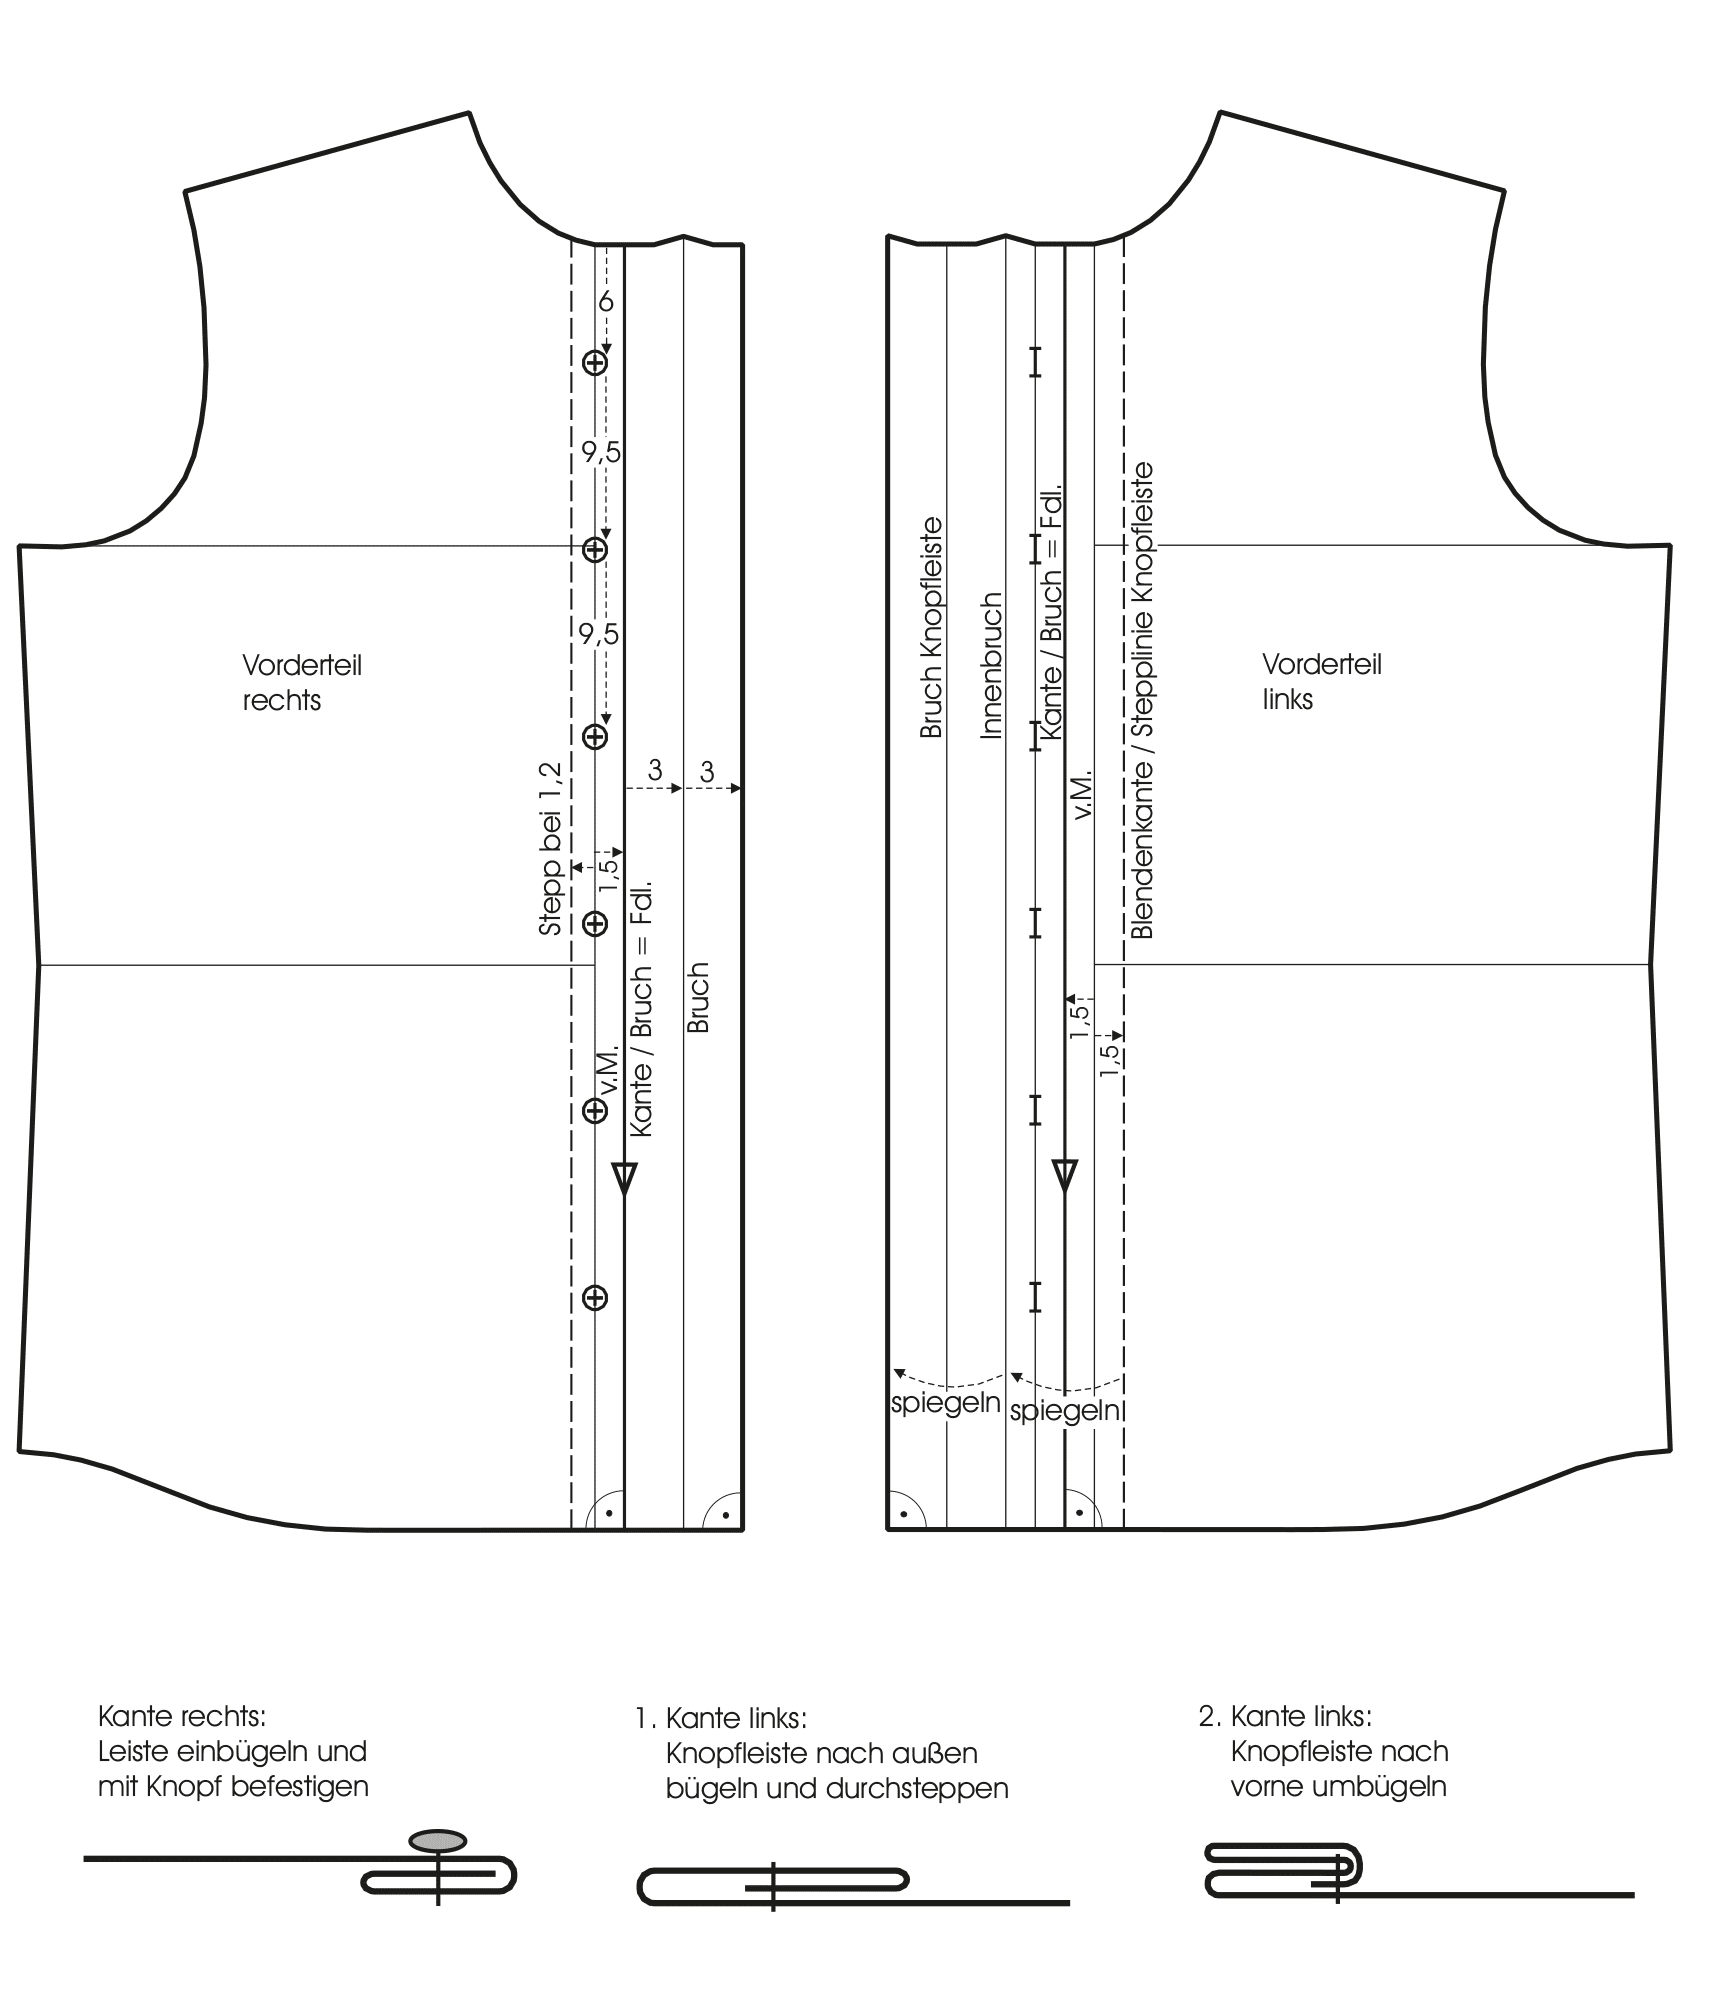 Add 1.5 cm overlap parallel to the centre front for the 3 cm buttonstand at the left front pattern. Mark the stitching line the same distance to the inside and mirror the buttonstand three times to the outside. Fold the buttonstand outward, stitched in the finished width and then press it back to the front (see also cross section illustration). For the right side, copy and Mirror the front part. Add only two times 3 cm to the overlap of 1.5 cm. Press the buttonstand twice and sew the buttons through all layers. Add less width for the overlap and buttonstand if the buttonstand is topstitched (here 1.2 cm). Mirror the neckline for the upper edge of the buttonstand. Mark the upper button 6 cm below the neckline and mark all other buttons with 9.5 cm distance. Mark the grainline parallel to the front edge. Back pattern and sleeves with cuffs are not shown here. They are taken from the basic cut. Mark the grainline parallel to the centre back and perpendicular to the elbow line.
Collar
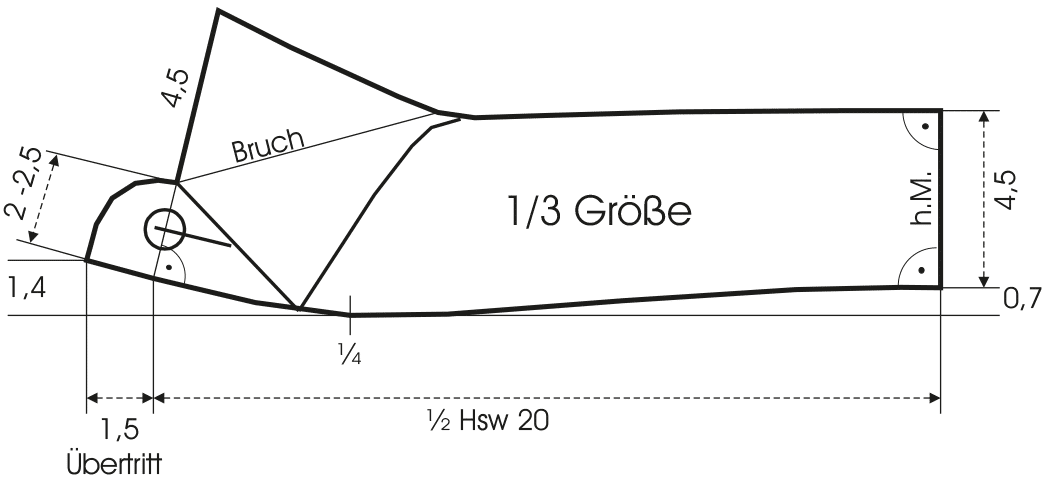
On a horizontal baseline, measure ½ of the neckline length and square up for the centre front and centre back. Along the centre back, measure 0.7 cm upwards for the collar roll and then 4.5 cm for the collar width. Square out to the left from both points. Add 1.5 cm overlap to the centre front and raise the collar 1.4 cm at the front. Draw the collar seam over the ¼-point on the baseline. Draw the centre front perpendicular to the collar line 2 cm to 2.5 cm wide. Complete the collar shape as shown. Mark the position of the buttonhole centered on the collarstand. Check the collar length and compare to the neckline. Adjust at the centre back if necessary.
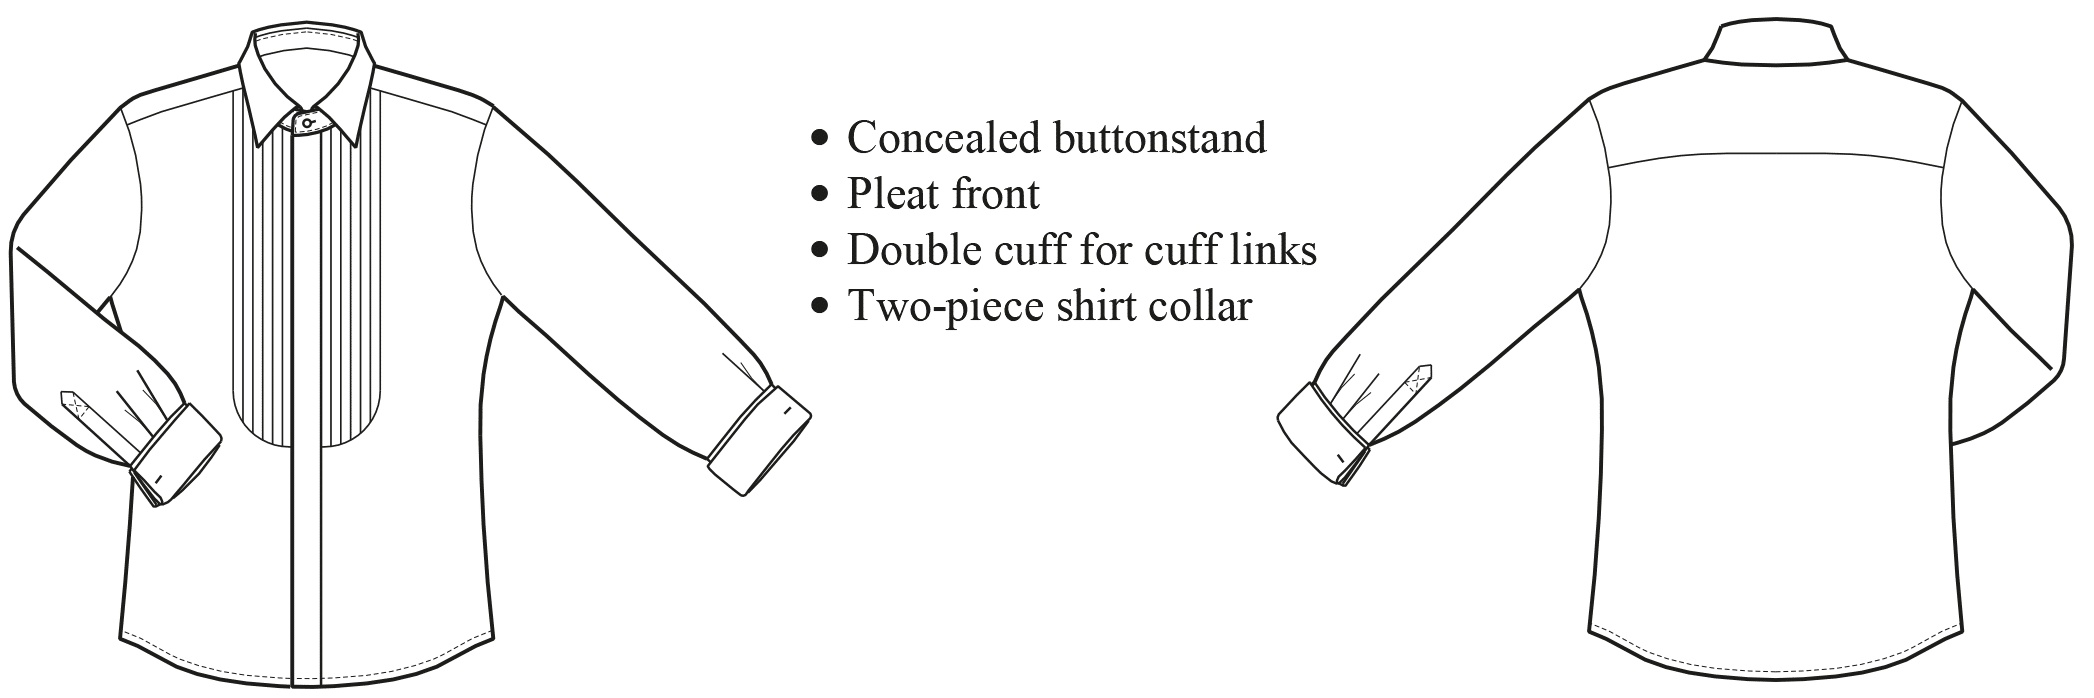
Tuxedo Shirt
Template: Basic Dress Shirt for Conductors
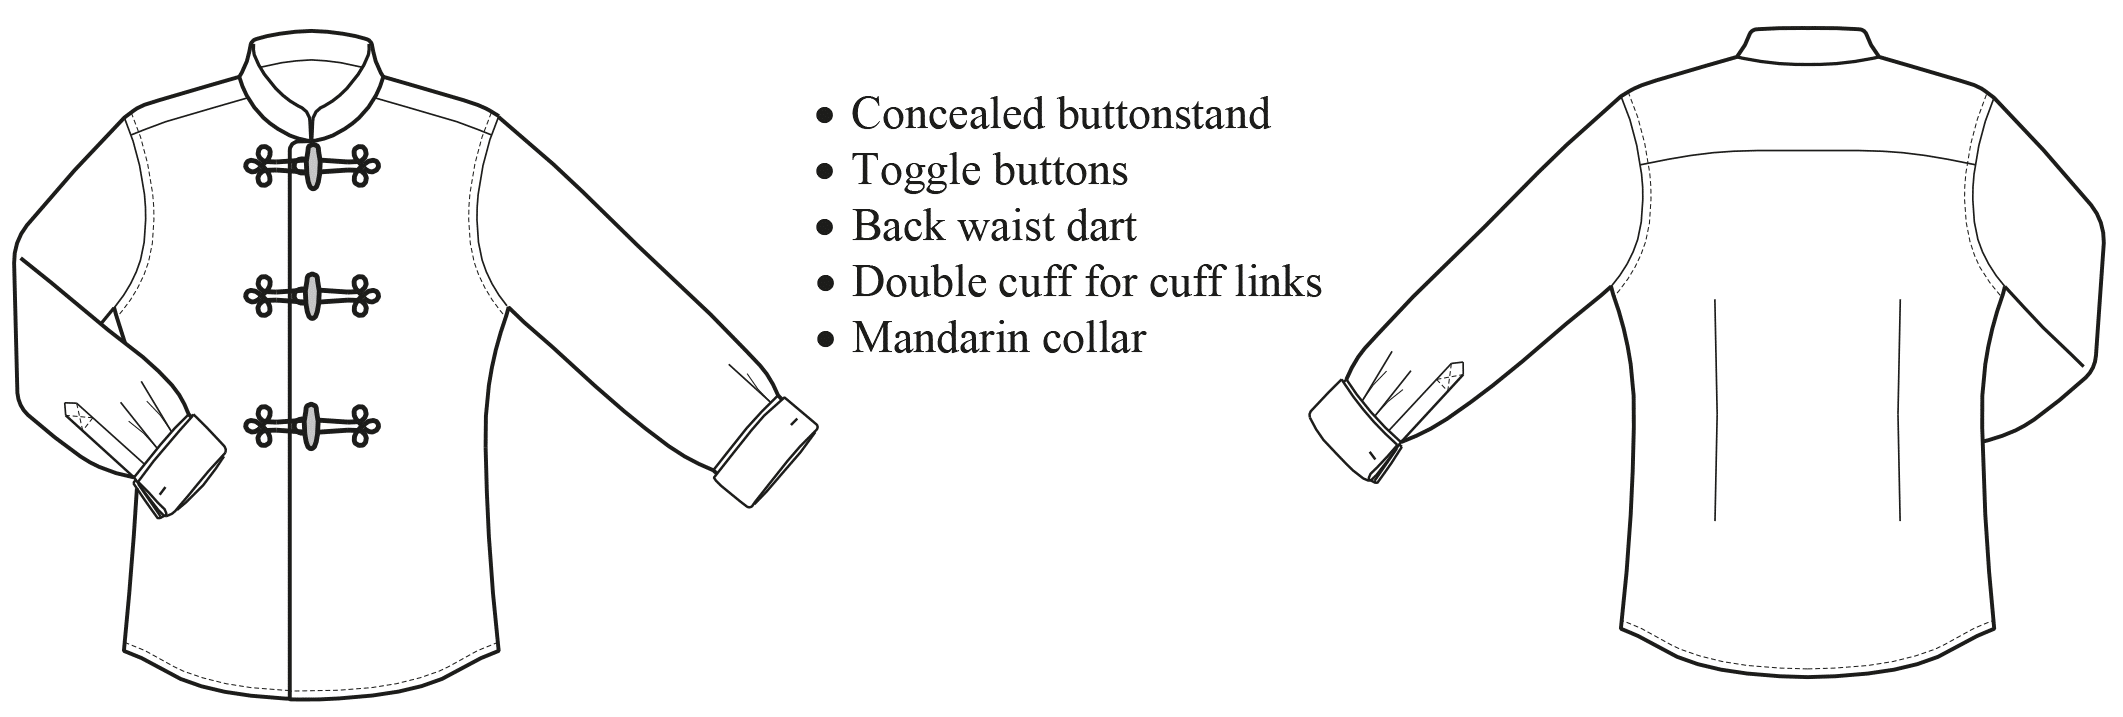
Shirt with Toggle Buttons
Template: Basic Dress Shirt for Conductors
